Inspection Guide

I N S P E C T I O N G U I D E
F a i r W o r k i n g C o n d i t i o n s(F W C)A u d i t
E x p e c t a t i o n s:
OCCUPATIONAL HEALTH & SAFETY
1) GENERAL CONDITIONS
Our Auditors will assess overall standards of construction, maintenance, hygiene and tidiness throughout the workplace. Workers should not be at risk from dirty, contaminated areas or exposed to hazards resulting from a lack of good general maintenance and “housekeeping”. 2) FIRE SAFTEY
Our Auditors will specifically look for the following:
(a) Sufficient emergency exits, all of which must be unobstructed and clearly marked
(b)Sufficient emergency evacuation routes all of which must be unobstructed, permitting
easy and rapid access. The corresponding exit doors should be kept unlocked and the major emergency exit routes clearly indicated. All fire doors should open outwards.
(c)Adequate fire safety equipment which must be suitably located, regularly inspected
and in good working condition.
(d) Documentary evidence of:
* Routine fire safety inspection processes
* Fire prevention procedures
* Action to be taken in case of fire
* An elected and suitably trained Fire Warden.
3) HAZARDOUS MATERIAL
Our Auditors will specifically look for the following:
(a) Bulk storage of all hazardous materials away from the building normally frequented by the employees and not on any evacuation route.
(b) A complete list of all the hazardous materials on site along with details of their associated dangers.
(c) Relevant hazard warning signs displayed on original delivery containers of products (such as paints, solvents and other chemicals), on any storage vessels, in storage areas and on the actual containers used in production areas. (The signs should display the relevant image and text)
d) Evidence that the employees are trained to understand the dangers associated with the hazardous materials that are used.
4) EQUIPMENT & CLOTHING
Our Auditors will specifically look for the following:
(a) Evidence that all machine operators are suitably trained in safe working methods and practices and are aware of the associated working hazards.
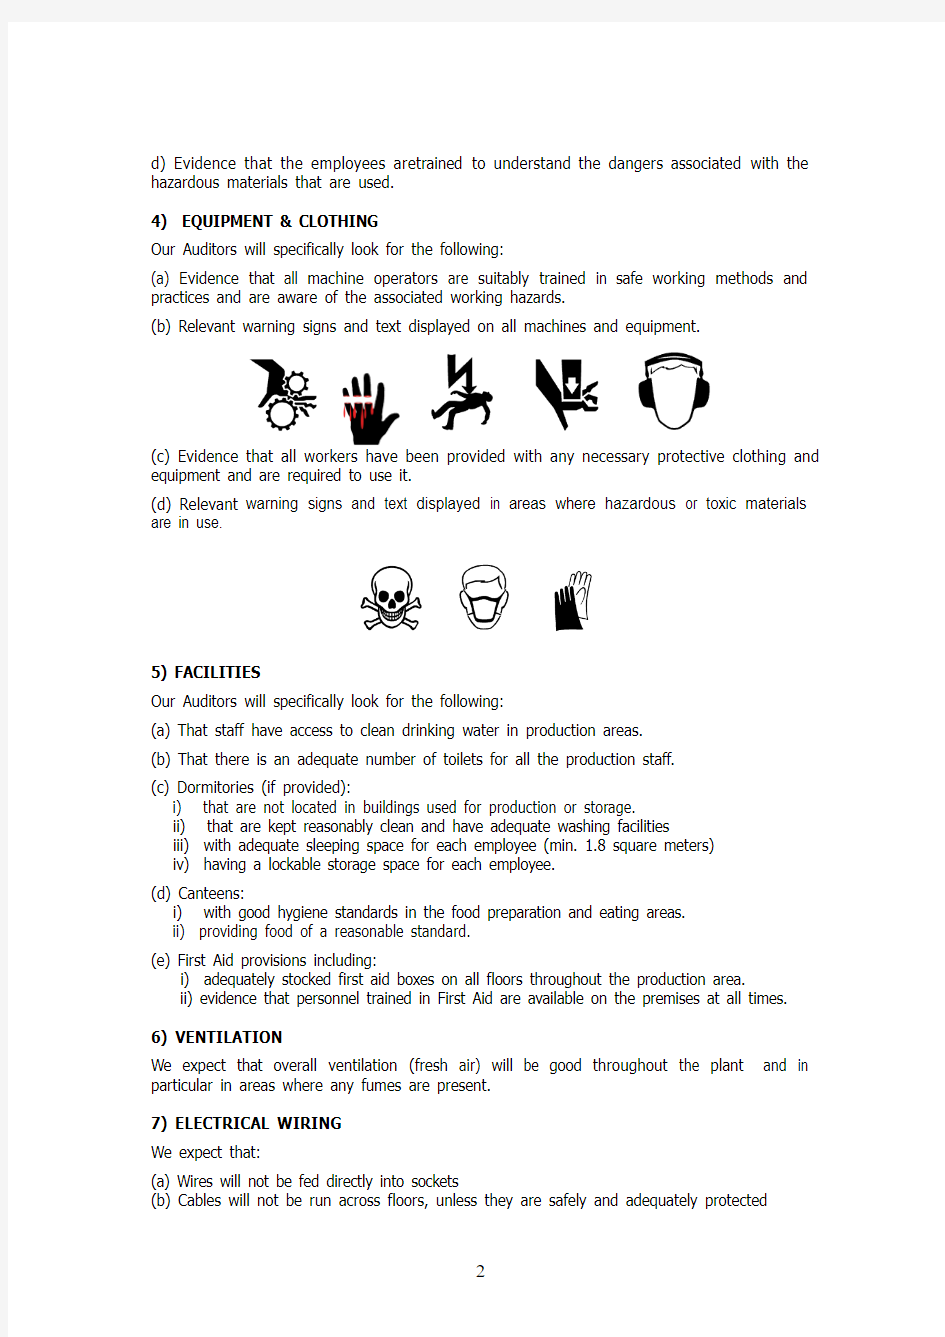
(b) Relevant warning signs and text displayed on all machines and equipment.
(c) Evidence that all workers have been provided with any necessary protective clothing and equipment and are required to use it.
(d) Relevant warning signs and text displayed in areas where hazardous or toxic materials are in use.
5) FACILITIES
Our Auditors will specifically look for the following:
(a) That staff have access to clean drinking water in production areas.
(b) That there is an adequate number of toilets for all the production staff.
(c) Dormitories (if provided):
i) that are not located in buildings used for production or storage.
ii) that are kept reasonably clean and have adequate washing facilities
iii) with adequate sleeping space for each employee (min. 1.8 square meters)
iv) having a lockable storage space for each employee.
(d) Canteens:
i) with good hygiene standards in the food preparation and eating areas.
ii) providing food of a reasonable standard.
(e) First Aid provisions including:
i) adequately stocked first aid boxes on all floors throughout the production area.
ii) evidence that personnel trained in First Aid are available on the premises at all times. 6) VENTILATION
We expect that overall ventilation (fresh air) will be good throughout the plant and in particular in areas where any fumes are present.
7) ELECTRICAL WIRING
We expect that:
(a) Wires will not be fed directly into sockets
(b) Cables will not be run across floors, unless they are safely and adequately protected
(c) Power sources and water inlets will be safely spaced apart.
E x p e c t a t i o n s:
EMPLOYEE INTERVIEWS
This part of the audit is fundamental and requires no input from factory management. Employee interviews are absolutely and strictly confidential. The anonymity of the participants is guaranteed so as to protect the integrity of the process The audit process involves interviewing as many employees as possible on the day of the assessment. This will be conducted is such a manner that causes minimum disruption to the general working functions of the factory. Employees will be invited to participate in group or individual interviews both on and off site in order to achieve the best possible representational cross-section of the workforce. We will ask the opinion of the workforce on a range of issues including working hours, wages, disciplinary procedures and discrimination. Most of the factories find the presented information a very useful independent insight into the thoughts and concerns of their workforce. Positive and negative experiences are documented.
人文社科软件用户手册_userguide2016
全国普通高等学校人文社会科学研究管理系统(校级网络版V2016版) 简要操作说明 所有:中国高校人文社会科学信息网 https://www.sodocs.net/doc/086003696.html, 2016年11月
第一章系统简介 1.系统概述 全国普通高等学校人文社会科学研究管理信息系统(RPMS),采用先进的Java软件技术开发,以支持多用户协同工作的B/S(浏览器/服务器)架构运行。功能上,面向教育部人文社会科学年度统计要求,可便捷、完整的录入相关基础数据,并严格按照统计规自动生成统计报表,从而保障人文社会科学统计工作的顺利进行。同时系统还可以有效支持学校的日常科研管理工作,成为高校科研管理工作的辅助平台。 2.版本情况 全国普通高等学校人文社会科学研究管理信息系统(RPMS)分为省级版与校级版两个版本。其中校级版,供各高校用户使用,进行校级的数据录入,报表生成,以及数据上报;省级版,供各省、自治区、直辖市教育厅及教委用户使用,用于汇总各高校上报的数据文件,生成省级报表及省级上报文件。 省级版与校级版系统,每年年末均会根据当年的统计报表制度要求及功能改进设计,发布一个当年的新版本。但每个新版系统,都会保证校级版数据的兼容与延续性,上一版本中的数据,一定可以完整的移植到新版系统中。 为此,各高校可随时进行基础数据的录入与调整工作,无须待到统计工作开始了,新版系统发布后,再进行突击性录入。
第二章 2016及2016SP1版新特点 1.功能改进 1.1网页样式 将网页页面加宽,改为面向1024X768像素屏幕分辨率进行设计,并调整了色调。 1.2新增办学性质字段 1.3调整了研究机构的机构类型与组成方式
BolztrapUserGuide
Chapter1 BoltzTraP This package contains the program Boltz mann Tra nsport P roperties(BoltzTraP)for calculat-ing the semi-classic transport coe?cients.It can be obtained from www.icams.de/boltztrap. The program has documented in https://www.sodocs.net/doc/086003696.html,mun.[1]If you publish results obtained using the program this paper should be sited. The program was originally interfaced to the WIEN2k code,but can easily be interfaced to other bandstructure codes.Marcos Alves and Matthieu Verstraete have provided Siesta and ab-init interfaces.This?le format is documented at the end of this?le.Please contribute if you make such an interface. 1.1Getting started 1.1.1Unpacking Run the command bunzip2BoltzTraP.tar.bz2;tar xvf BoltzTrap.tar This will unpack several directories src The source code test Example?les,Al,Bi2Te3and CoSb3 doc This?le util A perl script to gather WIEN energy?les 1
IMM User Guide
IMM使用指南 一.如何访问IMM (1) 二.IMM主要功能介绍 (4) 三.几个常用功能 (5) 1.远程开关机 (5) 2.通过IMM刷新服务器的UEFI/IMM微码 (6) 3.远程终端功能 (7) 一.如何访问IMM 通常主机后部有一个专用的管理端口,例如下图以3650M3为例,可以通过此端口访问IMM。 IMM管理端口默认IP:192.168.70.125 用户名:USERID 密码:PASSW0RD 注意字母为大写,密码中的“0”是数字0 在UEFI中修改IMM的IP地址 在开机自检的过程中根据提示按F1进入UEFI设置,
输入需要修改的IP地址后,选择Save Network Settings
在IE中输入IP地址即可访问IMM管理界面
二.IMM主要功能介绍 System status 查看服务器的健康状况,包括温度、电压和风扇状态等。 Virtual Light Path 查看服务器光通路诊断板上是否有告警。 Event Log 可以查看服务器的日志信息,可以用Save Log as Text File另存日志信息为文本文件。 Vital Product Data 查看服务器的型号序列号及各种微码版本。 Power/Restart 通过IMM控制开关服务器,包括定时开关机功能 Remote Control 远程控制服务器终端,需要添加IBM Virtual Media Key选件来实现此功能,大部分机型标配没有此选件。 PXE Network Boot 设置服务器的PXE启动。 Firmware Update
刷新服务器的UEFI和IMM的微码。 System Settings 设置IMM的时间日期,名字等基本信息。 Login Profiles 为IMM添加除默认之外的其他用户。 Alerts 设置snmp告警等信息。 Serial Port 设置串口信息 Port assignments 定义IMM所使用的端口。 Network Interfaces 设置IMM的网络地址 Network Protocols 配置SNMP,DNS等网络协议 Security 配置SSL、SSH等安全协议 Configuration File 备份和恢复IMM的配置文件 Restore Default Settings 将IMM恢复默认设置 Restrat IMM 重启IMM Log off 退出登录 三.几个常用功能 1.远程开关机 选择Power/Restart选项可以实现远程开机、关机和重启
TRDB_D5M_UserGuide
Terasic TRDB_D5M Digital Camera Package
TRDB-D5M User Manual 2 https://www.sodocs.net/doc/086003696.html, July 1, 2014 CONTENTS CHAPTER 1 ABOUT THE KIT (1) 1.1 K IT C ONTENTS ..................................................................................................................................................... 1 1.2 A SSEMBLE THE C AMERA ...................................................................................................................................... 1 1.3 G ETTING H ELP ..................................................................................................................................................... 3 CHAPTER 2 TRDB_D5M (4) 2.1 F EATURES ............................................................................................................................................................. 4 2.2 P IN -OUT OF THE 40-PIN CONNECTOR ON TRDB-D5M ....................................................................................... 5 2.3 P IN D ESCRIPTION OF THE 40-PIN I NTERFACE OF TRDB_D5M .......................................................................... 6 CHAPTER 3 DIGITAL CAMERA DESIGN DEMONSTRATION (7) 3.1 D EMONSTRATION S ETUP ...................................................................................................................................... 7 3.2 C AMERA D EMONSTRATION S ETUP O N DE4 B OARD ........................................................................................... 7 3.3 C AMERA D EMONSTRATION S ETUP O N DE2-115 B OARD .................................................................................... 9 3.4 C ONFIGURING THE C AMERA AND L OAD THE I MAGE C APTURED TO Y OUR PC (DE2-70 B OARD U SERS ) ........ 11 3.5 C ONFIGURING THE C AMERA (DE2 B OARD U SERS ) .......................................................................................... 13 3.6 C ONFIGURING THE C AMERA (DE1 B OARD U SERS ) .......................................................................................... 14 3.7 B LOCK D IAGRAM OF THE R EFERENCE D ESIGN ................................................................................................. 16 CHAPTER 4 APPENDIX (17) 4.1 R EVISION H ISTORY ............................................................................................................................................. 17 4.2 A LWAYS V ISIT TRDB_D5M W EBPAGE FOR N EW A PPLICATIONS (17)
User_Guide
企业客户分类规则挖掘系统使用说明 (1)启动customer_classify.exe文件,首先弹出图1所示的“企业客户分类规则挖掘系统”的说明窗口,片刻后,系统自动弹出系统主界面,如图2所示。 (2)如图2所示,在系统主界面中有菜单和企业客户分类规则挖掘系统的功能简介。菜单包括企业客户分类规则挖掘、查看数据、系统原理、使用说明和退出。 (3)请点击“查看数据”,系统将弹出“企业客户数据”窗口显示客户的原始数据,如图3所示。 (4)请点击“系统原理”菜单查看该系统的原理。 (5)请点击“使用说明”菜单查看如何使用该系统。 (6)请点击“企业客户分类规则挖掘”菜单,弹出图4所示的“企业客户分类规则挖掘”窗口。 图1 “企业客户分类规则挖掘系 统”的说明窗口 图2 系统主界面 图3 企业客户数据窗口
(7)在参数设置中已经输入各参数值,如种群大小为50,最大迭代数目为40,最小支持度阈值ms 为0.2,最小置信度阈值mc 为0.6,交叉概率为80%,变异概率为5%。如图5所示。用户可以自己修改各参数值。 (8 )点击遗传运算操作中的“编码”,右侧出现编码,运算状态显示为“请选择筛选种群的运算!”,如图6、7所示。 (9)点击遗传运算操作中的“筛选种群”,右侧将把不符合置信度和支持度的编码用“***”表示出来,运算状态显示为“当前尚未达到最大迭代次数,请继续进行交叉运算!”,如图8、9所示。 图4 “企业客户分类规则挖掘”窗口 图5 参数设置 图6 编码操作的结果 图7 编码操作的运算状态
(10)依次点击遗传运算操作中的“交叉”和“变异”,运算状态中分别显示“当前尚未达到最大迭代次数,请继续进行变异运算!”和“当前尚未达到最大迭代次数,遗传算法可以继续进行!”,如图10、11所示。此时,“算法继续运行”按钮变为可用。 (11)点击“算法继续运行”按钮,出现如图12所示的对话框,点击“确定”按钮,运算状态中显示“算法运行大概需要2-3分钟,请耐心等候”,直到2-3分钟后“输出最优规则集”按钮变为可用。 (12)点击“输出最优规则集”按钮,根据遗传算法得到的最优规则集对话框显示出来,如图13所示。 图8筛选种群操作的结果 图9 筛选种群操作的运算状态 图10 交叉操作的运算状态 图11变异操作的运算状态 图12 算法运行提示
Userguide
联想蓝牙手机中心 快速入门 目录: 最低要求 (2) 安装之前 (3) 安装联想蓝牙手机中心 (4) 移动设备安装和配置 (5) 卸载联想蓝牙手机中心 (6) 联想蓝牙手机中心主窗口 (7) 联想蓝牙手机中心主窗口功能介绍 (8) 联想蓝牙手机中心功能面板 (9) 菜单(多级功能列表) (10) 其它信息 (11)
最低要求 联想蓝牙手机中心需要使用 Windows 2000,XP或 Vista。如需关于其它操作系统以及与升级有关的任何信息,请与联想公司。 为使联想蓝牙手机中心正确运行,请检查下列事项: ? 一台配备Pentium(R)II 233MHz的计算机,并且已经连接到您的手机设备。 ? 一个可用的USB端口。 ? 拥有20MB可用空间的本地硬盘驱动器。 ? 与联想蓝牙手机中心兼容的设备。 ? 与您的手机设备运营商的服务合约中包含高速数据网络选项(以便网络上使用高速电子邮件和 Internet 浏览);数据服务是与网络和服务合约有关的特性,并不是在所有地区都能使用。有关的详细信息,请与您的无线服务提供商联系。 ? 最低活动内存:在 Windows(R) 2000 和 XP 下最少 64MB 的 RAM。
安装之前 屏幕快照 本指南中的屏幕快照基于在Windows(R)XP环境下使用联想蓝牙手机中心。在其它Windows(R) 操作系统下运行此应用程序时,屏幕内容可能会有变化。这并不影响软件的功能性。 联机帮助 联想蓝牙手机中心提供上下文关联的联机帮助,单击“帮助”按钮或按键盘上的F1可以访问联机帮助。帮助文件中包含有关如何使用联想蓝牙手机中心的完整信息。
MOD11_UserGuide
Collection-5 MODIS Land Surface Temperature Products Users' Guide Zhengming Wan ICESS, University of California, Santa Barbara April 2009
ALERT --- This document is a living document that describes the Collection-5 MODIS Land Surface Temperature (LST) products. It is revised as progress is made in the development and assessment of the LST products. Described is the current state of the MODIS LST products. The purpose of the document is to give the potential user of LST products an understanding of the MODIS LST products and the data in those products. The MODIS LST products MOD11_L2, MOD11A1, and MOD11B1 have been validated at stage 1 with in situ measurements in more than 50 clear-sky cases in the temperature range from -10o C to 58o C and the column water vapor range of 0.4-4cm, most of them presented in published papers (Wan et al., 2002 and 2004; Coll et al., 2005; Wan, 2008; Wan and Li, 2008). More validation activities are under way. Please use the Collection-4 Users’ Guide for the descriptions of V4/V4.1 Terra MODIS LST products (named starting with MOD11) and V4/V4.1 Aqua MODIS LST products (named starting with MYD11).
User Guide
ELECTRA User Guide Version 1.2, March 2004
Copyright Notice Copyright ?2003-2004 by KONEKT, SPRL. All rights reserved. No part of this work may be reproduced without receiving the prior permission of the copyright owner. All brand or product names mentioned in this guide are trademarks or registered trademarks of their respective owners. In particular: SPECCTRA? is a registered trademark of Cadence, Inc. Windows is a trademark of Microsoft Corp. Disclaimer KONEKT SPRL AND ITS LICENSORS MAKE NO WARRANTY OF ANY KIND, EXPRESS OR IMPLIED, WITH REGARD TO THIS MATERIAL, INCLUDING, BUT NOT LIMITED TO, THE IMPLIED WARRANTIES OF MERCHANTABILITY AND FITNESS FOR A PARTICULAR PURPOSE. 2
ELECTRA v1 1Overview of ELECTRA Routing Technology (5) 2Main Features (7) 3CAD Flow Integration (8) 4Using ELECTRA (9) 4.1Pushbutton Autorouting (9) 4.2Basic Routing Strategy (10) 4.3Analyzing Routing Results (11) 4.4Improving routability (13) 4.5Restarting the autorouter (13) 4.6Advanced Rules Hierarchy (14) 4.7Mouse driven Viewing Navigation (17) 5Quick Command Reference (19) 5.1Notations (19) 5.2Descriptors (19) 5.3Types: (20) 5.4Command Reference (21) autoroute (21) bestsave (21) bus (21) check (22) circuit (22) clean (23) cost (24) delete all wires (25) direction (26) fanout (26) filter (27) 3
丰田普锐斯用户手册PriusUserGuide
DRIVING (2) Just Drive It ! ............................. 2 Modes ......................................... 2 Eco-Meter .................................. 4 Energy Monitor .......................... 6 Consumption .............................. 8 Efficiency ................................. 10 Trip Info ................................... 11 Battery Info .............................. 12 Brake Assist ............................. 13 Tire Pressure ............................ 13 BUTTONS .. (14) Steering-Wheel ........................ 14 Voice ........................................ 16 Cruise ....................................... 16 Dimmer .................................... 16 Timer (PHV) ............................ 17 Cabin Air ................................. 17 Window Defog ......................... 18 Fan Options .............................. 18 Other Buttons ........................... 20 HELPFUL TIPS .. (21) Fuel Door ................................. 21 Rear Hatch . (21) Grille Blocking ........................ 22 OTHER . (23) External Cargo ......................... 23 Security .................................... 25 EDUCATION (26) Real-World Data ...................... 26 Operational Info ....................... 26 GLOSSARY .. (29) Disclaimer: All the information stated in this document was provided by Prius owners. None were affiliated with Toyota Motor Corporation, except as customers. This document is not sanctioned by Toyota Motor Corporation or any of its affiliates. The ideas, suggestions, and opinions offered in this document have not been endorsed by the manufacturer of those specific components or Toyota Motor Corporation. Any harm or damage that may result from the application of or the following of any ideas, suggestions, or opinions contained in this document is the sole responsibility of the individual that applied or followed said ideas, suggestions or opinions. The authors of this document hereby declare that they cannot and will not be held liable, in any fashion, for the content or the use of this document. Toyota Prius User-Guide Second Edition for the 2010-2012 models
CMUX_User_Guide
CMUX User Guide 30268ST10299A Rev. 0 - 13/10/06
CMUX User Guide 30268ST10299A Rev. 0 - 13/10/06 This document is refered to the following products: GM862-GPS 3 990 250 657 GE863-GPS 3 990 250 660 GM862-QUAD 3 990 250 659 GM862-QUAD-PY 3 990 250 658 GE863-OUAD Pb balls 3 990 250 662 GE863-PY Pb balls 3 990 250 661 GE864-QUAD 3 990 250 675 GE864-PY 3 990 250 676 GE863-QUAD 3 990 250 648 GE863-PY 3 990 250 650
CMUX User Guide 30268ST10299A Rev. 0 - 13/10/06 Contents 1INTRODUCTION (4) 1.1Scope of document (4) 2APPLICABLE DOCUMENTS (5) 3TECHNICAL CHARACTERISTICS (6) 3.1Product architecture (6) 3.2Implementation feature and limitation (6) 3.3AT command interface interactions (6) 4SERIAL MULTIPLEXER PROTOCOL (8) 4.1CMUX Frame Structure (8) 4.2UIH Control Channel Frame Coding (11) 4.3UIH Data Channel Frame Coding (13) 4.4CMUX establishment scenario (14) 5TELIT SERIAL PORT PC INTERFACE FOR CMUX (15) 5.1Interface Specification (15) 5.2Scenario (15) 5.3Graphical Interface (16) 5.4Application Setup (18) 6INTEGRATOR HINTS (19) 6.1How to begin (19) 6.2Flow control (20) 6.3Blocking command (20) 6.4Lookup table for FCS calculation (21) 6.5Ignored command (22) 7AT Commands (23) 8Document Change Log (24)
urg user guide
Unified Coverage Reporting User Guide Version X-2005.12 December 2005 Comments? E-mail your comments about this manual to vera_support@https://www.sodocs.net/doc/086003696.html,
Copyright Notice and Proprietary Information Copyright 2005 Synopsys, Inc. All rights reserved. This software and documentation are owned by Synopsys, Inc., and furnished under a license agreement. The software and documentation may be used or copied only in accordance with the terms of the license agreement. No part of the software and documentation may be reproduced, transmitted, or translated, in any form or by any means, electronic, mechanical, manual, optical, or otherwise, without prior written permission of Synopsys, Inc., or as expressly provided by the license agreement. Right to Copy Documentation The license agreement with Synopsys permits licensee to make copies of the documentation for its internal use only. Each copy shall include all copyrights, trademarks, service marks, and proprietary rights notices, if any. Licensee must assign sequential numbers to all copies. These copies shall contain the following leg-end on the cover page: “This document is duplicated with the permission of Synopsys, Inc. for the exclusive use of __________________________________________ and its employees. This is copy number __________.” Destination Control Statement All technical data contained in this publication is subject to the export control laws of the United States of America. Disclosure to nationals of other countries contrary to United States law is prohibited. It is the reader’s responsibility to determine the applicable regulations and to comply with them. Disclaimer SYNOPSYS, INC., AND ITS LICENSORS MAKE NO WARRANTY OF ANY KIND, EXPRESS OR IM-PLIED, WITH REGARD TO THIS MATERIAL, INCLUDING, BUT NOT LIMITED TO, THE IMPLIED WAR-RANTIES OF MERCHANTABILITY AND FITNESS FOR A PARTICULAR PURPOSE. Trademarks Synopsys, the Synopsys logo, Arcadia, BiNMOS-CBA, CMOS-CBA, COSSAP, DESIGN (ARROWS), DesignPower, DesignWare, dont_use, EPIC, ExpressModel, in-Sync, LM-1000, LM-1200, Logic Modeling, Logic Modeling (logo), Memory Architect, ModelAccess, ModelTools, PathMill, PL debug, RailMill, SmartLicense, SmartLogic, SmartModel, SmartModels, SNUG, SOLV-IT!, SourceModel Library, Stream Driven Simulator, Synopsys, Synopsys (logo), Synopsys VHDL Compiler, Synthetic Designs, Synthetic Libraries, TestBench Manager, and TimeMill are registered trademarks of Synopsys, Inc 3-D Debugging, AMPS, Behavioral Compiler, CBA Design System, CBA-Frame, characterize, Chip Architect, Compiled Designs, Core Network, Core Store, Cyclone, Data Path Express, DataPath Architect, DC Expert, DC Expert Plus, DC Professional, DelayMill, Design Advisor, Design Analyzer, Design Compiler, DesignSource, DesignTime, DesignWare Developer, Direct RTL, Direct Silicon Access, dont_touch, dont_touch_network, ECL Compiler, ECO Compiler, Embedded System Prototype, Floorplan Manager, Formality, FoundryModel, FPGA Compiler, FPGA Express, Frame Compiler, General Purpose Post-Processor, GPP, HDL Advisor, HDL Compiler, Integrator, Interactive Waveform Viewer, Library Compiler, LM-1400, LM-700, LM-family, Logic Model, ModelSource, ModelWare, Module Compiler, MS-3200, MS-3400, Power Compiler, PowerArc, PowerGate, PowerMill, PrimeTime, RTL Analyzer, Shadow Debugger, Silicon Architects, SimuBus, SmartCircuit, SmartModel Windows, Source-Level Design, SourceModel, SWIFT, SWIFT Interface, Synopsys Graphical Environment, Test Compiler, Test Compiler Plus, Test Manager, TestSim, Timing Annotator, Trace-On-Demand, VCS, VCSi, VHDL System Simulator, VirSim, Visualyze, Vivace, VSS Expert, and VSS Professional are trademarks of Synopsys, Inc. Linux is a registered trademark of Linus Torvalds used by permission. All other product or company names may be trademarks of their respective owners. Unified Coverage Reporting User Guide, Version X-2005.06 2
VIA音效卡用户指南(简体中文版)VIA_HD_AudioDeck_userGuide_sc
用户指南 VIA HD Audio Adeck For Windows 2000, Windows XP & Server 2003 June 20th 2008 Revision 1.10sc
版本修订摘要 版本日期编修备注 1.0sc Oct.20.07 Jill Yang Initial public release 1.10sc Jun.20.08 Jill Yang Update Function Page
目录 版本修订摘要 (2) 目录 (3) 图目录 (4) 前言 (5) 系统需求 (6) 显示模式 (7) 简易模式 (7) 完整模式 (8) 面板细部 (9) 上面板 (9) 下面板 (10) 配置面板 (11) 喇叭配置面板 (11) 播音、录音音量设定面板 (13) 音效配置面板 (16) 进阶配置面板 (18) S/PDIF配置面板 (21) 系统信息面板 (22) 工具提示 (24) 工具列 (25) Magic 5.1 (26)
图目录 图1 – 简易模式的Adeck (7) 图2 – 完整模式的Adeck (8) 图3 – 上面板 (9) 图4 – 喇叭配置面板 (11) 图5 – 启用「独立耳机」的喇叭配置面板 (11) 图6 – 喇叭控制面板中的耳机测试面板 (12) 图7 – 混音配置面板 – 播放装置设定 (13) 图8 – 混音配置面板 – 录音装置设定 (14) 图9 – 混音配置面板 – 前置麦克风 (14) 图10 – 混音配置面板 – 耳机 (15) 图11 – 音效配置面板 – 均衡器 (16) 图12 - 没有启用平滑滚轴的均衡器设定 (16) 图13 – 启用平滑滚轴的均衡器设定 (16) 图14 – 音效配置面板 – 重低音强化管理 (17) 图15 – 插座配置面板 – 后面板 (18) 图16 – 插座配置面板 – 前面板 (18) 图17 – 插座配置面板 – 插座侦测提示 (19) 图18 – 插座配置面板 – 耳机配置 (20) 图19 – S/PDIF配置面板 – S/PDIF输出 (21) 图20 – S/PDIF配置面板 – S/PDIF输入 (21) 图21 – 系统信息面板 (22) 图22 – 热键配置面板 (22) 图23 – 热键 – 使用热键调整音量 (23) 图24 – 工具提示 (24) 图25 – Adeck的工作列图示 (25) 图26 – 在工作列图标按下鼠标右键 (25) 图27 – Magic 5.1 – 切换至四声道 (26) 图28 – Magic 5.1 – 切换至六声道 (27)
Noah_LSM_USERGUIDE_2.7.1 LSM模式介绍及使用简介
THE COMMUNITY Noah LAND-SURFACE MODEL (LSM) User’s Guide Public Release Version 2.7.1 Last Updated Feb. 9 2005 This document is filename NOAH_LSM_USERGUIDE_2.7.1 doc at ftp://https://www.sodocs.net/doc/086003696.html,/mmb/gcp/ldas/noahlsm/ver_2.7.1 Author: Kenneth Mitchell (NCEP/EMC) Point of Contact: Vince.Wong@https://www.sodocs.net/doc/086003696.html,, phone 301-316-5029 Collaborators: Mike Ek, Vince Wong, Dag Lohmann, Victor Koren, John Schaake, Qingyun Duan, George Gayno, Brian Moore, Pablo Grunmann, Dan Tarpley, Bruce Ramsay, Fei Chen, Jinwon Kim, Hua-Lu Pan, Ying Lin, Curtis Marshall, Larry Mahrt, Tilden Meyers, Paul Ruscher TABLE OF CONTENTS 1.0 Introduction 2.0 Model Heritage 3.0 Directory Contents and Quick-Start Guide to Execution 4.0 Subroutine Summary and Calling Tree 5.0 Control File Contents and Function 6.0 Input Atmospheric Forcing File 7.0 LSM Initial Conditions 8.0 Specifying Model Parameters 9.0 Execution Output Files 10.0Technical References 1.0 INTRODUCTION This User’s Guide provides execution guidance for and physical description of the public version of the community Noah LSM. This version of the Noah LSM is a stand-alone, uncoupled, 1-D column version used to execute single-site land-surface simulations. In this traditional 1-D uncoupled mode, near-surface atmospheric forcing data is required as input forcing (see Sec 6.0). This LSM simulates soil moisture (both liquid and frozen), soil temperature, skin temperature, snowpack depth, snowpack water equivalent (and hence snowpack density), canopy water content, and the energy flux and water flux terms of the surface energy balance and surface water balance. See Sec 10 for the lineage of key technical references.
相关文档
- userguide
- 人文社科软件用户手册_userguide2016
- 福汇交易平台II userguide
- Noah_LSM_USERGUIDE_2.7.1 LSM模式介绍及使用简介
- Suunto_Ambit3_Peak_UserGuide_中文说明书2.0
- UserGuide
- 蓝牙耳机使用说明Bluetoothheadsetuserguide-FCCID
- DP1308A_UserGuide_CN
- 丰田普锐斯用户手册PriusUserGuide
- VM_UserGuide
- WorkbenchUserGuide
- 软件开发测试流程(UserGuide)
- TRDB_D5M_UserGuide
- MOD11_UserGuide
- VIA音效卡用户指南(简体中文版)VIA_HD_AudioDeck_userGuide_sc
- sense_userguide_PC英语使用说明
- BolztrapUserGuide
- Userguide
- User Guide
- Battery user guide 手表电池使用指南_v1 0