M. Physical and Virtual Tools Activity Theory Applied to the Design of Groupware
Physical and Virtual Tools: Activity Theory Applied to the Design of Groupware
MORTEN FJELD1, KRISTINA LAUCHE2,
MARTIN BICHSEL3, FRED VOORHORST1,
HELMUT KRUEGER1, MATTHIAS RAUTERBERG4
1 Institute for Hygiene and Applied Physiology (IHA), Swiss Federal Institute of Technology (ETH), Clausiusstr. 25, CH-809
2 Zurich, Switzerland
2 Institute for Work and Organisational Psychology (IfAP), Swiss Federal Institute of Technology (ETH), Nelkenstr. 11, CH-8092 Zurich, Switzerland
3 Institute of Mechanical Systems (IMES), Swiss Federal Institute of Technology (ETH),
Tannenstr. 3, CH-8092 Zurich, Switzerland
4 Center for User-System Interaction (IPO), Technical University Eindhoven (TUE),
Den Dolech 2, NL-5612 AZ Eindhoven, The Netherlands
Contact: morten@fjeld.ch, www.fjeld.ch, color version: www.fjeld.ch/cscw
Abstract. Activity theory is based on the concept of tools mediating between subjects and objects. In this theory, a n individual’s creative interaction with his or her surroundings can result in the production of tools. When an individual’s mental processes are exteriorized in the form of tools - termed objectification - they become more accessible to other people and are therefore useful for social interaction. This paper shows how our understanding of activity theory has shaped our design philosophy for groupware and how we have applied it. Our design philosophy and practice is exemplified by a description of the BUILD-IT system. This is an Augmented Reality system we developed to enhance group work; it is a kind of graspable groupware which supports cooperative planning. The system allows a group of people, co-located around a table, to interact, by means of physical bricks, with models in a virtual three-dimensional (3D) setting. Guided by task analysis, a set of specific tools for different 3D planning and configuration tasks was implemented as part of this system. We investigate both physical and virtual tools. These tools allow users to adjust model height, viewpoint, and scale of the virtual setting.Finally, our design practice is summarized in a set of design guidelines. Based on these guidelines, we reflect on our own design practice and the usefulness of activity theory for design.
Key words:Design, activity theory, Augmented Reality, Virtual Reality, graspable, groupware, objectification, physical tools, virtual tools, co-located interaction, cooperation, planning, configuration, social, computer.
1. Introduction
The aim of this paper is to explain and illustrate our design philosophy for developing graspable groupware. Our philosophy is based mainly on the concepts of tools and exteriorization found in Leont’ev’s (1978, 1981) and Engestr?m’s (1990, 1996) work on activity theory. Our practice rests on B?dker’s (1991) and Kaptelinin’s (1996) work, where they apply activity theory to human-computer interaction. In our construction of a system we employed a recent technology
called Augmented Reality (AR). Before we began to develop the system, we studied users needs by employing task analysis methodology.
According to Leont’ev, not only is activity shaped by physical surroundings, activity in turn shapes the surroundings. When activity shapes those surroundings what happens is that internal mental activity materializes into artifacts. This process of turning mental activity into an object or objectification is what Leont’ev called exteriorization. While it is obvious that for any individual the moment of exteriorization is an important step in his or her creative design activity, it is perhaps less obvious that this is a crucial step in making ideas accessible to others. From this perspective exteriorization is an important social moment which supports mutual understanding in a collective creative design process.
In our design philosophy we take account of the physical and social surroundings as well as the physical and mental faculties of human beings. We draw on B?dker’s (1991) and Kaptelinin’s (1996) work as a basis for our design process. While we do not consider aspects of human consciousness and emotionality in human development, we note the possible connection between these aspects and human-computer interaction (Nardi, 1996b).
A vital part of our design philosophy is the tradition of AR, which enriches natural communication with virtual features. Backed up by activity theory and the usage of AR, we developed groupware for layout planning and configuration tasks; this groupware is called the BUILD-IT system (Rauterberg et al., 1997a, 1997b, 1998; Fjeld et al., 1998a, 1998b, 1998c, 1999a, 1999b, in press). This system enables end-users, grouped around a table, to cooperate in the active design of a virtual setting, thus supporting co-located, instead of distributed, interaction. The multi-user functionality of BUILD-IT overcomes a serious drawback often seen with computer-supported cooperative work (CSCW) systems, namely that they are based on single-user applications (1) (Grudin, 1988). We believe that co-location is an indispensable factor for the early stages of a complex planning process. Input and output, however, can be prepared and further developed off-line, using a conventional Computer-Aided Design (CAD) system. Other major projects where graspable groupware was constructed to support planning processes are the metaDESK (Ullmer and Ishii, 1997) and the Environment and Discovery Collaboratory (EDC) (Arias et al., in press).
Section 2 introduces our theoretical background, which stems from activity theory; we discuss concepts such as tools, objectification and collective action regulation. The difference between goal-directed pragmatic action and exploratory epistemic action is emphasized. Section 3 describes our design philosophy in terms of AR. Task analysis and the incorporation of both physical and virtual tools are two methods which we show to emerge naturally out of our design philosophy. Section 4 demonstrates how our design philosophy was used to develop the groupware called BUILD-IT. Our design philosophy is subsequently applied to the design of tools for graspable groupware. We describe
the basic principles of human interaction with graspable tools and show how such tools are developed according to the results of task analysis, whereby we focus on the challenges and problems we encountered. In Section 5, the benefits of activity theory for groupware design are discussed and a set of design guidelines is outlined.
2. The concept of tools in activity theory
To provide a theoretical background, we show how our understanding of activity theory has shaped our goals and the design process of AR groupware. First, our account of the tool concept and objectification is given. Then, collective action regulation is explained. Finally, we introduce two types of complete action regulation cycles for goal-directed pragmatic action and for exploratory epistemic action.
2.1 TOOLS AND OBJECTIFICATIONS
In the most general sense, a ctivity means a subject’s interaction with his or her surroundings. Modern activity theory originated from Soviet cultural-historical psychology (Vygotsky, 1978; Leont’ev, 1978, 1981), which in turn is rooted in both eighteenth and nineteenth century classical German philosophy - from Hegel’s idealism to the historical materialism of Marx and Engels, in which the concept of activity was extensively elaborated. These roots are quite unfamiliar to most Anglo-American readers and have therefore been partly neglected (Kuutti, 1996). Yet, Engestr?m (1991) claims that activity theory today is transcending these origins, becoming truly international and multidisciplinary. Two results of this development are Engestr?m and Middleton (1996) and Nardi (1996a).
Fundamental to modern activity theory is the idea that the development of thoughts and cognitive activity requires social interaction and exchange with a physical environment. Via the process of internalization, social interaction turns into mental activity. Handling ever more abstract objects and concepts is part of an individual’s cognitive development. Nevertheless, the physical environment remains important, since it is used for the externalization of thoughts and as external memory. This is particularly important for the abstract planning and configuration tasks we focus on in this paper.
Individuals are confronted with tasks that life puts in front of them and they use artifacts as tools or create tools out of their understanding. These tools then become part of the cultural context of other people. A tool mediates an activity, thereby connecting a human being, not only to the world of objects - his or her physical surroundings - but also to other human beings. At the same time the use of a tool appropriates the collective experience of humanity embodied in that tool (Leont’ev, 1982). In this sense we view the developmental processes of human beings, their physical surroundings and social culture as co-evolutionary. As
Engestr?m (1991) puts it: “The idea is that humans can control their own behavior – not ‘from the inside’, on the basis of biological urges, but from the outside, using and creating artifacts”.
For planning activities Engestr?m’s idea has been applied to artifacts and tools, resulting in sketches, documents, and three-dimensional (3D) objects or devices. (At this point in our research process, we view Engestr?m’s artifacts and tools as corresponding to Leont’ev’s (1978) objectifications of physical nature.) Hacker et al. (1998) describe the importance of grasping design ideas by sketching and by low-cost prototyping. Such methods may help to achieve design results in a faster and better way than by using abstract design processes. Physical interaction handles, for instance bricks (Fitzmaurice et al., 1995), can be seen as physical devices for exteriorization in a planning process.
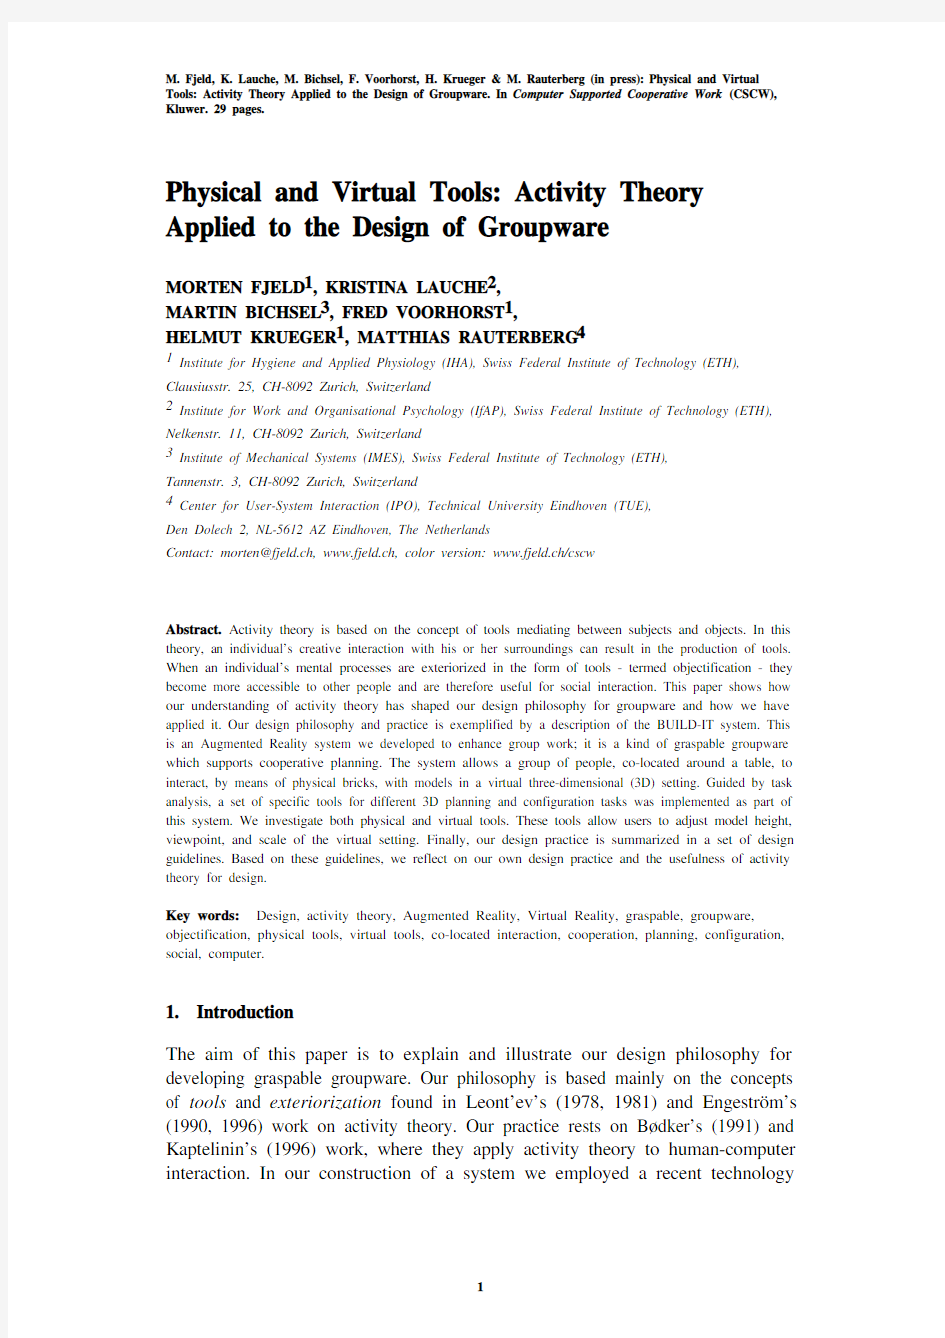
To illustrate the tradition of tool development in activity theory, a historic example might be of interest. In the historical collection of the ETH library, we found that mathematicians of the eighteenth century (Diderot and D’Alembert, 1778) employed a variety of physical tools (2) (Fig. 1). Modern mathematics has become even more an abstract field of study.
Figure 1. Tool production during the eighteenth century (Diderot and D’Alembert, 1778).
However, the view of tools presented above can also impose some limitations on the potential applications of activity theory. In Virtual Reality (VR) “the border between a tool and reality is rather unclear; information technology can provide the user not only with representations of objects of reality but also with a sort of reality as such, which does not obviously represent anything else and is intended to be just one more environment with which the individual interacts” (Kaptelinin, 1996, p. 64). This unclear border is a problem VR presents to activity theory; it might be solved by enriching activity theory’s basic principles with new ideas from cultural-historical traditions or other approaches for studying the use of artifacts.
One answer may be found in the distributed cognition approach, in which internal and external representations of artifacts are examined (Flor and Hutchins, 1991; Hutchins 1991). As in activity theory, this approach describes how we may take advantage of artifacts designed by others in collaborative manipulation. Compared with activity theory, “distributed cognition has taken most seriously the
study of persistent structures, especially artifacts” (Nardi, 1996c, p. 85). However, the two closely related frameworks show one distinct difference. In activity theory artifacts mediate human thought and human behavior and there is no intrinsic symmetry between people and their tools. Based on the 19th century debates on epistemology and on what a human being is, gaining knowledge can be seen as an individual process, a process of knowing, which can only take place in an individual. In contrast, distributed cognition puts people and things at the same level; they are both ‘agents’ in a system (Nardi, 1996c, p. 86). Hence, the distributed cognition approach ignores the faculties of human beings not found within computers, like motive, emotionality, and consciousness. It also ignores for computers their non-human traits, namely their ability to execute programs in a precise and predictable manner. By focusing on a common capability of humans and computers, much is lost on both sides.
Another answer is found in B?dker’s (1996, pp. 151-152) characterization of the different focuses in the use activity:
? ”The physical aspects - support for operations toward the computer application as a physical object. The physical aspects are the conditions for the physical handling of the artifact. ...
? The handling aspects - support for operations toward the computer application. ... The handling aspects are the conditions for transparency of the artifact that allow the user to focus on the ‘real’ objects and subjects of the activity. ...
? The subject/object-directed aspects - the conditions for operations directed toward objects or subjects that we deal with ‘in’ the artifact or through the artifact. ... ”
In our work we understand the physical aspects as how to use the hardware to operate the groupware, the handling aspects as how to operate the groupware, and the subject/object-directed aspects as how to use groupware to solve a task.
B?dker talks about ‘real’ objects and subjects of the activity. Working with VR, the object of the activity is represented by a virtual world. What a subject situated within that virtual world would see, is represented by a virtual viewpoint. By interpreting the term ‘real’ in the handling aspects as ‘virtual’, we may overcome the limitations pointed out by Kaptelinin (1996), i.e. we may clearly define the border between tool and reality. This interpretation takes on particular importance when we develop our so-called navigation methods (Section 4.3.3), which are purely based on the handling aspects. In a more general way, we will use all three focuses in the use activity to structure the description of our design process (Section 4).
2.2 COMMON OBJECTIFICATION
In more recent developments, the scope of activity theory has broadened to encompass interaction within a community (Engestr?m, 1991). Since our design philosophy is centered on supporting co-located groups, this new development has been of particular interest to us. As pointed out above, a tool connects an individual to other human beings by mediating activity, thereby becoming part of a cultural context. Of particular interest to us are tools that are made or used by groups.
The individual processes of goal setting, planning, and action are transferred into collective action regulation (Weber, 1997; 1999). This transfer refers to coordination and allocation processes within a group. Weber introduces the term common objectification to mean materialization of collective action regulation, integrating different schools of activity theory. ”The process of common objectification is understood as a process by which all (or several) members of a workgroup mutually transfer their individual knowledge, expertise, and experience into a material form. By doing this, they make their materialized knowledge available to other group members” (Weber, 1999, p. 13). First applied to industrial work groups, common objectification was also found to be of great importance in design and planning teams because planning tasks require even more mutual exchange of knowledge among experts (Lauche et al., 1999). The results of a process of common objectification can take the form of reports, design documents, prototypes, drawings, or software. Therefore, it is part of our design philosophy to facilitate the creation of such results among a group of users.
2.3 GOAL-DIRECTED AND EXPLORATORY ACTION
General models for goal-based problem solving were first suggested by Newell and Simon (1972). Drawing from the same sources as activity theory, action theory has focused on goal-directed action at work (Hacker, 1994; Frese and Zapf, 1994; Volpert et al, 1989; Frese and Sabini, 1985). Hacker (1998) introduced the notion of complete action cycle (Fig. 2) for goal-directed pragmatic action, consisting of:
(1) setting the next (or first) goal in performing a task,
(2) planning according to the conditions of execution, including selection of
tools and preparation of actions necessary for goal attainment,
(3) physical (or even mental) performance, and
(4) control according to the set goal via different sources of feedback.
Figure 2. A complete action cycle for goal-directed pragmatic action as suggested by Hacker, 1994. Action is derived from goal setting.
In our work, however, we have realized that both our own design process and the planning task for which we are designing the groupware are not exclusively goal-directed; they also have exploratory elements. Exploratory epistemic actions (Kirsh and Maglio, 1994) are performed to unveil hidden information or to gain insight that would otherwise require a great deal of mental computation. Exploratory epistemic action means that no specific goal is available for initial action. Only after the receipt of feedback, which gives information on the means available, can a goal be generated. Based on this goal, a new planning stage and a new action phase can be initiated. Thereby, an alternative kind of complete action cycle emerges (Fig. 3).
Figure 3. A complete action cycle for exploratory epistemic action. Goal setting is derived from action.
Our aim will be to design a system which fluently mediates both kinds of actions, goal-directed pragmatic and exploratory epistemic action.
3. Design philosophy
In this section we present our design philosophy, which is based on coinciding action and perception spaces, in its relation to Augmented Reality (AR). Task analysis and a shifting design focus between physical and virtual tools are described as two further design methods emerging from our philosophy.
3.1. AUGMENTED REALITY
Computer-supported cooperative work (CSCW) has enabled distant and asynchronous communication between people and has helped build ‘bridges’ in our global economy. This has brought about many well-advertised advantages, ranging from economic benefit to less status-oriented network communication. However, with many CSCW systems, users hardly interact with their physical environment. They deal only with virtual objects, which is also the case for most single-user applications. Sometimes users are even embedded in a fully virtual world, unable to draw on any attributes of the tangible physical world. Much of the users’ mental capacity is employed to adapt to the virtual world, leaving less capacity for actual task solving.
An alternative approach offered by AR is to bring the virtual world of computers into the physical world of everyday human activity. This approach includes aspects of natural communication which serve as mediators for mutual understanding: eye-contact, body language, and physical object handling. It is non-intrusive (Vince et al., 1999), using no gloves or helmets, and thereby respects body-space (Rauterberg, 1999). At the same time users can still draw on the advantages of a virtually enriched world, which is of particular importance to planning tasks. The activity of planning is mainly ‘virtual’ because it involves reflecting on and modifying objects that will only exist in the future. Virtual models of these objects can be more easily changed than physical models (3). They can be stored in external computer memory and can be visualized for interaction purposes. Thus both physical and virtual models have their rightful place in a planning process. A specific aim of our project is to study ways to integrate computer-mediated activity into the physical world. This is how we came to work within the tradition of AR, where computer-generated models and physical objects are handled in one workspace.
Figure 4. AR means that a physical workspace (left) is augmented, or enriched, by a virtual world (right). Even when users interact with the projected, virtual models, they do not leave the physical context (e.g. sketching) and tools (e.g. pencil).
AR was first described by Wellner et al. (1993) and Mackay et al. (1995). The goal of AR is to “allow users to continue to use the ordinary, everyday objects they encounter in their daily work and then to enhance or augment them with functionality from the computer” (Mackay et al., 1995). According to Mackay,
AR means that computer information is projected onto drawings so that users can interact with both the projected information and the paper drawing. The first brick-based AR system was described by Fitzmaurice et al. (1995). A more recent example of how AR can be used to support urban planning is given by Arias et al. (in press). Their focus is to create “shared understanding among various stakeholders... [by] ...creating objects-to-think-with in collaborative design activities.” (Arias et al., in press). Figure 4 illustrates some of these principles. Pen-based input has been studied extensively; in this paper we look at bricks as input medium.
3.2. ACTION AND PERCEPTION
In his ‘Writings on the philosophy of making’ Aicher (1996) criticizes the lack of doing by planners and the overemphasis on the reduction of real-life to inner, rational activity. He advocates a closer connection between action and mental reflection, indicating a need to enable users to bring together action and reflection in human computer interaction. For our design practice this means to “create possibilities for the users to try out the user interface through use, not only through reflection” (B?dker, 1991, p. 148). Hence, people must be able to employ their everyday motor faculties in their interaction with computers. We set out to create an interface with various input modes and tactile interaction. This demanded a user interface able to interpret a wide range of human expressions. Such interfaces need powerful computer vision methods (Rauterberg et al., 1997b).
A further important aspect of our design philosophy is the coincidence of action and perception space (Rauterberg, 1995). When handling physical objects, the space in which we act coincides with the space from which we receive (visual) feedback: we can see what we do. This is not the case for the handling of virtual models with a mouse-keyboard-screen interface, where there is a separation between action and perception spaces. Input and output devices are separated. To overcome this separation, Rauterberg (1995) suggested an alternative approach to interface design, an approach where action space and perception space coincide. Support is given by Hacker and Clauss (1976), who found that performance increases when task relevant information is offered in the same space where action takes place. This principle not only applies to visual but also to haptic or tactile feedback. Akamatsu and MacKenzie (1996) showed how including tactile feedback might improve computer-involved, task-solving performance.
3.3. TASK ANALYSIS AS PART OF THE DESIGN PROCESS
An integral part of our design philosophy is to gain a detailed understanding of the target activity: cooperative planning. For CSCW it is of particular importance to investigate which part of an activity is of a genuine cooperative nature and which
part merely employs computers for individual work.
In the tradition of socio-technical systems theory (Emery, 1959), a task is seen as the link between the human/social system and the computer/technical system. Based on this tradition, it is not sufficient to take end-user expectations and preferences as guidelines for future design. Such a strategy would focus on what is already available and would be of little use for innovative breakthroughs. For instance, end-users would project their understanding of existing CAD functionality onto new interfaces without taking into consideration the whole socio-technical system they are part of. Therefore, instead of taking account of current personal and technical constraints, our analysis focuses on the task.
The strategy of our task analysis was to interview planning experts and observe their working processes, then to elicit difficulties with the predominant socio-technical system of meetings, drawings, and single-user CAD applications. The experts explained their jobs and provided examples of objectifications they used. Also, interaction with colleagues and customers was part of the interview. The results were used to make decisions about future directions in our design.
3.4. EXTERIORIZATION AND INTERIORIZATION OF TOOLS
Through our own design practice (Section 4.2) we made the following observations, valid from both a designer and from an end-user point of view. Before users had gained experience with physical tools (first step), user operation of the system was slow. Section 4 offers a few examples, for instance the initial bricks (Fig. 8, right, in center) and the first generation virtual tool for changing model height (Fig. 9). Once physical tools were available and mastered (second step), they became beneficial to task solving. This was the case for the more recent bricks (Fig. 8, right) and the physical tools for changing model height (Fig.
10). Based on our understanding of activity theory, we noticed that the physical tools used in the second step were an exteriorization of the knowledge we gained from our collective design activity (Section 2.2). Based on the experience gained with physical tools, we even saw one case where a second generation virtual tool could replace the physical ones (third step). This was the case for an elaborated virtual tool for changing model height (Figs. 11-12). In the transition from the second to the third step the knowledge acquired using the physical tool was partly internalized (e.g. by giving our design team a common reference about the use of physical tools, even though not in use), partly implemented in the virtual tool (e.g. by mapping physical buttons onto virtual handles).
We observed that our experience is close to an idea of Kaptelinin (1996, p. 62), describing a three-step development of tool usage:
1. ”The initial phase, when performance is the same with and without a tool
because the tool is not mastered well enough to provide any benefits,
2. the intermediate stage, when aided performance is superior to unaided
performance, and
3. a final stage, when performance is the same with and without the tool but
now because the tool-mediated activity is internalized and the external tool (such as a checklist or a visualization of complex data) is no longer needed.”
Since the three steps we observed and Kaptelinin’s idea have important points in common, we employed his idea as a justification for a repeatedly shifting design focus between virtual and physical tools.
4. Design example: the BUILD-IT system
BUILD-IT is a planning tool based on state-of-the-art computer vision technology (Rauterberg et al., 1997a, 1997b, 1998; Fjeld et al., 1998a, 1998b, 1998c, 1999a, 1999b, in press). This system (Fig. 5) enables its users to cooperate in a virtual environment for planning a real-world object, such as a room, a school, a factory, or a piazza. Grouped around a table and employing tangible physical bricks, users can select and manipulate virtual model s within the setting which they are planning. This use of physical bricks represent a new way of interacting. Tethered bricks (requiring wires or cables) were investigated in the Active Desk by Fitzmaurice et al., (1995). Fitzmaurice and Buxton (1997) later developed wireless bricks, detected by using a Wacom board. In the more recent use of tangible bricks, their surface is detected from above (Ishii and Ullmer, 1997; Ullmer and Ishii, 1997; Rauterberg et al., 1997a, Underkoffler and Ishii, 1998). It was shown that a brick-based interface is significantly easier to use and more intuitive than a mouse-keyboard-screen (Rauterberg et al., 1996).
Figure 5. BUILD-IT consists of a rack, mirror, table, chairs, and a screen (top left). In addition to a high-end PC, the rack contains two beamers, a video camera, and a light-source. The system offers two perspectives of the same setting: a horizontal plan view for combined action and perception and a vertical side view (top right). Models projected in the plan view can be rotated and positioned using a brick (bottom left). Bimanual interaction is an essential part of the interaction concept (bottom right).
4.1 BASIC ASPECTS OF THE BUILD-IT SYSTEM
Based on our discussion of tools (Section 2.1), we have chosen to structure the system description according the focuses in the use activity(B?dker, 1996, pp. 151-152). In this section (Section 4.1), we present all the basic aspects of the BUILD-IT system and its use. In the following section (Section 4.2) we focus on the design of tools, reflected by the physical aspects and the handling aspects. A detailed investigation of the subject/object-directed aspects belongs to future research.
4.1.1 Physical aspects of the system
In our system the position and orientation of the brick on the table top is determined by a computer vision system. Reflective material is applied to the top of each brick. The bricks reflect light from a light-source to a camera viewing the surface from above. Image processing software then recognizes the bricks and determines the two-dimensional (2D) position and orientation of each (Bichsel, 1997). This information is then used to control the groupware and hence update
the image projected on the table (4). For the interaction taking place on the table, our technology respects the principle of coinciding action and perception spaces (Section 3.2). For the image projected on the screen, however, the same principle is not respected.
4.1.2 Handling aspects of the system
In BUILD-IT the users have two up-to-date views of the setting they are creating and manipulating at all times: the plan view and the side view. The plan view is the bird’s eye view from above - which is projected onto the table. The side view is projected onto a screen near the table. In the case of the side view, a virtual camera, which can be located either outside or inside the plan view, allows the users to choose from which position the side view is to be projected. The side view can also be zoomed. In the case of the plan view, the entire projection of the setting can be shifted from side to side, rotated, or zoomed. The plan view also contains a virtual storage space for models not in immediate use. It allows users to create multiple model instances. A model instance brought back to the storage space is deleted from the views. For all handling operations affecting virtual models users draw on basic, everyday manual skills - selecting, placing, rotating, re-positioning, and fixing.
Figure 6. The basic steps for user manipulations with the brick.
In BUILD-IT mediation between users and the virtual world follows a cyclic order (Fig. 6). Users select a model by putting the brick at a model’s position. The model can be re-positioned, rotated, and fixed by simple brick manipulation. A model can be de-selected by covering the brick. Then, another model is selected or the brick is left idle inside or outside the plan view. Using a material, hand-held brick, everyday manual patterns - like grasping, moving, rotating, and covering -are activated. Since all the steps in the cycle are reversible, the cost of making a mistake is low. Thus, exploratory epistemic and goal-directed pragmatic actions are equally supported, as described in Section 2.3. However, there is no possibility of undoing, so users must keep information about previous steps in their planning process. (More comments regarding undo appear later in Section 5).
4.1.3 Subject/object-directed aspects of the system
The BUILD-IT system can be used by a single individual, but its full potential is realized as a mediator among members of a work group (Fig. 7). Basic usage of the system is acquired within minutes. Therefore, it may stimulate people possessing different sets of skills and/or different modes of knowledge to work closer together and thereby enhance their (verbal) exchange. Also, since the system forces people to work with shared resources, it has a capacity to reveal potential misunderstandings among them. A collective learning process can be triggered through the unifying workspace. This was actually experienced by our design team itself during system development work.
Figure 7. Typical multi-user (left) and single-user (right) situations. Interaction and display take place in the plan view, whereas an additional perspective is offered by the side view.
Although we have designed a co-located, multi-user groupware system, the physical and virtual tools presented in this paper may be important steps towards a multi-site, multi-user system and therefore represent a technological foundation for CSCW. Based on standard software and hardware, the system will allow for a distributed networking CSCW system in the near future. In our projection of such a system initial configuration will be transferred at start-up time, then only brick data will be transferred at real-time. This will allow the use of standard, commercial communication channels.
4.1.4 From CAD to BUILD-IT: A new tool for planning
In most companies CAD systems have replaced drawings and physical models. This change has helped speed up the design process by systematizing recurrent tasks and reducing the monotonous work of small changes. CAD systems are more than simple drawing tools; they offer interfaces to production monitoring and quality control. In CAD systems part prices or other meta-data can be stored with 3D data. However, not all planners are yet acquainted with CAD systems. This results in a division of labor between planners and CAD specialists, complicating the planning process. Another drawback of CAD systems is that they are not well suited for the early stages of a design process (Hacker et al.,
1998) nor for person-to-person or group communication. This is partly because they are based on single-user applications (Grudin, 1988).
Our task analysis involved 16 planning experts from the machinery and processing industries and from the field of architecture. As a result, we distinguished three possible domains of use for the BUILD-IT system:
1. Cooperative planning among a team of experts: For cooperative work and
concurrent engineering, the BUILD-IT system offers a multi-user interface.
This interface may enhance common understanding of an early planning process by offering professional tools, like advanced model height adjustment and full 3D navigation.
2. Interactive planning with customers or clients: In this domain the most
important feature is that the customers can easily step into the early planning process and visualize their own ideas. Clients who are not used to planning -and thereby not used to 2D views - will be more at home with 3D images. The BUILD-IT system gives these users an easier access to 3D vision.
3. Marketing: For presentation and marketing purposes, tangible bricks may
stimulate intuitive, play-like interaction. Potential clients using the system may be more involved than in conventional presentations, where interaction is fully controlled by a salesperson.
In all three domains BUILD-IT will not replace CAD systems. Rather, it may serve as a pre-CAD complement in the early stages of design (5). It might also stimulate the evolution of CAD systems (6).
4.2 DESIGN PRACTICE OF THE BUILD-IT SYSTEM
The challenges we faced were of three kinds. First, there is a potential perceptual problem for the users. The users employ physical bricks to design and manipulate a virtual setting which is simultaneously projected onto the table on which the bricks are sitting. Thus, the users are living and acting in two realities at once (Section 4.2.1). Designing bricks to link these realities fluently is related to the physical aspects of the system. Second, we encountered the technological problem of changing model height (Section 4.2.2) related to shifting focuses between the physical and the handling aspects of the system. The third problem we faced was a clear mixture of a perceptual problem for the user and a significant technological challenge to us: BUILD-IT uses 2D - or planar - interaction to access a 3D virtual setting (Section 4.2.3). The answer we found - a set of navigation tools - leverages alternative handling aspects of our system. The subject/object-directed aspects of the system (Section 4.1) will not be discussed any further.
4.2.1 Physical aspects: Brick design
The question related to the physical aspects was how to design an interface where users can move physical bricks and simultaneously immerse themselves in a
virtual setting. Due to the use of reflective material for detection of brick position and orientation by the computer vision system, there is flexibility in the design of the brick size and shape. However, the bricks’ shapes need to help the user keep his or her fingers or hand off the reflective area. To test different designs, we performed some exploratory brick modeling (Lauche, 1998), based on different materials, forms, and metaphors (7) (Fig. 8, left).
Figure 8. In the beginning we experimented with different bricks, based on different materials, forms, and metaphors (left). The first feasible brick was the block (right, in center). The more recent circular and rectangular bricks (right) are based on the principle of a reduction screen (see the text in this section).
The first feasible brick was the block (Fig. 8, right, in center). The advantages of this shape are that users grasp the brick easily and that image detection is simple. However, due to the height of the brick, the continuity of the projected image is broken. Therefore the brick is not always suited to mediate fluently between users and the virtual world. A short experiment showed that this disruption led to a breakdown of the fluent mediation, presenting us with a problem.
To solve such a problem Kaptelinin (1996, p. 50) suggested: “deal with two interfaces instead of one user interface, with two borders, separating (1) the user from the computer and (2) the user and the computer from the outside world.”Kaptelinin draws upon Bateson’s (1972) “blind man’s stick dilemma”: where is the boundary between the individual who uses a tool and the external world? Does it coincide with the individual-tool boundary or with the tool-world boundary? In our case, the tool is the brick mediating between individual and virtual worlds. As an alternative to the original brick (Fig. 8, right, in center), we decided to design a brick so that users perceive interaction with the virtual world, not interaction with the tangible world of the bricks.
Such a brick can be designed by employing a reduction screen (Voorhorst, 1999). Such screens are borders placed in front of a monitor to reduce depth cues. The same idea can be used to construct the brick as an open box with a narrow black frame on the edge (Fig. 8, right). For users, the bottom of the box-like brick is indistinguishable from the table surface, thus minimizing image disruption. This design also reduced the risk of users accidentally covering the reflective area.
4.2.2 Shifting between physical and handling aspects: Changing model height Up until this point, the system placed all models on a single storey. Task analysis (Section 4.1.4) showed that potential end-users wanted to be able to position models on different stories of a building. To do this we used a three-step design process (Section 3.4) suggested by Kaptelinin (1996). In a first step of that process, subjects work with a virtual tool moving single models into a virtual series of stories. For this step, user performance was not satisfactory and we looked for alternatives. In a second step we tested physical tools which affected a particular virtual floor. A virtual floor looks like a grid-layer. This grid-layer can be adjusted upward and downward. The models selected move along with the vertical placement of the virtual floor. Physical tools improved performance but their use was too tedious (Fjeld et al., 1999). In a third step, a second-generation of virtual tools was developed, recombining elements of the first and the second step. Hence, the virtual floor could be handled with a virtual tool; the physical tools were no longer needed. The second step was related to the physical aspects of the system, the first and third steps were related to the handling aspects of the system. Each step is described below.
Step 1: A virtual prototype for height manipulation: The height slice
Height manipulation by means of side view handling was first achieved by copying a narrow vertical slice of the side view, called the height slice, and locating it along one edge of the plan view. The desired view of the height slice is selected and set by the user. Thus, models appear visible in the height slice, can be selected, and can be moved up and down (Fig. 9). When de-selected, models remain at the selected height. Further details are given in Fjeld et al. (1999b).
Figure 9. Setting model height by selecting (left) and moving (center) a model in the height slice. The model being moved is also seen in the side view (right).
Step 2: Physical tools as mediators for model height
Based on physical tools (Fig. 10), we explored three ways to physically handle model height. First, we implemented Digit, a digital controller which acts on a selected model and sets the model height by means of up-down buttons and provides a digital display of the height. Second, we developed Tower, offering the same buttons as the first tool combined with a luminous, quasi-analog scale
showing selected height. The up-down buttons and the visual feedback are organized along the height axis, so action and perception are partly coincident. Third, we implemented Slider, a vertical sliding-rule where height is handled and indicated by an up-down handle. With Slider, handling and height cues are both organized along the height axis; thus action and perception are fully coincident (Section 3.2). Further details are given in Fjeld et al. (1999b).
Figure 10. Physical height tools: Digit, a box with up-down buttons and display; Tower, a luminous scale with up-down buttons; Slider, a sliding-rule with up-down handle and digital display (left to right).
Step 3: ‘Back to the virtual’: Floor handling
The resulting solution for selection and manipulation of the models selected among multiple stories is a virtual tool called Floor and is a second generation virtual solution. Floor reuses the height slice from the first solution and is based on the knowledge gained with the second solution. Floor is handled in the height slice, located along one edge of the plan view. The user first selects a number of models in the plan view, forming a group. This group of selected models then moves vertically as a whole when Floor is moved upward or downward in the height slice (Figs. 11-12). De-selected models remain at the last selected height. Only models at or above Floor are visible. Further details are given in Fjeld et al. (1999b).
Figure 11. Selecting models in the plan view; selecting Floor in the height slice; raising Floor with the group of selected models (left to right).
Figure 12. Side view; selecting and raising Floor with a group of selected models (left to right).
4.2.3 Handling aspects: Spatial navigation
Our task analysis (Section 4.1.4) showed that experts navigate and inspect virtual environments in a range of activities, such as urban planning and architectural walkthroughs. Depending on a user’s acquaintance with virtual environments, navigation can range from exploratory epistemic to goal-directed pragmatic action. It is necessary to assume different points of view, to get an overview, and to look at things in detail in a fluent manner (Brooks, 1986).
Our answer to this need is offered by combining tangible bricks with 3D view handling of orientation and scale. Brick-based interaction in 2D has already been investigated (Fitzmaurice, 1996, Ullmer and Ishii, 1997). Also, bimanual camera manipulation and model handling in 3D graphics interfaces have been examined (Balakrishnan and Kurtenback, 1999) using two mice, a keyboard, and a screen. Here, we combine the strengths of these two approaches. The multimedia framework (MET++, Ackermann, 1996) we employ allows for full interaction in a 3D world. However, planar interaction with bricks provides only position and rotation but not height or inclination information. The resulting navigation methods are two alternative ways to bridge the gap between planar interaction and 3D view handling.
We first considered a design strategy based on the physical aspects, as was the case for general brick design (Section 4.2.1). This would have resulted in a physical, camera-like brick affecting the virtual side view camera. Such a solution would have required extending the properties sensed by the computer vision input. Based on our experience with the physical height tools (Section 4.2.2), we decided to explore virtual solutions (Fjeld et al., 1999a). The decision we took, is also
supported by Ware and Rose (1999), who examined the use of real handles for the rotation of virtual models.
Hence, we investigated a design strategy based on the handling aspects of the system. Our strategy was to handle the virtual world or the virtual viewpoint (Section 2.1). This opened up two alternative design principles and both were investigated. First, in order to handle the virtual world - updating the view directly - we implemented the Continuous Update method. Second, in order to handle the virtual viewpoint - updating the view after viewpoint handling - we implemented the Select and Reframe method, where a frame represents the border of the plan view or the side view. The aim of our future research is to test which of these design principles is best suited for fluent navigation (8).
Each navigation method consists of two tools, one for the plan and one for the side view control (Table I). The tools can be activated in the virtual storage space (Fig. 13). By employing one brick - unimanual handling - shift and rotation of the controlled view can be set. By employing two bricks - bimanual handling - shift, rotation, and zoom of the controlled view can be set (9). Bimanual handling will be illustrated here. The two methods can be combined, but only one tool per view can be activated and used at a time.
Table I: The symbols used in the menu to represent the tools. There is one method (Continuous Update and Select and Reframe) per column and one view (plan and side view) per row.
Figure 13. The tools are situated in the virtual storage space (menu) on the right.
iPhone手机使用手册—“照片”操作说明
查看照片和视频删除照片和视频幻灯片显示共享照片和视频拷贝并粘贴照片和视频从电子邮件信息、彩信或网页存储图像将照片指定给联系人墙纸常见问题 iPhone手机使用手册—“照片”操作说明 iPhone 可让您随身携带照片,从而使您可以与家人、朋友和同事共享它们。在 iPhone 上查看照片,或者通过 AirPlay (IOS4.2)在使用 Apple TV 的电视机上查看它们。您可以从电脑同步照片和视频、查看用IPHONE拍摄的照片和视频、将照片用做墙纸,或者指定照片以识别来电的联系人。您还可以用电子邮件和彩信发送照片和视频,将照片和视频上传到MobileMe 画廊,以及打印照片。 【注】视频功能仅在 iPhone 3GS或新款机型上可用。 一、与电脑同步照片和视频 iTunes 可以使照片和视频与以下应用程序来同步: Mac: iPhoto 4.0.3(苹果电脑的图片管理软件,同步视频需要iPhoto 6.0.6或更新版本),或者 Aperture(apple公司图片处理软件,仅限照片) PC: Adobe Photoshop Elements 8.0或更高版本(仅限照片)。 您还可以从电脑上包含图像的任何文件夹同步照片和视频。 创建 iPhone 版本的视频 iPhone 支持 H.264 和 MPEG-4 视频格式(带 AAC 音频)。如果在将视频同步到 iPhone 时遇到问题,您可以使用 iTunes 创建一个 iPhone 版本的视频。 1、将视频拷贝到您的 iTunes 资料库。 2、在 iTunes 中,从“资料库”列表中选择“影片”,然后选择您想要同步的视频。 3、选取“高级”>“创建 iPod 或 iPhone 版本”。 二、查看照片和视频 您可以在“照片”中浏览从电脑上同步来的照片。您还可以查看使用 iPhone 的内建摄像头拍摄的照片和录制的视频。 使用 iPhone 拍摄的照片和视频、从电脑同步的照片和视频,或者从电子邮件或彩信存储的照片和视频可在“照片”中查看。如果使照片与 iPhoto 8.0(iLife 09 的一部分)或更高版本同步,则可以按您所识别的事件和面孔查看您的照片和视频。如果标记了位置数据,您还可以看到照片和视频的拍摄地点。 操作步骤: 1、在“照片”中,轻按相簿。轻按屏幕底部的按钮,以按事件、面孔或地点(如果适用)
firmware升级流程
Firmware升级流程 一.概述 AN5116-02系统中,EC2以及各种ONU的芯片firmware版本均由TEKNOCUS公司提供,且更新比较频繁。目前最新中试的版本为R140,而工程是普遍使用的为R105版本,因此,工程上的AN5116-02系统迫切需要升级以满足新的功能需求和维护要求。一般情况下,我们可通过图形网管命令直接对局/远端的芯片firmware升级。参考拓扑图如下: 二.升级操作方法 升级的对象主要有EC2的firmware和ONU的firmware两项,每一项目又分为三个子项:boot程序,app程序和personality程序(boot可能不是必需的)。升级时,我们不关心三个子项的名称,仅关心这些程序是属于EC2的,还是ONU的,如果我们要升级的子项是EC2上的,则应在图形网管上选择升级“EC2 firmware”;反之,如果是ONU 上的子项升级,则应在图形网管上选择升级“ONU firmware”。另外,boot,app,personality这三个子项一般是严格按照顺序来升级的,即先升级boot,然后是app,最后是personality。升级时,待升级的对象必须在位,如果是ONU,它应该是已经授权了的状态。 下面介绍整个升级流程。 假设目前网管具有以下条件: 网管服务器ip地址为10.26.1.2/16 欲使用的FTP服务器的用户名为test , 密码为test 文件目录为D:\ ONU的授权号为5,其对应在线的EC2槽位号为2。 首先准备好FTP服务器和要升级的所有文件: 1.打开FTP server 软件,并设置用户名和密码均为test,文件存放目录为D:\ 。 2.准备好升级文件。根据归档提供的*.tkf文件编辑好ONU的personality文件 (编辑方法见文档后的附录),并任意改好文件名,如ec2_https://www.sodocs.net/doc/244964752.html,f , ec2_https://www.sodocs.net/doc/244964752.html,f , ec2_https://www.sodocs.net/doc/244964752.html,f ,onu_https://www.sodocs.net/doc/244964752.html,f , onu_https://www.sodocs.net/doc/244964752.html,f , onu_https://www.sodocs.net/doc/244964752.html,f,
91手机助手For iPhone(苹果)详细使用教程
91手机助手For iPhone详细使用教程 91手机助手(iPhone版)是由网龙公司开发的一款PC端使用的iPhone手机第三方管理工具,以其美观的界面,方便的操作为一直以来iPhone手机没有方便的配套PC端使用工具提供了一套完美的解决方案,给您带来全新的操作体验。 91手机助手For iPhone 点击下载 一、91手机助手For iPhone版简介 91手机助手(iPhone版)是由网龙公司开发的一款PC端使用的iPhone手机第三方管理工具,以其美观的界面,方便的操作为一直以来iPhone手机没有方便的配套PC端使用工具提供了一套完美的解决方案,给您带来全新的操作体验。 iPhone版手机助手功能列表: 固件支持:iPhone 1.X | 2.X | 3.X |4.X 固件 ; 操作系统:支持32位和 64位的Windows XP / Vista / Windows 7 资料管理:联系人管理、电脑收发管理短信、定制日程、管理任务 媒体娱乐:轻松编辑设置手机铃声、手机主题、壁纸 阅读管理:几十万免费电子书在线/本地化管理;新闻RSS订阅等 软件管理:本地软件管理;海量手机软件免费安装 系统管理:系统信息查阅;进程管理;注册表管理等 备份还原:备份还原短信、通话记录、主题铃声、联系人等十几种信息 为什么要使用91手机助手? FREE/免费-都是免费的,91手机助手免费,软件游戏电子书也是免费的 轻松管理智能手机-还有什么比把智能机当傻瓜机玩更开心的呢? 海量资源尽情下载使用-真的是海量,几万手机软件,几十万电子书 完美个性体验-从界面到功能打造最安全最轻松的智能手机PC端管理工具
安装vmware-tool
安装vmware-tool的一个目的是调节ubuntu系统的屏幕大小(num*num) vmware workstation 12 pro, 官网上下载的ubuntu-14.04.4-desktop-amd64,主机华硕主板,64位win7,安装Linux需要开启intel虚拟技术, 点击vmware的标题栏的VM,再点击reinstall VM tools, 会挂载一个虚拟的光驱,里面有vmtools的压缩文件,打开一个terminal,不需要输入什么指令进入纯文本模式,我的指令都是在terminal下进行的。我的Linux中的vmware压缩文件在/media/yuting/VMware Tools中,(肯定在/media目录下,找一找,找VMware Tools),没有/mnt/cdrom,不能直接在/media目录下解压,可能因为 /media只能读。使用sudosu指令变成root用户,cp到新建的文件夹/vmtool,(使用mkdir命令在根目录下建立, mkdirvmtool)使用tar zxvf VMwareTools-10.0.5-3228253.tar.gz解压,产生vmware-tools-distrib目录,进入此目录,./vmware-install.pl,开始安装。 安装过程的画面,这几个使用默认值,有的你自己看情况,你直接enter选[no]反而中断安装,第一遍我第一个问题自己写了一个路径,然后觉得不好,但已经到第二个问题,于是中断安装,关闭terminal,然后作死把/vmtool路径下的vmware-uninstall-tools.pl和vmware-config-tools.pl删了,结果再安装vmware说已安装一个版本,要先卸载才能安装,结果卸不掉,然后搜索到 /vmware-tools-distrib/bin中有,我复制粘贴到/vmtool目录下,然后重新安装才成功。 In which directory do you want to install the binary files? [/usr/bin] What is the directory that contains the init directories (rc0.d/ to rc6.d/)? [/etc] What is the directory that contains the init scripts? [/etc/init.d] In which directory do you want to install the daemon files? [/usr/sbin] In which directory do you want to install the library files? [/usr/lib/vmware-tools] Thepath "/usr/lib/vmware-tools" does not exist currently. This programisgoingto create it, including needed parent directories. Is thiswhatyou want? [yes] In which directory do you want to install the documentation files? [/usr/share/doc/vmware-tools] Thepath "/usr/share/doc/vmware-tools" does not exist currently.Thisprogramisgoing to create it, including needed parent directories.Isthis what you want? [yes] 最后Enjoy, --the VMware team 安装完成。
最新苹果iPad2使用说明书完整超详细
苹果iPad2平板电脑新手使用教程 有需求请下载,因为超详细 最近关于苹果最火的无非就是iPad2的发售,之前用过iPhone的朋友对iPad2的使用还算了解,但也有没用iPhone但入手iPad2的朋友,这样对苹果官方的套件iTunes就不是很熟悉了,小编有幸入手了一台iPad2,这里给刚入手iPad2但又不是很熟悉不太会用的朋友一个简单的初级入门iPad2使用教程。 什么是iTunes iTunes是苹果所有移动设备的PC套件,不管是iPod、iTouch、iPhone还是今天要说的iPad2,都要使用iTunes 来安装应用程序。 下载完毕后,安装好下载的iTunes,把iPad2用数据线连上电脑,iTunes就会识别了。 同步程序 因为现在iPad2的越狱还没有高人放出,大家只能花钱购买正版或者是免费的试玩版的游戏或者软件了。 注册好了之后,找到你喜欢的一个应用程序,比如我选的这个 点开之后是这个界面,然后点击这里的免费字样
然后就会显示正在下载 下载好了之后,在应用程序选项卡,就会看到刚刚下载的游戏。 这时点击设备中的应用程序选项卡,然后选中要同步的程序
接着点击右下角的同步字样,等待同步完毕即可。 这样就同步完毕之后就会在iPad2的桌面上看到刚刚下载的网球游戏了,QQ等其他一些免费的软件也是一样的道理。 下面是我用iPad2专用的QQ上的一些截图,看着确实很过瘾。
同步音乐 同步音乐其实也是很简单的,首先先把你电脑中要同步到iPad2中的音乐添加到iPad2的资料库中。 这样iPad2中的资料库的音乐标签里就会显示 然后找到设备中的音乐标签,选中要同步的音乐,
VMWARE中虚拟工具VMTOOLS的安装.
VMW ARE中虚拟工具VMTOOLS的安装 安装vmtools之前,需要先打开虚拟机,并且启动其中的操作系统。 注意看下图中鼠标的位置。请将鼠标移动到相应位置上点击右键。 在弹出的菜单最下端点击“SETTING”如果安装的是中文版的VMW ARE,那么这一栏显示的是“设置” 接下来的操作请看下图:
在上图中,这个linux.iso镜像文件究竟在哪里?是困扰很多初学者的一个问题。如果说你的电脑(不是虚拟机,而是真实的电脑)是windows系统,那么,linux.iso应该在安装VMW ARE 的安装目录下寻找比方说,我以前把vmware安装到了“D:\Program Files\VMware\VMware workstation”目录下,所以,linux.iso也应该去“D:\Program Files\VMware\VMware workstation”目录下去寻找。(补充) 接下来点击“OK” 现在桌面上出现了光盘图标了
“Terninal” 再到终端里面输入以下命令: # mount -o,loop /dev/cdrom /mnt 这句话的意思是把光驱挂载到/mnt目录之下。 前面那个#不要输入 然后输入:# cd /mnt
进入到挂载目录下 输入以下命令# tar zxvf VmwareTools-8.4.2-261024.tar.gz -C ~,意思是把VmwareTools-8.4.2-261024.tar.gz解压到/root目录下。注意字母C应该大写。 解压完成后,输入以下命令 # /root/vmware-tools-distrib/vmware-install.pl 然后回车 然后无论提示什么都是直接按回车 在安装过程中有两段文字需要引起注意 “The installation of Vmware Tools 8.4.2 build-261024 for linux completed successfully .You can decide to remove this software from you system at any time by invoking the following command:'/usr/bin/vmware-uninstall-tools.pl'” 意思是说vmtools已经安装成功了,以后如果想要卸载,请输入/usr/bin/vmware-uninstall-tools.pl然后回车。 在接下来的显示内容中,出现下面这段话:”Before running Vmware-Tools for first time, you need to configure it by invoking the follow command:'/usr/bin/vmware-config-tools.pl' .”意思是说在第一次使用VMTOOL以前需要先对工具进行一下配置。/usr/bin/vmware-config-tools.pl 就是配置文件的位置和名称。如果以后需要重新配置,可是输入这条命令后按下回车。 这里主要是看清这两条命令的写法和具体位置,以便以后需要时能尽快找到。 最后出现下面这幅画面,这幅画面是对虚拟机分辨率进行设置,从图中我们可以看到最下端有个[17],而在上面可以看到[17]旁边有个大于号还写着1366*768这说明当前,VMTOOLS工具默认的分辨率是第17项,1366*768像素。如果想要更改,请输入新的选项数字。在图中,我输入的是16,那么,我的LINUX系统分辨率就应该是1280*800而不是原先的1366*768了 按下回车后,屏幕会暂时黑一会儿,很快就会出现图像了。 接下来出现一段文字(见下图)在显示的文字中看到ENJOY说明安装配置完成了。
苹果Mac操作系统使用教程
Mac使用教程 Mac使用教程(基础篇) 如果您是计算机新手,或只是需要一些教学课程,帮助您将Mac的功能发挥到淋漓尽致,那么您就来对地方了。我们将带领您以最有效率的方式使用Mac。无论您想知道如何操作使用Mac桌面(或只是要知道什么是桌面)、找出连接打印机、iPod、数字相机或其他设备的方式、搜寻电子邮件和Internet、认识各种功能的操作方式、学习如何使用Mac随附的软件,或在无法得心应手地操作时需要协助指点,这种种问题的答案,我们都为您准备好了。准备好了吗?请把您的问题告诉我们:第一课:Mac基础操作如果您是初次接触计算机,才刚开始学习各项操作技巧,不用紧张,其实操作Mac不过就是靠一连串的点选动作。这一课将为您介绍与计算机界面互动的基本方式,也会教您如何在Mac上完成一些基本工作。让我们进入课程内容吧! 第一次使用Mac吗?那就从学习Mac基础操作开始吧!点点选选轻松操作如果您对Mac桌面和Finder视窗的操作不是很熟练,建议您从这里开始学起,如果已经很熟悉了,可以直接跳到“建立帐号”那部分。我们先来谈谈计算机操作的基本技巧。移动鼠标时(iBook或PowerBook的使用者是以手指在触
控式轨迹板上滑动),您会看到有个箭头(即光标)在屏幕上四处游移。您可以利用这个箭头选取或操作屏幕上的项目,像是选取档案、按下按钮、拖移滑杆等等。有时候在执行不同的操作或应用程式时,箭头会变成手、十字型、I型或其他图像。举例来说,如果您用Safari来浏览这个网页,并在网页上移动箭头,您会发现,当箭头移到文字或文字栏位(如Google文字框或URL栏位)上的时候,它会变成I型光标(有点像字母"I"的形状),通常这表示您可以与文字或栏位有所互动(例如输入或拷贝文字)。当箭头移到按钮或链接上,它会变成手的形状,告诉您这个项目可以点选。有时候Mac忙于工作时,箭头会暂时变成旋转中的彩色圆盘(有的Mac使用者称之为海滩球或风车),这代表某项工作正在执行中。 在您执行不同的工作或应用程式时,箭头(图中最左边)可能会以不同的样子出现。按一下鼠标(或触控式轨迹板按钮)可以选取箭头指向的项目。换句话说,如果箭头落在档案图像上,按一下即可选取该档案;如果箭头落在按钮或链接上,按一下可以启用该按钮或链接;要是落在文字栏位上,按一下可以反白该栏位并输入文字。对话框里出现蓝色按钮时(可参考“打印”或“储存”对话框),您可以按下Return键来选取该按钮,不一定要用鼠标。若想开启档案、档案夹或应用程式,请按两下鼠标按钮。通常您需要按两下Finder视窗或桌面上的项目才能将其开启,不过Dock里的项目除外,想开启Dock里的项目,按其图像一下即可。
firmware升级流程
版本均由TE R140,而工 系统迫切需要升级以满足新的功能需求和爱护要求。一样情形下,我们可通过图形网管命令直截了当对局/远端的芯片firmware升级。参考拓扑图如下: 升级操作方法 升级的对象要紧有EC2的firmware和ONU的firmware两项,每一项目又分为三个子项:boot程序,app程序和personality程序(boot可能不是必需的)。升级时,我们不关怀三个子项的名称,仅关怀这些程序是属于E C2的,依旧ONU的,如果我们要升级的子项是EC2上的,则应在图形网管上选择升级“EC2 firmware”;反之,如果是ONU上的子项升级,则应在图形网管上选择升级“ONU firmware”。另外,boot,app,personality这三个子项一样是严格按照顺序来升级的,即先升级boot,然后是app,最后是personality。升级时,待升级的对象必须在位,如果是ONU,它应该是差不多授权了的状态。 下面介绍整个升级流程。 假设目前网管具有以下条件: 网管服务器ip地址为10.26.1.2/16 欲使用的FTP服务器的用户名为test , 密码为test 文件名目为D:\ ONU的授权号为5,其对应在线的EC2槽位号为2。 第一预备好FTP服务器和要升级的所有文件: 打开FTP server 软件,并设置用户名和密码均为test,文件存放名目为D:\ 。
预备好升级文件。按照归档提供的*.tkf文件编辑好ONU的personality 文件(编辑方法见文档后的附录),并任意改好文件名,如ec2_https://www.sodocs.net/doc/244964752.html,f , e c2_https://www.sodocs.net/doc/244964752.html,f , ec2_https://www.sodocs.net/doc/244964752.html,f ,onu_https://www.sodocs.net/doc/244964752.html,f , onu_https://www.sodocs.net/doc/244964752.html,f , onu_https://www.sodocs.net/doc/244964752.html,f,分别放置于FTP对应的名目D:\下。注意文件名不要太长,应在网管能识别的范畴之类,一样来讲,包括后缀名在内,文件名不应超过16个字符。 然后升级EC2的firmware: 保证系统正常,网管连接正常。然后通过图形网管界面单击系统模块的GSW盘,依次选择配置----升级系统软件,将弹出一个对话框,第一填写对话框如下: 单击“升级系统软件”,并等待升级终止,EC2的boot程序即升级完毕。但目前确信不需要升级EC2的boot程序,可省去这步。 将上图对话框中的“文件名”项改为ec2_https://www.sodocs.net/doc/244964752.html,f,再单击“升级系统软件”,并等待升级终止,EC2的app程序即升级完毕。 将上图对话框中的“文件名”项改为ec2_https://www.sodocs.net/doc/244964752.html,f,再单击“升级系统软件”,并等待升级终止,EC2的pers程序即升级完毕。 EC2升级完成后,应登陆到系统的命令行网管中,在该EC2的debug 名目下执行restore olt 1 和restore olt 2命令。执行完毕后,两路EC2芯片将自行启动即可。 然后升级ONU的firmware: 保证系统正常,网管连接正常,ONU在线并差不多授权过。通过图形网管界面单击系统模块的GSW盘,依次选择配置----升级系统软件,将弹出一个对话框,第一填写对话框如下: 单击“升级系统软件”,并等待升级终止,ONU的boot程序即升级完毕。
安装VMWare Tools
安装VMWare Tools 安装VMWare Tools 1、在VMWare菜单VM下,install VMWare Tools 系统自动加载VMWare Tools镜像,此时在ubuntu桌面能够看到,如下图所示。 双击打开光盘,里面有文件 VMwareTools-8.8.2-590212.tar.gz,右键copy到桌面。如下图所示。 2、解压 输入命令 tar zxf /home/sunev/Desktop/VMwareTools-8.8.2-590212.tar.gz 此时,桌面将出现一个名为vmware-tools-distrib的文件夹,进入到该目录 cd /home/sunev/Desktop/vmware-tools-distrib 3、安装 执行安装命令 sudo ./vmware-install.pl 在安装过程中会出现Do you still want to proceed with this legacy
installer?[no] ,这时你必须要输入yes,不能直接回车。其他步骤可一直回车到结束。如果需要你输入的最好输入yes 出现:Enjoy the VMware team 则安装成功VMWare Tools安装完毕,在VMWare菜单View下Autosize 选择Autofit Guest,重启一下ubuntu,这时,ubuntu的桌面占据了VMWare下的整个窗口。 另外,安装完VMWare Tools之后,ubuntu下的文件可以复制粘贴到windows下了,不过也仅限于文件,复制文件夹的时候则出现错误。 4、卸载 VMware tools的卸载 /vmware-tools-distrib/bin/vmware-uninstall-tools.pl 但是当再次安装Vmware Tools时,会出现错误。解决的办法是在安装前把/usr/lib/vmware-tools删除: rm -rvf /usr/lib/vmware-tools 然后再重新安装Vmware tools,就可以安装成功。
iphone使用方法
Itunes 安装成功。 如何注册APPLE ID (iphone 软件下载账号) 注册iphone 账号的必备条件: 将itunes 在电脑上安装完成,能够正常运行; 需要用户有一个正常使用的Email (电子邮件地址) 步骤: 1,将itunes 安装成功后,双击打开,在主界面左侧面菜单栏中选择单击itunes store 打开页面在右侧找到免费应用软件,点击查看全部,选择需要的免费软件(点击‘免费’) 弹出创建APPLE ID 对话框; 2,点击 创建新账户 点击 继续 出现iphone 协议条款界面,选择 我已阅读并同意以上条款与条件,单击 继续 出现创建itunes store (APPLE ID) 账户界面按提示填写完成: 输入电子邮件地址:(例如:unicom33@https://www.sodocs.net/doc/244964752.html, ) 为账号设置密码:********(此ID 密码必须由大写字母,小写字母,阿拉伯数字组成8位以上)再次输入密码进行确认,输入提示问题和答案(用汉语拼音例如:问题,wodemingzi ;答案,mingzi )输入用户出生日期,点击继续,进入提供付款方式界面,付款方式选择“无”输入用户姓名,称谓,地址,城市,邮编,省份,电话,点击继续进入验证您的账户界面,点击完成将链接文件发送至用户电子邮箱。 3,用户进入电子邮箱(与用户申请APPLE ID 地址相同)打开收到的APPLE 邮件点击 立 itunes 安装在电脑上,双击右面图标 在电脑上按提示进行安装,安装 完毕后如下图 如何下载itunes 软件 输入网址: https://www.sodocs.net/doc/244964752.html,/itunes/download/ 显示界面
1password怎么用windows版iphone版使用教程
1password 怎么用windows 版+iphone 版使用教程 (阿香婆硬盘维护工具)Ashampoo HDD Controlv3.00.50 绿色便携版 类型:磁盘工具大小:18.8M 语言:中文评分:5.0 标签: 立即下载iOS8 升级后支持浏览器插件,1Password 终于可以直接在Safari 中使用了,这是很大的进步。1Password 一款国外的付费的,从来没正式进入中国进行推广的效率类应用在免费后,能冲进中区App Store 前10 名,实属罕见! windows 版1password 怎么用?1Password 有什么优势很简单,使用1Password 这个软件,你可以给每个不同的网站设置不同的登陆密码,而且每个网站的登陆密码你自己都不需要记住(可以设置的无比强大),让1Password 来帮你记住所有网站的密码。当然,你需要给1Password 来设置一个复杂的、并且要牢记的主密码,因为如果你忘了这个主密码就意味着你所有的网站都不能登陆。那么有人可能会问,让1Password 来帮助自己记密码,那么1Password 这个软件本身是安全的吗?答案自然是肯定的,1Password 会将你所有网站的登陆密码以你你在 1Password 中记录的信息保存在一个 经过高强度加密的文件里,即便1Password 的员工或者其他人得到
了这个文件,也必须要使用你设置的主密码才能解密,只要你不将主 密码泄露,那么就是非常安全的。当然,世界上没有100% 安全的密码,我们每个人都只是应该将安全风险降到最低而已。安装并配置 1Password(forMac )这 里我们使用Mac 版1Password 为例进行讲解,Windows 版本的使用方法也基本类似。首先,从1Password 官方网站下载30 天试用版本,或者直接从MacApPStore 中购买正式版本并安装。初次运行1Password 的界面如上图所示,如果你之前没有使用过〔Password,应该直接选择” NewDataFile (新建数据文件)”,以后你的密码数据都会保存在这个数据文件里面。如果你之前有使用过IPassword并且已经保存了数据,那么就应该选择” FindExisting (查找已有文件)”,这里我们只是向新用户介绍如何使用。点击” NewDataFile ”之后首先要给这个数据文件设置主密码,这个密码必须足够强大,而且一定要牢记的密码,并且必须输入密码提示(否则不能进入下一步)。设置主密码之后,你就已经成功建立一个数据文件了,虽然这个数据文件里还没有保存你的任何资料。下一步首先是让你输入主密码,只有输入主密码之后,才能查看数据文件里面的所有资料(包括你给其他网站设置的密码都会在这里面)由于是新用户,所以输入主密码进入之后你可以看到还没有任何 数据。不过先别急,我们还需要一点点 小配置。首先要做的是进入1Password 的偏好设置,Mac 用 户可以点击菜单栏的〔Password ------ Preferences,在“ General”
解决Linux安装 VMware tools 工具的方法
解决Linux安装VMware tools 工具的方法 VMware虚拟机中如何安装VMWare-Tools详解好处:可以支持图形界面,可以支持共享文件功能等 1、以root身份登陆计算机 2、开始安装Vmware 选择VM-->install VMware Tools 3、桌面右击打开终端 输入如下命令[root@localhost ~]# mkdir /mnt/cdrom输入注意空格
4、 root@localhost ~]# cd /mnt/cdrom/ [root@localhost cdrom]# ls 显示其下有哪些文件, 类似 windows中的dir 5、将文件拷贝至根目录下的tmp这个临时目录下 [root@localhost cdrom]# cp VMwareTools-7.8.4-126130.tar.gz /tmp //拷贝到/tmp下这里如果VMware的版本不同出现的数字也是不同的,不过差不过,至于这串字符你要是怕输错了,可以复制粘贴右击 6、进入tmp文件夹 [root@localhost cdrom]# cd /tmp/ [root@localhost tmp]# tar zxvf VMwareTools-6.5.0-118166.tar.gz //解压文件
7、[root@localhost tmp]# cd vmware-tools-distrib [root@localhost tmp]# ls [root@localhost vmware-tools-distrib]# ./vmware-install.pl //安装开始 8、最后用“./install.pl”命令来运行该安装程序,然后根据屏幕提示一路回车。到此整个安装过程算是完成了。 9、分辨率这块默认17以下的你写个常用的11 800*600那种的也行
VMware Tools的安装方法
VMware Tools的安装方法 VMware Tools是VMware虚拟机中自带的一种增强工具,相当于VirtualBox 中的增强功能(Sun VirtualBox Guest Additions),是VMware提供的增强虚拟显卡和硬盘性能、以及同步虚拟机与主机时钟的驱动程序。 只有在VMware虚拟机中安装好了VMware Tools,才能实现主机与虚拟机之前的文件共享,同时可支持自由拖拽的功能,鼠标也可在虚拟机与主机之前自由移动(不用再按ctrl+alt),且虚拟机屏幕也可实现全屏化。 VMware Tools专栏提供VMware Tools下载及安装方法(含VMware Tools在linux 系统,如Ubuntu系统下的安装方法),以及VMware Tools安装出错的解决方法。 VMware Tools的安装方法很简单,新手请按照以下步骤操作即可。 运行VMware虚拟机后,在菜单中,单击“虚拟机”->“安装VMware Tools”,如图: 然后VMware会给出一个提示,如图:
单击“安装”按钮继续,然后等一会,虚拟机中会自动打开如下界面: 如果过了很长时间依然没有反应的话,请根据下面的步骤操作: 点击“虚拟机(M)”→“设置(S)…”→点选“硬件”选项卡下的“CD ROM”;在右侧窗口处点选“使用ISO镜像(I)”→点击“浏览(B)”,这时会弹出选择窗口对话框;如果你的虚拟机安装在了C盘,那么你就点选“C:\Program Files\VMware\VMware Workstation”,你会在对话窗口处看到,在“VMware Workstation”文件夹下有5个压缩文件,名字分别是“freebsd”、“linux”、“netware”、“solaris”、“windows”;它们分别是这5种操作系统下相对应的虚拟机驱动程序,选择对应的就可以了!
教程iphone新手基本操作介绍,使用方法
教程iphone新手基本操作介绍,使用方法 iPhone新手基本操作介绍 现在看到很多新手买了手机之后,每天都在问怎么用怎么用,却懒的动手搜索,有的却不知道怎么用搜索引擎,(各位老大不要笑,真的有人不知道怎么用 , 我就认识几个人不会用的)其实我也只用了几个月,在这里只想帮助一下新手,说的不对请各位大人拍砖 基础篇: ihone 拿到手后肯定是先装卡开机啦!(观众:废话) iphone 和别的机子不一样,装手机卡的地方在它的顶部,找个牙签或细铁丝找到顶上一个小洞洞,在开机键的旁边(什么你不知道哪个是开机键, ........ 算我没说)用铁丝插进去斜一点挑上来,有人说捅一下会自己弹出来,我试了很多遍都不行,不知道是不是人品问题还要个体差异。然后就开机吧,因为 iphone 用的是苹果 OS 智能系统,所以开机速度有点慢,不要认为是死机啦!新买的机器肯定是破解好的,要不你也用不了,有的商家你买的时候就给你装了很多软件,但是有的却没有,我的买的时候就没有,只能打电话发短信,谁叫咱人品不好呢,付过钱之后商家的电脑上不了网,不能装软件,郁闷!!!只好拿个空机子回家了 硬件篇:充电的问题,经常看到有的兄弟问关机怎么冲不了,关机状态下一插冲电器就自动开机了,这个是正常的,苹果就是这样设计的,想关机充电的先把机子关了再把插头插上就行了不过充电速度慢了点 PS: 我都是开机冲的软件篇:机器要装软件的话有几种方式,我只说说我的用法,第一: iTunes 这个肯定要装的,不然的话 iphone pc suite 这个软件是用不了的。软件到苹果官方网就有。装完之后,(大家要注意的是到编辑 - 偏好设置 - 常规里面把自动核查更新前面的勾去掉,同步里面 - 禁用所有 iphone 和 ipod 自动同步前面的勾打上)
操作系统升级步骤
Windows XP系统升级操作说明 目录 一、电脑兼容性检测 (1) 1.W INDOWS 7升级顾问使用说明 (1) 2.W INDOWS 8升级助手使用说明 (3) 二、数据备份与迁移 (5) 1.数据文件 (5) 2.电子邮件 (5) 1)Outlook文件备份 (6) 2)Outlook文件导入 (6) 3)Foxmail迁移 (8) 三、操作系统升级步骤 (9) 信息化技术中心 2014年3月
一、电脑兼容性检测 Windows 7升级顾问和Windows 8升级助手是工具软件,用于扫描电脑是否满足系统升级要求,检测电脑硬件、设备或已安装程序可能会影响操作系统升级安装的潜在问题,并提出升级前应执行哪些操作的建议。如果电脑满足升级要求,您就能将操作系统升级到更高的版本Windows 7/8/8.1;否则,您只能购买新电脑以满足更高版本操作系统的安装要求。 Windows 7升级顾问和Windows 8升级助手的下载途径:1)登录进入信息化用户服务平台网站https://www.sodocs.net/doc/244964752.html,,在“自助服务”页面的校园正版软件栏内下载;2)登录进入信息门户https://www.sodocs.net/doc/244964752.html,,点击右上角的“服务”进入信息化用户服务频道,在校园正版化软件栏目中下载。校外需要通过SSL VPN客户端连通校园网后下载。 1. Wind ows 7升级顾问使用说明 如果您想将Windows XP升级至Windows 7系统,可在Windows XP系统运行Windows 7升级顾问。使用 Windows 7升级顾问扫描电脑之前,需要将所有常用的 USB 设备或其他设备(如打印机、外部硬盘、扫描仪等)插好,并打开这些设备的电源。 在Windows XP系统下运行Windows7升级顾问,点击“开始检查”按钮(如图1-1所示),升级顾问对您的电脑进行扫描并进行兼容性检查(如图1-2所示),扫描完成后将生成预安装Windows 7 32/64位操作系统的兼容性报告,点击右上角的“保存报告”按钮(如图1-3所示)可将检测报告保存到您指定的路径下(如图1-4所示)。 检测报告为网页格式文件(如图1-5所示),报告会根据电脑的CPU主频、内存容量和硬盘已使用空间等参数告知您是否满足Windows 7 32/64位操作系统的安装要求。 图1-1 运行Windows 7升级顾问
苹果版MT4使用教程
苹果版MT4使用教程 一、手机版MT4下载介绍 MT4下载及安装 打开手机的“App Store”,搜索界面输入MT4,选择“MetaTrader4”进行下载安装,安装成功后“打开”MT4,如下图所示: 二、手机版MT4注册及登录介绍 1)注册模拟账户 第一步 打开MT4软件,找到“打开个人模拟账户”,进入“选择服务器”页面,输入“cityoflondonmarkets”,选择后缀“Demo”的服务器,进入注册页面。如下图所示
第二步 填写注册信息(名称、电话、邮箱以及“入金”金额,此处的“入金”为模拟,金额可随意选择),如下图所示: 第三步 注册信息填写完整,点击“注册”,即可注册成功,页面随即出现“模拟账号、密码以及只读密码”等账户信息,并自动登录成功。
2)登录真实账户 第一步 打开MT4软件,找到“登录一个已有账户”,进入“服务器”页面,输入“cityoflondonmarkets”,选择后缀“Live”的服务器,进入登录页面。“登录”处输入MT4实盘交易帐号,“密码” 处输入MT4交易密码(“保存密码”处可自行勾选)。点击“登录”如下图所示:
三、苹果版MT4界面介绍 (一)菜单 1)打开mt4,可以看到的页面下方有“行情”、“图表”、“交易”、“历史”、“设置”菜单,如下图所示: 2)如上图所示,点击左上角,可以进入页面拖动和删除页面显示货币对,如下图所示:
3)点击右上角,可以添加交易品种和查看产品规格,如下图所示: (二)行情 打开MT4软件,首先看到的便是“行情”页面,即“市场报价”,点击简单与高级,可以切换是否显示点差和日线最低价和最高价
虚拟机vmware tools的安装
不懂得安装虚拟机VMware tools的想必都是刚在虚拟机上玩系统初学者,无疑我们对虚拟机的了解并不深,这使得本来很容易安装的VMware tools在我们安装时变得复杂而又难以琢磨,到头一直的付出因此却成空了。我自己在第一次安装虚拟机VMware tools时,的确遇到了许多得问题,上网查到得答案说得不是十分完整,全是只注重过程,因此,我在此详细的写完VMware tools的安装全程,让更多的初学者完全轻松的安装VMware tools。 在安装虚拟机VMware tools之前,你需要知道如下概念: (1)虚拟机有免安装绿色版,也有非免安装绿色版,一般非免安装绿色版在你安装完虚拟机后,其目录下会自动生成VMware tools安装文件(windows.iso、linux.iso),而免安装绿色版因为是压缩包,里面有没有VMware tools安装文件那就要看发布这个包的人有没有把VMware tools安装文件打包在里面咯,如果没有,那你就要麻烦点,自己去下载咯。 (2)虚拟机可以装多个系统、多种系统(只要你硬盘够呛~),这大家都知道,然而VMware tools 不是针对虚拟机的,而是针对系统的,也就是说假如你虚拟机装有两个系统(可以都是Windows XP),其中一个系统中安装了VMware tools,那么就只有安装了VMware tools的这个系统才能使用VMware tools的功能,另外一个系统并不能使用VMware tools,不要以为在一个系统中装了VMware tools,以后我装什么系统就不用安装VMware tools都可以使用VMware tools了,你哪个系统需要使用VMware tools,哪个系统就要安装VMware tools,这是一一对应的关系。(3)VMware tools安装根据系统,就有不同的VMware tools镜像,不过大家都是ISO格式的包(windows.iso、linux.iso),安装的时候就要根据你的虚拟系统来选择再安装了,不要见到是*.iso 格式就选了,比如Linux有Linux的VMware tools,一般命名为linux.iso,它最终是通过运行linux.iso 包里面*.pl 格式的文件进行VMware tools安装的,如果你是XP系统,VMware tools安装包一般命名为windows.iso,它最终是通过运行windows.iso包里面steup.exe来运行安装的。 好了,你只需要弄清这三点,基本上是完全可以轻松安装VMware tools了,下面我给出安装过程。 windows VMware tools安装步骤: (1)在CD-ROM虚拟光驱中选择使用ISO镜像,找到VMWARE TOOLS 安装文件,如D:\VMware\VMware Workstation\Programs\windows.iso (2)启动进入windows (3)退出到windows,在虚拟机菜单栏中点击虚拟机-> 安装VMWARE TOOLS 子菜单,会弹出对话框,点击"确认" 安装 (4)此时,它会自动运行安装,你只管按“下一步”就可以安装完成了,如果它不自动运行的话,那你就进入光驱(G:)盘,找到一个stuep.exe文件双击安装就好,就这简单。 linux VMware tools安装步骤: (1)在CD-ROM虚拟光驱中选择使用ISO镜像,找到VMWARE TOOLS 安装文件,如D:\VMware\VMware Workstation\Programs\linux.iso (2)以ROOT身份进入LINUX (3)进入linux新建一个终端,输入/sbin/telinit 3 进入纯文本模式,然后在纯文本模式下再次用root身份登陆 (4)退出到windows,在虚拟机菜单栏中点击虚拟机-> 安装VMWARE TOOLS 子菜单,会弹出对话框,点击"确认" 安装 (5 挂载光驱mount /dev/cdrom /mnt/cdrom (注意命令中输入的空格)这时,你的linux.iso 里面的文件就相当于windows光盘里面的文件了
iPhone史上最全的使用教程
iPhone史上最全的使用教程 iPhone的解锁、越狱、激活、固件等等是什么意思,有什么分别 这几天看见好多新人问这几个词的含义及区别。我在这儿说说我的看法,不是官方解释,不懂的学习一下,懂的绕道,如有错误,敬请指正! 第一次买来时或恢复官方固件后,iPhone会处于那种只能拨打紧急电话状态,不能使用其它功能,如果要使用其它功能,就必须进行一项操作,那就是“激活”。一般有锁版的只有使用对应运营商的卡(如美国的AT&T卡)或者无锁版使用任何卡,才可以激活。激活之后就可以使用其它功能了。 有人说:“放屁,老子用的美版,移动的卡,怎么从来不用激活就可以使用啦?”这里就要说到“越狱”,一般来说,有锁版的不签约用户,可以不激活,可以不软解,但不能不越狱!越狱主要有两个作业:第一就是使用破解软件和第三方软件,第二就是绕过官方的激活操作(具体原理不清楚,不知是绕过还是欺骗,希望高人指点)。 什么叫“软解”呢?“软解”是“软件解锁”的简称。那什么叫“解锁”呢?解锁解锁,解的是网络运营商的锁。为什么为什么这么牛叉的手机AT&T才卖你$199?就是因为有这个锁!锁住这个牛叉的手机,让你只能用他的手机卡,让他挣钱!就像移动心机只能插移动卡一样,不能使用其它运营商的网络。可是有些国家法律规定:“不许搞技术垄断,消费者是上帝,他想用啥网就用啥网,只要上帝给点钱,你就必须能让他使用其它运营商的卡!”于是“解锁”就诞生了。怎么解锁是运营商的事,上帝们只要付钱就行了。比如澳版等!还有个词叫“无锁”,就是没有网络锁!比如官网订购的港版! 无锁好啊无锁好,就是价钱受不了!还有些国家法律不保护花钱的上帝们,比如美国。想买无锁?下辈子吧!于是一些牛叉无比的上帝们开始钻研,他们就是DEV Team ! 他们做了个“软件解锁程序”,这就是大名鼎鼎,无比牛叉的“YellowSn0w”,可以不通过运营商就可以“解锁”,于是上帝们省钱了。在软解之前,有个令大家又爱又恨的东西:“卡贴”,卡贴的作用和软解一样,实现有锁版使用第三方运营商的卡!不过历史的车轮是无情的,卡贴,注定不属于2009这个牛叉年份! “破解”,说实话一般都不这么说,在本论坛一般是指“破解软件”。看看你iPhone里N页的图标,想必其中总有“破解软件”的身影吧!呵呵,当然也有使用正版软件的朋友!尊敬他们!有锁和无锁 比如现在有一部iPhone,3G iPhone,有锁版或无锁版,有锁版就是加了网络锁,也就是绑定了运营商,比如美版的A T&T,英国的O2。无锁版也叫官方解锁版,比如港行里的无锁版(香港另有和记的“3”定制版iPhone)。 二、越狱 越狱对有锁和无锁的都适用。越狱是指通过改变一些程序使得iPhone的功能得到加强。 不论有锁版还是无锁版,如果只是想用App Store里的正版小软件,那么就不用越狱;如果想安装更多的好玩的非App Store里的软件,或者是说“盗版软件”,那么就得越狱。 三、解锁 解锁只适用于有锁版。如果不需要换运营商,当然不用解锁。但比如,对流到中国大陆的美