Cisco ASA 5500 常用配置命令手册

Cisco ASA 5500 常用配置命令手册
默认分类 2010-03-03 16:36:09 阅读56 评论0字号:大中小订阅
Cisco ASA 5500 常用配置命令手册
1. 常用技巧
Shruntp查看与ntp有关的
Shru crypto 查看与vpn有关的
Shru | inc crypto 只是关健字过滤而已
2.故障倒换
failover
failoverlan unit primary
failoverlan interface testint Ethernet0/3
failover link testint Ethernet0/3
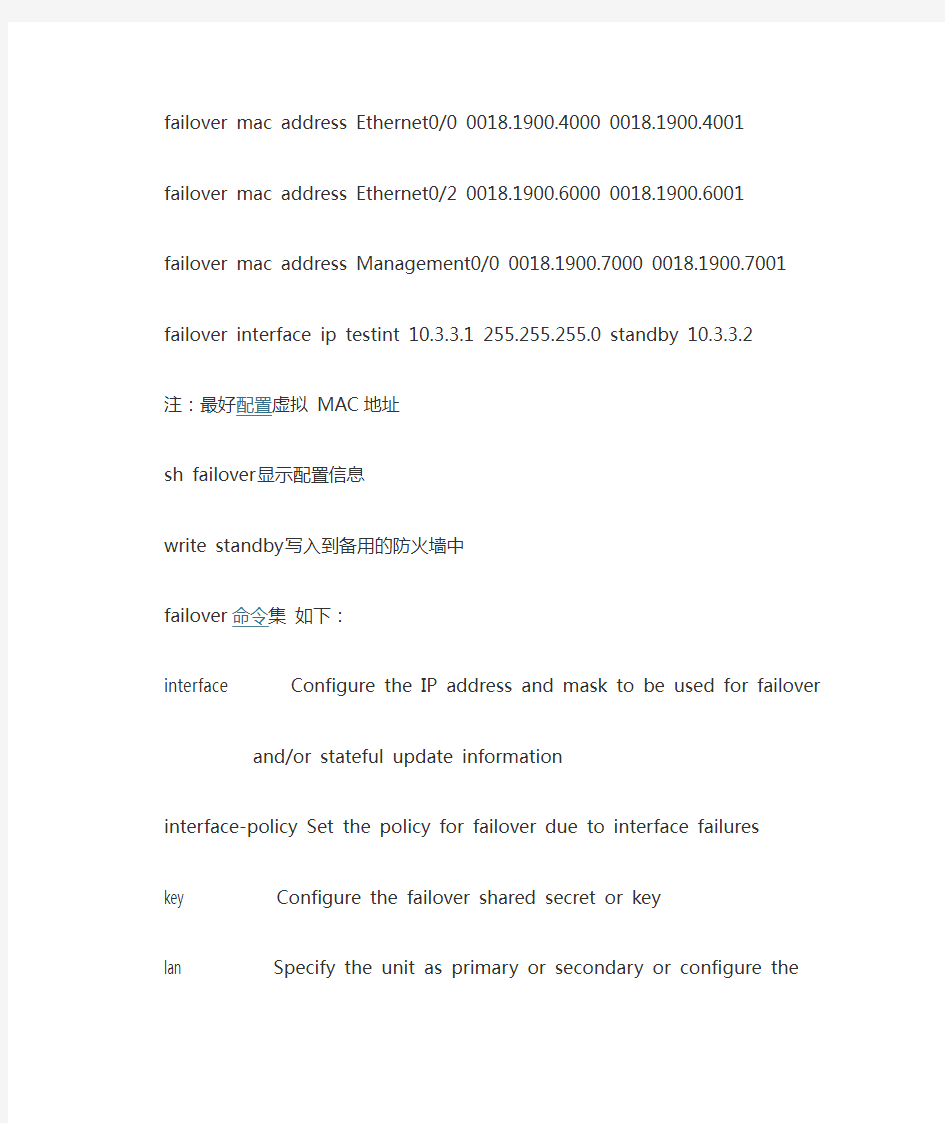
failover mac address Ethernet0/1 0018.1900.5000 0018.1900.5001 failover mac address Ethernet0/0 0018.1900.4000 0018.1900.4001 failover mac address Ethernet0/2 0018.1900.6000 0018.1900.6001 failover mac address Management0/0 0018.1900.7000 0018.1900.7001 failover interface iptestint 10.3.3.1 255.255.255.0 standby 10.3.3.2
注:最好配置虚拟MAC地址
sh failover显示配置信息
write standby写入到备用的防火墙中
failover命令集如下:
interface Configure the IP address and mask to be used for failover and/orstateful update information
interface-policy Set the policy for failover due to interface failures
key Configure the failover shared secret or key
lan Specify the unit as primary or secondary or configure the interface and vlan to be used for failover communication link Configure the interface and vlan to be used as a link for stateful update information
mac Specify the virtual mac address for a physical interface
polltime Configure failover poll interval
replication Enable HTTP (port 80) connection replication
timeout Specify the failover reconnect timeout value for
asymmetrically routed sessions
sh failover 命令集如下:
history Show failover switching history
interface Show failover command interface information
state Show failover internal state information
statistics Show failover command interface statistics information
| Output modifiers
3配置telnet、ssh及http管理
usernamejiang password Csmep3VzvPQPCbkx encrypted privilege 15 aaa authentication enable console LOCAL
aaa authentication telnet console LOCAL
aaa authentication ssh console LOCAL
aaa authorization command LOCAL
http 192.168.40.0 255.255.255.0 management
ssh 192.168.40.0 255.255.255.0 inside
4. vpn常用管理命令
shvpn-sessiondb full l2l 显示site to site 之vpn通道情况
shipsec stats 显示ipsec通道情况
shvpn-sessiondb summary 显示vpn汇总信息
shvpn-sessiondb detail l2l 显示ipsec详细信息
shvpn-sessiondb detail svc 查看ssl client信息
shvpn-sessiondb detail webvpn查看webvpn信息
shvpn-sessiondb detail full l2l 相当于linux下的ipsec whack –status 如果没有建立连接,则表示ipsec通道还没有建立起来。
5.配置访问权限
可以建立对象组,设定不同的权限,如:
object-group network testgroup
description test
network-object 192.168.100.34 255.255.255.255
access-listinside_access_in line 2 extended permit ip object-group all any
access-groupinside_access_in in interface inside
6.配置sitetosite之VPN
cryptoipsec transform-set ESP-3DES-SHA esp-3des esp-sha-hmac
crypto map outside_map 20 match address outside_cryptomap_20_1
crypto map outside_map 20 set pfs
crypto map outside_map 20 set peer 218.16.105.48
crypto map outside_map 20 set transform-set ESP-3DES-SHA
crypto map outside_map interface outside
isakmp identity address
isakmp enable outside
isakmp policy 10 authentication pre-share
isakmp policy 10 encryption 3des
isakmp policy 10 hash sha
isakmp policy 10 group 2
isakmp policy 10 lifetime 86400
tunnel-group 218.16.105.48 type ipsec-l2l
tunnel-group 218.16.105.48 ipsec-attributes
pre-shared-key *
peer-id-validatenocheck
tunnel-group-map enable rules
注:打打PFS并设定以IP地址作为peer名,一个接口只能有一个加密图
7. webvpn配置(sslvpn)
webvpn
enable outside
character-encoding gb2312
csd image disk0:/securedesktop-asa-3.1.1.16.pkg
svc image disk0:/sslclient-win-1.1.0.154.pkg 1
svc enable
customization customization1
title text TEST WebVPN system
title style background-color:white;color: rgb(51,153,0);border-bottom:5px groo
ve #669999;font-size:larger;vertical-align:middle;text-align:left;font-weight:bold
tunnel-group-list enable
注:也可通过ASDM图形界面进行配置
登录后,可访问内部资源,如下例:(客户端首先要安装Java插件
jre-1_5_0-windows-i586.exe,并打开浏览器的ActiveX)
1) https://https://www.sodocs.net/doc/fa16377937.html,输入用户名和密码
2) 出现工具条
3) 在Enter Web Address内输入192.168.40.8即可访问内部网站
4)在browse network输入192.168.40.8即可访问共享文件
5)点击application access,即可查看端口转发设置,如使用putty访问本机的2023端口,则即可通过ssh登录192.168.40.8
8.远程拨入VPN
相关的ASA配置命令如下:
access-listinside_access_in extended permit ip object-group remotegroup any access-listinside_access_in extended permit icmp object-group remotegroup any access-listremotevpn_splitTunnelAcl standard permit 192.168.100.0 255.255.255.0 access-listvpnclient_splitTunnelAcl standard permit 192.168.100.0 255.255.255.0 ip local pool dialuserIP 192.168.101.1-192.168.101.254 mask 255.255.255.0 group-policyremotevpn attributes
dns-server value 202.96.128.68 192.168.40.16
default-domain value https://www.sodocs.net/doc/fa16377937.html,
usernamejiang password Csmep3VzvPQPCbkx encrypted privilege 15 cryptoipsec transform-set ESP-3DES-SHA esp-3des esp-sha-hmac
cryptoipsec transform-set ESP-DES-MD5 esp-des esp-md5-hmac
cryptoipsec transform-set ESP-DES-SHA esp-des esp-sha-hmac
crypto dynamic-map outside_dyn_map 20 set pfs
crypto dynamic-map outside_dyn_map 20 set transform-set ESP-3DES-SHA crypto dynamic-map outside_dyn_map 20 set reverse-route
crypto map outside_map 65535 ipsec-isakmp dynamic outside_dyn_map
crypto map outside_map interface outside
tunnel-groupremotevpn type ipsec-ra
tunnel-groupremotevpn general-attributes
address-pooldialuserIP
default-group-policyremotevpn
tunnel-groupremotevpnipsec-attributes
pre-shared-key *
客户端设置如下:
9.日志服务器配置
logging enable
logging timestamp
logging emblem
logging trap informational
loggingasdm warnings
logging host inside 192.168.40.115 format emblem
logging permit-hostdown
vpn-simultaneous-logins 3
10. Snmp网管配置
snmp-server host inside 192.168.40.47 community testsnmp
snmp-server location DG-GTEST
snmp-server contact jiangdaoyou:6162
snmp-server community testsnmp
snmp-server enable traps snmp authentication linkup linkdowncoldstart
注:指定主机后,192.168.40.47才可能进行管理
11. ACS配置
安装后管理:http://ip:2002通过ACS可以进行授权、认证等等很多功能因内容太多,暂省略
12. AAA配置
Aaa服务器配置:
aaa-serverradius_dg host https://www.sodocs.net/doc/fa16377937.html,
key dfdfdfdf146**U
authentication-port 1812
accounting-port 1813
radius-common-pw dfdfdfdf146**U
a
对于拨入vpn的配置
tunnel-groupvg_testerp general-attributes
address-poolciscovpnuser
authentication-server-groupradius_dg
default-group-policyvg_testerp
13. 升级IOS
copy tftp://192.168.40.180/asa/asa721-k8.bin disk0:/asa721-k8.bin
boot system disk0:/asa721-k8.bin (多个Image时使用)
14. 疑难杂症
1) 在远程子网不能ping通过对方的网关,如在无锡格兰不能ping 192.168.40.251 输入命令:management-access inside (通过ASDM不能设置这一项)
2) NAT有时不能快速启作用
使用命令:clear xlate即可!
Cisco设备的基本配置命令
switch> 用户模式 1:进入特权模式 enable switch> enable switch# 2:进入全局配置模式 configure terminal switch> enable switch#c onfigure terminal switch(conf)# 3:交换机命名 hostname aptech2950 以aptech2950为例 switch> enable switch#c onfigure terminal switch(conf)#hostname aptch-2950 aptech2950(conf)# 4:配置使能口令 enable password cisco 以cisco为例 switch> enable switch#c onfigure terminal switch(conf)#hostname aptch2950 aptech2950(conf)# enable password cisco 5:配置使能密码 enable secret ciscolab 以cicsolab为例 switch> enable switch#c onfigure terminal switch(conf)#hostname aptch2950 aptech2950(conf)# enable secret ciscolab 6:设置虚拟局域网vlan 1 interface vlan 1 switch> enable switch#c onfigure terminal switch(conf)#hostname aptch2950 aptech2950(conf)# interface vlan 1 aptech2950(conf-if)#ip address 192.168.1.1 255.255.255.0 配置交换机端口ip 和子网掩码 aptech2950(conf-if)#no shut 是配置处于运行中aptech2950(conf-if)#exit aptech2950(conf)#ip default-gateway 192.168.254 设置网关地址 7:进入交换机某一端口 interface fastehernet 0/17 以17端口为例switch> enable switch#c onfigure terminal switch(conf)#hostname aptch2950 aptech2950(conf)# interface fastehernet 0/17 aptech2950(conf-if)#
cisco配置命令大全
933a LMI使用Q933A标准.LMI(Local management Interface)有3种:ANSI:T1.617;CCITTY:Q933A和CISCO特有的标准。 # fram-relay intf-typ ABC ABC为帧中继设备类型,它们分别是DTE设备,DCE交换机或NNI(网络接点接口)支持。# frame_relay interface_dlci 110 br 配置DLCI(数据链路连接标识符)。 # frame-relay map ip ABCD XXXX broadcast 建立帧中继映射。ABCD为对方ip地址,XXXX为本地DLCI号,broadcast允许广播向前转发或更新路由。 # no shutdown 激活本端口. # exit ---- 5 .帧中继子接口的配置: # conf t # int s0.1 point-to-point
对应S0的子接口1,点对点方式。 # ip addr ABCD XXXX ABCD为子口1的IP地址,XXXX为子网掩码。# frame-relay intreface-dlci 100 br 6.配置拨号备份 (1).配置备份主口 # conf t # int s0 S0为主口. # backup int asy 1 A1口为备份口. # backup delay 0 1 延时1秒. (2).配置虚拟接口 # conf t # ip addr ABCD XXXX
ABCD为虚拟接口IP地址,XXXX为子网掩码。 # encap ppp 封装ppp协议. # dialer in-band 激活随叫随拨功能. # dialer idle-timeout 7200 # dialer map ip ABCD modem-script call broadcast 6225481 br 映射对应的拨号口.ABCD为对方拨号口的ip地址,6225481为对应的电话号码。 # dialer_group 1 定义拨号组成员. (3).配置防火墙 # dialer_list 1 pro ip permit 允许ip协议通过。 (4).配置连接口令 # user name ABCD pass XXXX ABCD为对方主机名,XXXX为连接口令. (5).配置拨号字符串
华三华为交换机路由器配置常用命令汇总定稿版
华三华为交换机路由器 配置常用命令汇总 HUA system office room 【HUA16H-TTMS2A-HUAS8Q8-HUAH1688】
H3C交换机配置命令大全1、system-view 进入系统视图模式 2、sysname 为设备命名 3、display current-configuration 当前配置情况 4、 language-mode Chinese|English 中英文切换 5、interface Ethernet 1/0/1 进入以太网端口视图 6、 port link-type Access|Trunk|Hybrid 设置端口访问模式 7、 undo shutdown 打开以太网端口 8、 shutdown 关闭以太网端口
9、 quit 退出当前视图模式 10、 vlan 10 创建VLAN 10并进入VLAN 10的视图模式 11、 port access vlan 10 在端口模式下将当前端口加入到vlan 10中 12、port E1/0/2 to E1/0/5 在VLAN模式下将指定端口加入到当前vlan中 13、port trunk permit vlan all 允许所有的vlan通过 H3C路由器配置命令大全华为交换机常用配置实例 H3C交换机路由器telnet和console口登录配置 2009年11月09日星期一 10:00
级别说明 Level 名称 命令 参观 ping、tracert、telnet 1 监控 display、debugging 2 配置 所有配置命令(管理级的命令除外)
思科基本配置命令详解
思科交换机基本配置实例讲解
目录 1、基本概念介绍............................................... 2、密码、登陆等基本配置....................................... 3、CISCO设备端口配置详解...................................... 4、VLAN的规划及配置........................................... 4.1核心交换机的相关配置..................................... 4.2接入交换机的相关配置..................................... 5、配置交换机的路由功能....................................... 6、配置交换机的DHCP功能...................................... 7、常用排错命令...............................................
1、基本概念介绍 IOS: 互联网操作系统,也就是交换机和路由器中用的操作系统VLAN: 虚拟lan VTP: VLAN TRUNK PROTOCOL DHCP: 动态主机配置协议 ACL:访问控制列表 三层交换机:具有三层路由转发能力的交换机 本教程中“#”后的蓝色文字为注释内容。 2、密码、登陆等基本配置 本节介绍的内容为cisco路由器或者交换机的基本配置,在目前版本的cisco交换机或路由器上的这些命令是通用的。本教程用的是cisco的模拟器做的介绍,一些具体的端口显示或许与你们实际的设备不符,但这并不影响基本配置命令的执行。 Cisco 3640 (R4700) processor (revision 0xFF) with 124928K/6144K bytes of memory. Processor board ID 00000000 R4700 CPU at 100MHz, Implementation 33, Rev 1.2
1-cisco路由器基本配置及远程登录
实训目的: (1)学习和掌握科路由器的配置方式和要求。 (2)学习和掌握科路由器的工作模式分类、提示符、进入方式。1、路由器的配置方式 ①超级终端方式。该方式主要用于路由器的初始配置,路由器不需要IP地址。基本方法是:计算机通过COM1/COM2口和路由器的Console口连接,在计算机上启用“超级终端”程序,设置“波特率:9600 ,数据位:8,停止位:1,奇偶校验: 无,校验:无”即可。常用 ②Telnet方式。该方式配置要求路由器必须配置了IP地址。基本方法是:计算机通过网卡和路由器的以太网接口相连,计算机的网卡和路由器的以太网接口的IP地址必须在同一网段。常用 ③其他方式:AUX口接MODEM,通过电话线与远方运行终端仿真软件的微机;通过Ethernet上的TFTP服务器;通过Ethernet上的SNMP网管工作站。 2、路由器的工作模式 在命令行状态下,主要有以下几种工作模式: ①一般用户模式。主要用于查看路由器的基本信息,只能执行少数命令,不能对路由 器进行配置。提示符为:Router>;进入方式为:Telnet或Console ②使能(特权)模式。主要用于查看、测试、检查路由器或网络,不能对接口、路由 协议进行配置。提示符为:Router#;进入方式为:Router>enable。 ③全局配置模式。主要用于配置路由器的全局性参数。提示符为:Router(config)#; 进入方式为:Router#config ter。 ④全局模式下的子模式。包括:接口、路由协议、线路等。其进入方式和提示符如下: Router(config)#ineterface e0 //进入接口模式 Router(config-if)#//接口模式提示符 Router(config)#rip //进入路由协议模式 Router(config-router)# //路由协议模式 Router(config)#line con 0 //进入线路模式
cisco交换机常用配置命令
3、常用配置命令 3.1 把端口加入到vlan Switch>en Password: Switch #conf t /*进入配置模式*/ Enter configuration commands, one per line. End with CNTL/Z. Switch (config)#inter f 0/1 /*进入端口*/ Switch (config-if)#switchport access vlan X /*把端口加入到vlan X*/ Switch (config-if)#end Switch #wr /*保存*/ Building configuration... [OK] Switch # 3.2 添加新vlan(在核心交换机上写) Switch>en Password: Switch #conf t /*进入配置模式*/ Enter configuration commands, one per line. End with CNTL/Z. Switch (config)#Vlan X /*添加新Vlan*/ Switch (config-vlan)#inter vlan X /*进入Vlan*/ Switch (config-if)#ip address x.x.x.x 255.255.255.0/*设置vlan ip地址*/ Switch (config-if)#no shut 3.3 配置trunk,透传vlan Switch>en Password: Switch #conf t /*进入配置模式*/ Enter configuration commands, one per line. End with CNTL/Z. Switch (config)#inter fast 0/x /*进入级联端口*/ Switch (config-if)#switchport mode trunk /*修改端口模式*/ Switch (config-if)# switchport trunk allowed vlan all /*设置允许通过的vlan*/ 保存 删除命令:所有的命令前面加no。
路由器配置常用命令汇总
Access-enable允许路由器在动态访问列表中创建临时访问列表入口 Access-group把访问控制列表(ACL)应用到接口上 Access-list定义一个标准的IP ACL Access-template在连接的路由器上手动替换临时访问列表入口 Appn向APPN子系统发送命令 Atmsig执行ATM信令命令 B 手动引导操作系统 Bandwidth 设置接口的带宽 Banner motd 指定日期信息标语 Bfe 设置突发事件手册模式 Boot system 指定路由器启动时加载的系统映像 Calendar 设置硬件日历 Cd 更改路径 Cdp enable 允许接口运行CDP协议 Clear 复位功能 Clear counters 清除接口计数器 Clear interface 重新启动接口上的件逻辑 Clockrate 设置串口硬件连接的时钟速率,如网络接口模块和接口处理器能接受的速率Cmt 开启/关闭FDDI连接管理功能 Config-register 修改配置寄存器设置 Configure 允许进入存在的配置模式,在中心站点上维护并保存配置信息 Configure memory 从NVRAM加载配置信息 Configure terminal 从终端进行手动配置 Connect 打开一个终端连接
Copy 复制配置或映像数据 Copy flash tftp 备份系统映像文件到TFTP服务器 Copy running-config startup-config 将RAM中的当前配置存储到NVRAM Copy running-config tftp 将RAM中的当前配置存储到网络TFTP服务器上 Copy tftp flash 从TFTP服务器上下载新映像到Flash Copy tftp running-config 从TFTP服务器上下载配置文件 Debug 使用调试功能 Debug dialer 显示接口在拨什么号及诸如此类的信息 Debug ip rip 显示RIP路由选择更新数据 Debug ipx routing activity 显示关于路由选择协议(RIP)更新数据包的信息 Debug ipx sap 显示关于SAP(业务通告协议)更新数据包信息 Debug isdn q921 显示在路由器D通道ISDN接口上发生的数据链路层(第2层)的访问过程 Debug ppp 显示在实施PPP中发生的业务和交换信息 Delete 删除文件 Deny 为一个已命名的IP ACL设置条件 Dialer idle-timeout 规定线路断开前的空闲时间的长度 Dialer map 设置一个串行接口来呼叫一个或多个地点 Dialer wait-for-carrier-time 规定花多长时间等待一个载体 Dialer-group 通过对属于一个特定拨号组的接口进行配置来访问控制 Dialer-list protocol 定义一个数字数据接受器(DDR)拨号表以通过协议或ACL与协议的组合来控制控制拨号 Dir 显示给定设备上的文件 Disable 关闭特许模式 Disconnect 断开已建立的连接
思科交换机配置命令大全
思科交换机配置命令大全 switch> 用户模式 1:进入特权模式 enable switch> enable switch# 2:进入全局配置模式 configure terminal switch> enable switch#configure terminal switch(conf)# 3:交换机命名 hostname aptech2950 以aptech2950为例 switch> enable switch#configure terminal switch(conf)#hostname aptch-2950 aptech2950(conf)# 4:配置使能口令 enable password cisco 以cisco为例 switch> enable switch#configure terminal switch(conf)#hostname aptch2950 aptech2950(conf)# enable password cisco 5:配置使能密码 enable secret ciscolab 以cicsolab为例 switch> enable switch#configure terminal switch(conf)#hostname aptch2950 aptech2950(conf)# enable secret ciscolab 6:设置虚拟局域网vlan 1 interface vlan 1 switch> enable switch#configure terminal switch(conf)#hostname aptch2950 aptech2950(conf)# interface vlan 1 aptech2950(conf-if)#ip address 192.168.1.1 255.255.255.0 配置交换机端口ip 和子网掩码 aptech2950(conf-if)#no shut 是配置处于运行中aptech2950(conf-if)#exit aptech2950(conf)#ip default-gateway 192.168.254 设置网关地址 7:进入交换机某一端口 interface fastehernet 0/17 以17端口为例switch> enable switch#configure terminal
路由器常用命令
cisco路由器常用命令 1:三大模式 router> 用户模式 router > enable 进入特权模式 router # router > enable 进入全局配置模式 router #configure terminal router (conf)# 2:其它模式 Router(config)#interface f1/0 进入接口配置模式Router(config-if)# Router(config)#interface f1/0.1 进入子接口配置模式Router(config-subif)# Router(config)#line console 0 进入line模式Router(config-line)# Router(config)#router rip 进入路由模式Router(config-router)# 3:路由器命名 hostname routera,以routerA为例 router > enable router #configure terminal router(conf)#hostname routerA routera (conf)# 4:配置各类密码 配置特权模式密码(使能口令) enable password cisco,以cisco为例 router > enable router #configure terminal router(conf)#hostname routerA routerA (conf)# enable password cisco 设置VTY(虚拟终端接口)密码 Router(config)#line vty 0 1
思科路由器基本配置与常用配置命令
思科路由器基本配置与常用配置命令(simple for CCNA) 启动接口,分配IP地址: router> router> enable router# router# configure terminal router(config)# router(config)# interface Type Port router(config-if)# no shutdown router(config-if)# ip address IP-Address Subnet-Mask router(config-if)# ^z 配置RIP路由协议:30秒更新一次 router(config)# router rip router(config-if)# network Network-Number router(config-if)# ^z 配置IGRP路由协议:90秒更新一次 router(config)# router igrp AS-Number router(config-if)# network Network-Number router(config-if)# ^z配置Novell IPX路由协议:Novell RIP 60秒更新一次 router(config)# ipx routing [node address] router(config)# ipx maximum-paths Paths router(config)# interface Type Port router(config-if)# ipx network Network-Number [encapsulation encapsulation-type] [secondary] router(config-if)# ^z配置DDR: router(config)# dialer-list Group-Number protocol Protocol-Type permit [list ACL-Number] router(config)# interface bri 0 router(config-if)# dialer-group Group-Number router(config-if)# dialer map Protocol-Type Next-Hop-Address name Hostname Telphone-Number router(config-if)# ^z配置ISDN: router(config)# isdn swith-type Swith-Type router(config-if)# ^z 配置Frame Relay: router(config-if)# encapsulation frame-relay [cisco | ietf ] router(config-if)# frame-relay lmi-type [ansi | cisco | q933a ] router(config-if)# bandwidth kilobits router(config-if)# frame-relay invers-arp [ Protocol ] [dlci ] router(config-if)# ^z配置标准ACL: router(config)# access-list Access-List-Number [ permit | deny ] source [ source-mask ] router(config)# interface Type Port router(config-if)# ip access-group Access-List-Number [ in | out ] router(config-if)# ^z配置扩展ACL: router(config)# access-list Access-List-Number [ permit | deny ] [ Protocol | Protocol-Number ] source source-wildcard [ Source-Port ] destination destination-wildcard [ Destination-Port ] [ established ]
Cisco交换机常用配置命令
Cisco交换机常用配置命令 CISCO交换机基本配置 switch>ena 進入特权模式 switch#erasenvram 全部清除交换机的所有配置 switch#reload 重新启动交换机(初始提示符为switch> ) ------------------------------------------------------------------------------------ CISCO交换机基本配置:Console端口连接 用户模式hostname>; 特权模式hostname(config)# ; 全局配置模式hostname(config-if)# ; 交换机口令设置: switch>enable ;进入特权模式 switch#config;进入全局配置模式 switch(config)#hostname cisco ;设置交换机的主机名 switch(config)#enable secret csico1 ;设置特权加密口令 switch(config)#enable password csico8 ;设置特权非密口令 switch(config)#line console 0 ;进入控制台口 switch(config-line)#line vty 0 4 ;进入虚拟终端 switch(config-line)#login ;虚拟终端允许登录 switch(config-line)#password csico6 ;设置虚拟终端登录口令csico6 switch#write 保存配置設置 switch#copy running-config startup-config 保存配置設置,與write一樣switch#exit;返回命令 配置终端过一会时间就会由全局配置模式自动改为用户模式,将超时设置为永不超时 switch#conf t switch(config)#line con 0 switch(config-line)#exec-timeout 0 --------------------------------------------------------------------------------- 交换机显示命令: switch#write;保存配置信息 switch#showvtp;查看vtp配置信息 switch#show run ;查看当前配置信息 switch#showvlan;查看vlan配置信息 switch#showvlan name vlan2 switch#show interface ;查看端口信息
路由器常用配置命令
Cisco常用配置命令Cisco常用配置命令 一.交换机的基本配置 C2950# config terminal 进入全局配置模式 show interface fastethernet0/1 查看端口0/1的配置结果 show interface fastethernet0/1 status 查看端口0/1的状态 show mac-address-table 查看整个MAC地址表 clear mac-address-table restricted static 清除限定性地址 C2950(config)# hostname 2950A / 设置主机名为2950A interface f0/23 / 进入端口23的配置模式 enable password cisco / 设置enable password为cisco enable secret cisco1 / 设置enable secret为cisco1 ip address 192.168.1.1 255.255.255.0 / 设置交换机IP 地址 ip default-gateway 192.168.1.254 / 设置默认网关 ip domain-name https://www.sodocs.net/doc/fa16377937.html, / 设置域名 ip name-server 200.0.0.1 / 设置域名服务器 配置查看MAC地址表 mac-address-table ? mac-address-table aging-time 100 / 设置超时是时间为100s mac-address-table permanent https://www.sodocs.net/doc/fa16377937.html, /f0/3 加入永久地址mac-address-table restricted static 0000.0c02.bbcc / f0/6 f0/7 加入静态地址 end show mac-address-table /查看整个Mac地址表 clear mac-address-table restricted static C2950(config-if)# interface fastethernet0/1 /进入接口F0/1子配置模式 interface Ethernet0 /进入以太网口0子配置模式 no shutdown /激活接口 speed ? /查看speed命令的子命令 speed 100 /设置该端口速率为100Mb/s dulplex full/half/auto /设置该端口为全双工 description TO_PC1 /设置该端口描述为TO_PC1 show interface fastethernet 0/1 /查看端口0/1的配置结果 show interface fastethernet 0/1 status /查看端口0/1的状态 配置VTP和STP 一. 配置VTP 2950A #vlan database /进入VLAN配置子模式 show vtp status /查看VTP设置信息 show vlan /查看VLAN配置信息 copy running-config startup-config /保存配置文件 2950A(vlan)#vtp server/client /设置本交换机为server/client模式
CISCO配置命令大全必学
这是学习CUSCO必学的 配置使能密码enable secret ciscolab 以cicsolab 为例 switch> enable switch#c onfigure terminal switch(conf)#hostname aptch2950 aptech2950(conf)# enable secret ciscolab 设置虚拟局域网vlan 1 interface vlan 1 switch> enable switch#c onfigure terminal switch(conf)#hostname aptch2950 aptech2950(conf)# interface vlan 1 aptech2950(conf-if)#ip address 192.168.1.1 255.255.255.0 配置交换机端口ip 和子网掩 码 aptech2950(conf-if)#no shut 是配置处于运行中 aptech2950(conf-if)#exit aptech2950(conf)#ip default-gateway 192.168.254 设置网关地址 进入交换机某一端口interface fastehernet 0/17 以17 端口为例switch> enable
switch#c onfigure terminal switch(conf)#hostname aptch2950 aptech2950(conf)# interface fastehernet 0/17 aptech2950(conf-if)# 8:查看命令show switch> enable switch# show version 察看系统中的所有版本信息 show interface vlan 1 查看交换机有关ip 协议的配置信息 show running-configure 查看交换机当前起作用的配置信息 show interface fastethernet 0/1 察看交换机1 接口具体配置和统计信息show mac-address-table 查看mac 地址表 show mac-address-table aging-time 查看mac 地址表自动老化时间 9:交换机恢复出厂默认恢复命令 switch> enable switch# erase startup-configure switch# reload 10:双工模式设置 switch> enable switch#c onfigure terminal switch2950(conf)#hostname aptch-2950 aptech2950(conf)# interface fastehernet 0/17 以17 端口为例 aptech2950(conf-if)#duplex full/half/auto 有full , half, auto 三个可选
路由基础配置命令
路由基础配置命令UTP双绞线类型: 直通线: 交叉线: 广域网线缆连接类型: DTE: DCE: 时钟速率: 路由器的接口:(作用) 1. 广域网接口: serial 2. 内网接口: fastethernet 3. 管理接口: console (控制台) AUX(备份) 连接两个设备: 1. 物理连接 2. 逻辑连接 配置网络设备: 1. 管理属性:用户名密码描述警告 2. 协议地址:IP IPX 3. 协议策略:vlan 静态访问控制 交换机直接可以应用 路由器需要初始配置才能应用 设备启动过程: 1. 加电自检 2. 查找加载操作系统 3. 查找加载配置文件 配置网络设备方式: 1. 初始配置:console 2. 初始配置后通过interface(拥有ip地址的接口): 1)telnet 2)TFTP 3)WEB 4)网络管理工具: SNA SDM 配置直接应用到内存
登陆路由器: Router> Router>enable /*进入特权模式 Router# Router#disable /*退出特权模式 Router> Router>logout /*退出路由器 Router>exit /*退出路由器 路由器IOS帮助功能:?的三个用法 1/ 直接问号 2/ Router#cl? clear clock Router#cl 3/ Router#clock % Incomplete command. Router#clock ? set Set the time and date Router#clock 问号的帮助功能:(查找路由器设置时间的命令并设置时间) Router#cl? clear clock Router#clock % Incomplete command. Router#clock ? set Set the time and date Router#clock set % Incomplete command. Router#clock set ? hh:mm:ss Current Time Router#clock set 11:04:50 % Incomplete command. Router#clock set 11:04:50 ? <1-31> Day of the month MONTH Month of the year Router#clock set 11:04:50 15
思科路由器常用配置命令大全
思科路由器常用配置命令大全 本文按字母顺序列举了思科路由器常用配置命令,适合思科路由器操作人员随时查看 Access-enable允许路由器在动态访问列表中创建临时访问列表入口 Access-group把访问控制列表(ACL)应用到接口上 Access-list定义一个标准的IP ACL Access-template在连接的路由器上手动替换临时访问列表入口 Appn向APPN子系统发送命令 Atmsig 执行ATM信令命令 B 手动引导操作系统 Bandwidth 设置接口的带宽 Banner motd 指定日期信息标语 Bfe 设置突发事件手册模式 Boot system 指定路由器启动时加载的系统映像 Calendar 设置硬件日历 Cd 更改路径 Cdp enable 允许接口运行CDP协议 Clear 复位功能 Clear counters 清除接口计数器 Clear interface 重新启动接口上的件逻辑 Clockrate 设置串口硬件连接的时钟速率,如网络接口模块和接口处理器能接受的速率 Cmt 开启/关闭FDDI连接管理功能 Config-register 修改配置寄存器设置 Configure 允许进入存在的配置模式,在中心站点上维护并保存配置信息 Configure memory 从NVRAM加载配置信息 Configure terminal 从终端进行手动配置 Connect 打开一个终端连接 Copy 复制配置或映像数据 Copy flash tftp 备份系统映像文件到TFTP服务器 Copy running-config startup-config 将RAM中的当前配置存储到NVRAM Copy running-config tftp 将RAM中的当前配置存储到网络TFTP服务器上 Copy tftp flash 从TFTP服务器上下载新映像到Flash Copy tftp running-config 从TFTP服务器上下载配置文件 Debug 使用调试功能 Debug dialer 显示接口在拨什么号及诸如此类的信息 Debug ip rip 显示RIP路由选择更新数据 Debug ipx routing activity 显示关于路由选择协议(RIP)更新数据包的信息 Debug ipx sap 显示关于SAP(业务通告协议)更新数据包信息 Debug isdn q921 显示在路由器D通道ISDN接口上发生的数据链路层(第2层)的访问过程 Debug ppp 显示在实施PPP中发生的业务和交换信息 Delete 删除文件 Deny 为一个已命名的IP ACL设置条件 Dialer idle-timeout 规定线路断开前的空闲时间的长度 Dialer map 设置一个串行接口来呼叫一个或多个地点 Dialer wait-for-carrier-time 规定花多长时间等待一个载体 Dialer-group 通过对属于一个特定拨号组的接口进行配置来访问控制 Dialer-list protocol 定义一个数字数据接受器(DDR)拨号表以通过协议或ACL与协议的组合来控
cisco2811配置命令
Cisco2811配置方法 1 配置方式 1) console 口直连模式 将设备自带的一根淡蓝色配置线RJ-45头接入路由器的con sole 口,另一端接入计算机串口,随后点击开始菜单 -附件-通讯 -超级终端,打开超级终端后输入一个名称,连接时使用 Com1 口,端口设置时点击还原为默认设置,点击确定等待几秒钟,可进入cisco2811配置界面,连接时需要输入密码,我已经设置 con sole连接密码为default 2) telnet 远程登录配置模式 tel net配置模式是在con sole配置模式基础之上进行的,我们需要用con sole 口进入设备,配置tele nt远程登录的IP地址并开启相应端口,此操作我已设置完成,下面介绍配置方法: 点击开始菜单-运行-输入cmd,打开dos窗口 输入tel net 192.168.103.1此IP地址我已设置为局域网网关 需要输入 telnet 登录密码密码为 default ,输入密码时不会显示所输入密码,输入之后会出现“outer> ”提示符, 配置参数时我们需要先进入特权模式,命令为: router>e nable,进入特权模式已经设置了一个密码,密码为default,输入密码后会出现“router# ”提示符,表示已经进入特权模式,如下图
以后我们配置主要在tel net模式下进行,比较方便,只要计算机接入局域网,在任何地方都可以配置。 下面介绍详细的配置命令: 我们进行配置时进入特权模式后还需进入全局配置模式下来配置设备参数 Router>e nable Router#c onf t Router(co nfig)#host name router2811 配置设备名称 配置局域网端口 Router2811(config)#interface FastEthernet 0/0 进入路由器 0/0 端口 Router2811(co nfig-if)# no shutdow n Router2811(c on fig-if)#ip address 192.168.103.1 255.255.255.255.0 Router2811(co nfig-if)#duplex auto
华三华为交换机-路由器配置常用命令汇总
欢迎阅读H3C交换机配置命令大全 1、system-view 进入系统视图模式 2、sysname 为设备命名 3、display current-configuration 当前配置情况 4、language-mode Chinese|English 中英文切换 5、interface Ethernet 1/0/1 进入以太网端口视图 6、port link-type Access|Trunk|Hybrid 设置端口访问模式 7、undo shutdown 打开以太网端口 8、shutdown 关闭以太网端口 9、quit 退出当前视图模式 10、vlan 10 创建VLAN 10并进入VLAN 10的视图模式 11、port access vlan 10 在端口模式下将当前端口加入到vlan 10中 12、port E1/0/2 to E1/0/5 在VLAN模式下将指定端口加入到当前vlan中 13、port trunk permit vlan all 允许所有的vlan通过 H3C路由器配置命令大全华为交换机常用配置实例 H3C交换机路由器telnet和console口登录配置 2009年11月09日星期一 10:00 级别说明 Level 名称 命令 参观 ping、tracert、telnet 1 监控 display、debugging
2 配置 所有配置命令(管理级的命令除外) 3 管理 文件系统命令、FTP命令、TFTP命令、XMODEM命令 telnet仅用密码登录,管理员权限 [Router]user-interface vty 0 4[Router-ui-vty0-4]user privilege level 3[Router-ui-vty0-4]set authentication password simple abc telnet仅用密码登录,非管理员权限 [Router]super password level 3 simple super [Router]user-interface vty 0 4[Router-ui-vty0-4]user privilege level 1[Router-ui-vty0-4]set authentication password simple abc telnet使用路由器上配置的用户名密码登录,管理员权限 [Router]local-user admin password simple admin[Router]local-user admin service-type telnet[Router]local-user admin level 3 [Router]user-interface vty 0 4[Router-ui-vty0-4]authentication-mode local telnet使用路由器上配置的用户名密码登录,非管理员权限 [Router]super password level 3 simple super [Router]local-user manage password simple manage[Router]local-user manage service-type telnet[Router]local-user manage level 2 [Router]user-interface vty 0 4[Router-ui-vty0-4]authentication-mode local 对console口设置密码,登录后使用管理员权限 [Router]user-interface con 0[Router-ui-console0]user privilege level 3[Router-ui-console0]set authentication password simple abc 对console口设置密码,登录后使用非管理员权限 [Router]super password level 3 simple super [Router]user-interface con 0[Router-ui-console0]user privilege level 1[Router-ui-console0]set authentication password simple abc 对console口设置用户名和密码,登录后使用管理员权限 [Router]local-user admin password simple admin[Router]local-user admin service-type terminal[Router]local-user admin level 3 [Router]user-interface con 0[Router-ui-console0]authentication-mode local 对console口设置用户名和密码,登录后使用非管理员权限 [Router]super password level 3 simple super [Router]local-user manage password simple manage[Router]local-user