思科ASA5505防火墙配置成功实例
配置要求:
1、分别划分inside(内网)、outside(外网)、dmz(安全区)三个区域。
2、内网可访问外网及dmz内服务器(web),外网可访问dmz内服务器(web)。
3、Dmz服务器分别开放80、21、3389端口。
说明:由于防火墙许可限制“no forward interface Vlan1”dmz内服务器无法访问外网。
具体配置如下:希望对需要的朋友有所帮助
ASA Version 7.2(4)
!
hostname asa5505
enable password tDElRpQcbH/qLvnn encrypted
passwd 2KFQnbNIdI.2KYOU encrypted
names
!
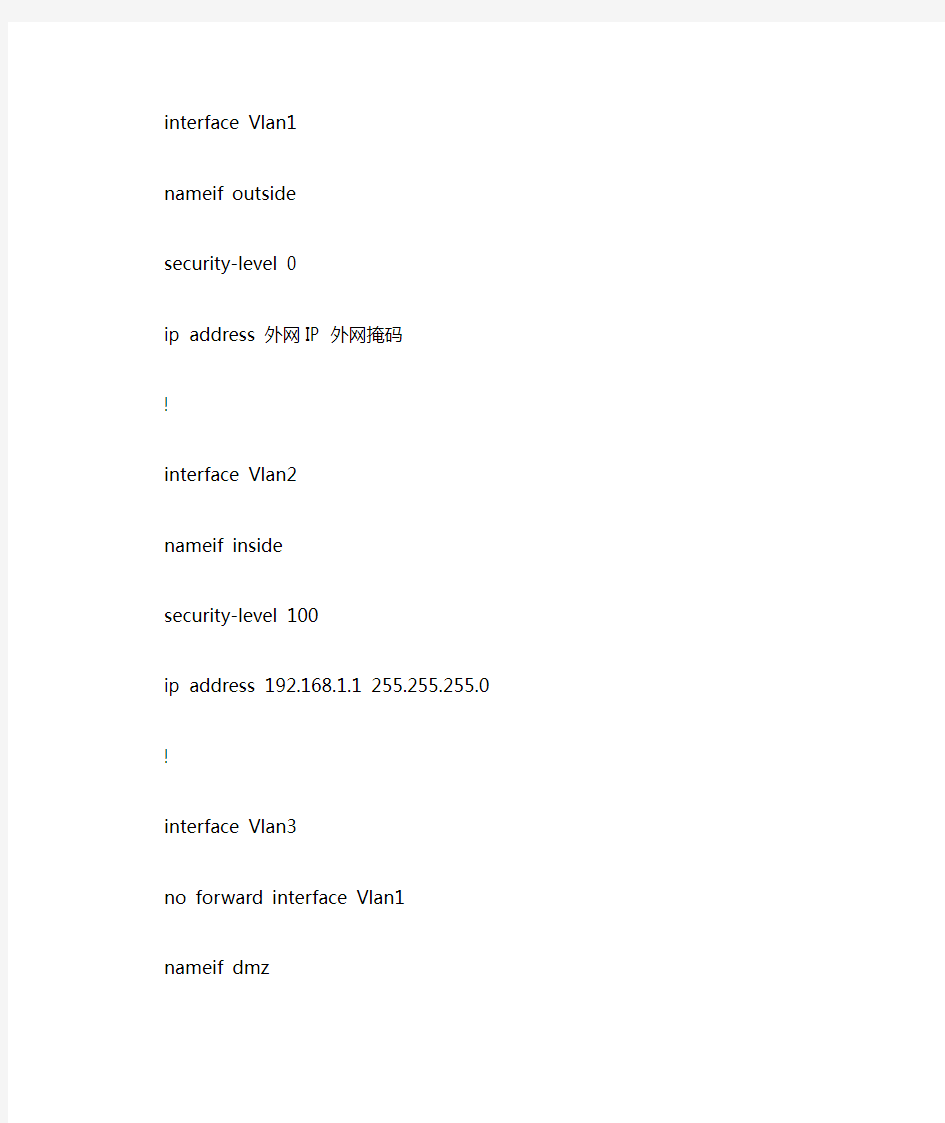
interface Vlan1
nameif outside
security-level 0
ip address 外网IP 外网掩码
!
interface Vlan2
nameif inside
security-level 100
ip address 192.168.1.1 255.255.255.0
!
interface Vlan3
no forward interface Vlan1
nameif dmz
security-level 50
ip address 172.16.1.1 255.255.255.0
!
interface Ethernet0/0
description outside
!
interface Ethernet0/1
description inside
switchport access vlan 2
!
interface Ethernet0/2
description dmz
switchport access vlan 3
!
interface Ethernet0/3
description inside
switchport access vlan 2
!
interface Ethernet0/4
shutdown
!
interface Ethernet0/5
shutdown
!
interface Ethernet0/6
shutdown
!
interface Ethernet0/7
shutdown
!
ftp mode passive
object-group service outside-to-dmz tcp
port-object eq www
port-object eq ftp
port-object eq 3389
access-list aaa extended permit tcp any host 外网IP object-group outsid e-
to-dmz
access-list bbb extended permit tcp host 172.16.1.2 192.168.1.0 255.255. 255.0 ob
ject-group outside-to-dmz
pager lines 24
mtu outside 1500
mtu inside 1500
mtu dmz 1500
icmp unreachable rate-limit 1 burst-size 1
asdm image disk0:/asdm-524.bin
no asdm history enable
arp timeout 14400
global (outside) 1 interface
global (dmz) 1 172.16.1.10-172.16.1.254 netmask 255.255.255.0
nat (inside) 1 192.168.1.0 255.255.255.0
nat (dmz) 1 172.16.1.0 255.255.255.0
alias (inside) 221.203.36.86 172.16.1.2 255.255.255.255
static (dmz,outside) tcp interface www 172.16.1.2 www netmask 255.255.2 55.255 d
ns
static (dmz,outside) tcp interface ftp 172.16.1.2 ftp netmask 255.255.2 55.255 d
ns
static (dmz,outside) tcp interface 3389 172.16.1.2 3389 netmask 255.255. 255.255
dns
static (inside,dmz) 172.16.1.2 192.168.1.0 netmask 255.255.255.255 dns access-group aaa in interface outside
access-group bbb in interface dmz
route outside 0.0.0.0 0.0.0.0 外网网关 1
timeout xlate 3:00:00
timeout conn 1:00:00 half-closed 0:10:00 udp 0:02:00 icmp 0:00:02
timeout sunrpc 0:10:00 h323 0:05:00 h225 1:00:00 mgcp 0:05:00 mgcp-pat 0:05:00
timeout sip 0:30:00 sip_media 0:02:00 sip-invite 0:03:00 sip-disconnect 0:02:00
timeout sip-provisional-media 0:02:00 uauth 0:05:00 absolute
no snmp-server location
no snmp-server contact
snmp-server enable traps snmp authentication linkup linkdown coldstart telnet timeout 5
ssh timeout 5
console timeout 0
!
class-map inspection_default
match default-inspection-traffic
!
!
policy-map type inspect dns preset_dns_map
parameters
message-length maximum 512
policy-map global_policy
class inspection_default
inspect dns preset_dns_map
inspect ftp
inspect h323 h225
inspect h323 ras
inspect netbios
inspect rsh
inspect rtsp
inspect skinny
inspect esmtp
inspect sqlnet
inspect sunrpc
inspect tftp
inspect sip
inspect xdmcp
inspect http
!
service-policy global_policy global
prompt hostname context
Cryptochecksum:9d2a6010d4fc078cf026f98dcec96007 : end
asa5505(config)#
Cisco ASA配置
Cisco ASA配置 思科防火墙ASA5520配置 思科防火墙ASA5520配置: 目的:1、内网可以上网 2、内网可以访问DMZ区域的服务器 3、外网可以通过公网IP访问DMZ区域的服务器 要求:1、内网的网段192.168.10.0 2、DMZ的网段192.168.5.0 3、外网IP地址:200.200.200.82 200.200.200.83 网关255.255.255.248(这个地址一般是运营商提供) 4、外网路由:200.200.200.81 5、DMZ区域的服务器IP地址:192.168.5.2 步骤1:配置接口inside、outside和dmz interface g0/0 speed auto duplex auto nameif inside Security-level 100 ip address 192.168.10.1 255.255.255.0 no shut exit interface g0/1 speed auto duplex auto nameif outside Security-level 0 ip address 200.200.200.82 255.255.255.248 no shut exit interface g0/2 speed auto duplex auto nameif dmz Security-level 50 ip address 192.168.5.1 255.255.255.0 no shut exit 步骤2、添加外网路由 route outside 0 0 200.200.200.81
Cisco ASA5505防火墙详细配置教程及实际配置案例
Cisco ASA5505防火墙详细配置教程及实际配置案例 interface Vlan2 nameif outside ----------------------------------------对端口命名外端口security-level 0 ----------------------------------------设置端口等级 ip address X.X.X.X 255.255.255.224 --------------------调试外网地址! interface Vlan3 nameif inside ----------------------------------------对端口命名内端口 security-level 100 ----------------------------------------调试外网地址ip address 192.168.1.1 255.255.255.0 --------------------设置端口等级! interface Ethernet0/0 switchport access vlan 2 ----------------------------------------设置端口VLAN与VLAN2绑定 ! interface Ethernet0/1 switchport access vlan 3 ----------------------------------------设置端口VLAN与VLAN3绑定 ! interface Ethernet0/2 shutdown ! interface Ethernet0/3 shutdown ! interface Ethernet0/4 shutdown ! interface Ethernet0/5 shutdown ! interface Ethernet0/6 shutdown ! interface Ethernet0/7 shutdown ! passwd 2KFQnbNIdI.2KYOU encrypted ftp mode passive dns domain-lookup inside dns server-group DefaultDNS
CISCO+ASA+5520配置手册
CD-ASA5520# show run : Saved : ASA Version 7.2(2) ! hostname CD-ASA5520 //给防火墙命名 domain-name default.domain.invalid //定义工作域 enable password 9jNfZuG3TC5tCVH0 encrypted // 进入特权模式的密码 names dns-guard ! interface GigabitEthernet0/0 //内网接口: duplex full //接口作工模式:全双工,半双,自适应 nameif inside //为端口命名:内部接口inside security-level 100 //设置安全级别 0~100 值越大越安全 ip address 192.168.1.1 255.255.255.0 //设置本端口的IP地址 ! interface GigabitEthernet0/1 //外网接口 nameif outside //为外部端口命名:外部接口outside security-level 0 ip address 202.98.131.122 255.255.255.0 //IP地址配置 ! interface GigabitEthernet0/2 nameif dmz security-level 50 ip address 192.168.2.1 255.255.255.0 ! interface GigabitEthernet0/3 shutdown no nameif no security-level no ip address ! interface Management0/0 //防火墙管理地址 shutdown no nameif no security-level no ip address ! passwd 2KFQnbNIdI.2KYOU encrypted ftp mode passive clock timezone CST 8 dns server-group DefaultDNS domain-name default.domain.invalid access-list outside_permit extended permit tcp any interface outside eq 3389 //访问控制列表 access-list outside_permit extended permit tcp any interface outside range 30000 30010 //允许外部任何用户可以访问outside 接口的30000-30010的端口。 pager lines 24 logging enable //启动日志功能
cisco防火墙配置的基本配置
cisco防火墙配置的基本配置 1、nameif 设置接口名称,并指定安全级别,安全级别取值范围为1~100,数字越大安全级别越高。 使用命令: PIX525(config)#nameifethernet0outsidesecurity0 PIX525(config)#nameifethernet1insidesecurity100 PIX525(config)#nameifethernet2dmzsecurity50 2、interface 配置以太口工作状态,常见状态有:auto、100full、shutdown。 auto:设置网卡工作在自适应状态。 100full:设置网卡工作在100Mbit/s,全双工状态。 shutdown:设置网卡接口关闭,否则为激活。 命令: PIX525(config)#interfaceethernet0auto PIX525(config)#interfaceethernet1100full PIX525(config)#interfaceethernet1100fullshutdown 3、ipaddress 配置网络接口的IP地址 4、global 指定公网地址范围:定义地址池。 Global命令的配置语法:
global(if_name)nat_idip_address-ip_address[netmarkglobal_mask] 其中: (if_name):表示外网接口名称,一般为outside。 nat_id:建立的地址池标识(nat要引用)。 ip_address-ip_address:表示一段ip地址范围。 [netmarkglobal_mask]:表示全局ip地址的网络掩码。 5、nat 地址转换命令,将内网的私有ip转换为外网公网ip。 6、route route命令定义静态路由。 语法: route(if_name)00gateway_ip[metric] 7、static 配置静态IP地址翻译,使内部地址与外部地址一一对应。 语法: static(internal_if_name,external_if_name)outside_ip_addrinside_ip_addre ss 8、conduit 管道conduit命令用来设置允许数据从低安全级别的接口流向具有较高安全级别的接口。 语法: conduitpermit|denyprotocolglobal_ipport[-port]foreign_ip[netmask]
思科ASA防火墙ASDM安装和配置
CISCO ASA防火墙ASDM安装和配置 准备工作: 准备一条串口线一边接台式机或笔记本一边接防火墙的CONSOLE 接口,通过开始——>程序——> 附件——>通讯——>超级终端 输入一个连接名,比如“ASA”,单击确定。 选择连接时使用的COM口,单击确定。 点击还原为默认值。 点击确定以后就可能用串口来配置防火墙了。 在用ASDM图形管理界面之前须在串口下输入一些命令开启ASDM。 在串口下输入以下命令: ciscoasa> ciscoasa> en Password: ciscoasa# conf t 进入全局模式 ciscoasa(config)# webvpn 进入WEBVPN模式 ciscoasa(config-webvpn)# username cisco password cisco 新建一个用户和密码ciscoasa(config)# int m 0/0 进入管理口 ciscoasa(config-if)# ip address 192.168.4.1 255.255.255.0 添加IP地址ciscoasa(config-if)# nameif guanli 给管理口设个名字 ciscoasa(config-if)# no shutdown 激活接口 ciscoasa(config)#q 退出管理接口 ciscoasa(config)# http server enable 开启HTTP服务 ciscoasa(config)# http 192.168.4.0 255.255.255.0 guanli 在管理口设置可管理的IP 地址 ciscoasa(config)# show run 查看一下配置 ciscoasa(config)# wr m 保存 经过以上配置就可以用ASDM配置防火墙了。 首先用交叉线把电脑和防火墙的管理口相连,把电脑设成和管理口段的IP地址,本例中设为192.168.4.0 段的IP打开浏览器在地址栏中输入管理口的IP地址: https://192.168.4.1 弹出一下安全证书对话框,单击“是” 输入用户名和密码(就是在串口的WEBVPN模式下新建的用户和密码),然后点击“确定”。出现也下对话框,点击“Download ASDM Launcher and Start ASDM”开始安装ASDM管理器,安装完以后从网上下载一个JAVA虚拟机软件(使用1.4以上Java 版本),进入https://www.sodocs.net/doc/3d5013792.html,下载安装,安装完后点击下面的“R un ASDM as a Java Applet ”。 出现以下对话框,点击“是”。 出现以下对话框,输入用户名和密码(就是在串口的WEBVPN模式下新建的用户和密码),然后点击“是”。 出现以下对话框,点击“是”。 进入ASDM管理器。 这样就可以通过ASDM来配置防火墙了。 以后就可以直接使用ASDM来管理防火墙了。
思科防火墙登陆及设置过程
一、防火墙登陆过程telnet 192.168.0.1 输入:123 用户名:en 密码:srmcisco
Conf t Show run 二、公网IP与内网IP映射: static (inside,outside) 61.142.114.180 192.168.0.7 netmask 255.255.255.255 0 0
三、再打开端口:输入以下一笔命今如 access-list acl-out permit tcp any host 61.142.114.183 eq 5800 (打开外部5800端口) access-list acl-out permit tcp any host 61.142.114.183 eq 5900 (打开外部5900端口) access-list acl-out permit tcp any host 61.142.114.183 eq 1433 (打开外部1433端口) access-list acl-in permit tcp any host 61.142.114.183 eq 1433 (打开内部1433端口) access-list acl-in permit tcp any host 61.142.114.183 eq 5900 (打开内部5900端口) access-list acl-in permit tcp any host 61.142.114.183 eq 5800 (打开内部5800端口)
四、登出防火墙:logout 五、增加上网电脑 1、nat (inside) 1 192.168.0.188 255.255.255.255 0 0(上网电脑IP地址) 2、arp inside 192.168.0.188 000f.eafa.645d alias(绑定上网电脑网卡MAC地址)
思科ASA5505防火墙配置成功实例
配置要求: 1、分别划分inside(内网)、outside(外网)、dmz(安全区)三个区域。 2、内网可访问外网及dmz内服务器(web),外网可访问dmz内服务器(web)。 3、Dmz服务器分别开放80、21、3389端口。 说明:由于防火墙许可限制“no forward interface Vlan1”dmz内服务器无法访问外网。 具体配置如下:希望对需要的朋友有所帮助 ASA Version 7.2(4) ! hostname asa5505 enable password tDElRpQcbH/qLvnn encrypted passwd 2KFQnbNIdI.2KYOU encrypted names ! interface Vlan1 nameif outside security-level 0 ip address 外网IP 外网掩码 ! interface Vlan2 nameif inside security-level 100 ip address 192.168.1.1 255.255.255.0 ! interface Vlan3 no forward interface Vlan1 nameif dmz security-level 50 ip address 172.16.1.1 255.255.255.0 ! interface Ethernet0/0 description outside !
interface Ethernet0/1 description inside switchport access vlan 2 ! interface Ethernet0/2 description dmz switchport access vlan 3 ! interface Ethernet0/3 description inside switchport access vlan 2 ! interface Ethernet0/4 shutdown ! interface Ethernet0/5 shutdown ! interface Ethernet0/6 shutdown ! interface Ethernet0/7 shutdown ! ftp mode passive object-group service outside-to-dmz tcp port-object eq www port-object eq ftp port-object eq 3389 access-list aaa extended permit tcp any host 外网IP object-group outsid e- to-dmz access-list bbb extended permit tcp host 172.16.1.2 192.168.1.0 255.255. 255.0 ob
思科PIX防火墙简单配置实例
思科PIX防火墙简单配置实例 在本期应用指南中,管理员可以学到如何设置一个新的PIX防火墙。你将设置口令、IP地址、网络地址解析和基本的防火墙规则。 假如你的老板交给你一个新的PIX防火墙。这个防火墙是从来没有设置过的。他说,这个防火墙需要设置一些基本的IP地址、安全和一些基本的防火墙规则。你以前从来没有使用过PIX防火墙。你如何进行这种设置?在阅读完这篇文章之后,这个设置就很容易了。下面,让我们看看如何进行设置。 基础 思科PIX防火墙可以保护各种网络。有用于小型家庭网络的PIX防火墙,也有用于大型园区或者企业网络的PIX防火墙。在本文的例子中,我们将设置一种PIX 501型防火墙。PIX 501是用于小型家庭网络或者小企业的防火墙。 PIX防火墙有内部和外部接口的概念。内部接口是内部的,通常是专用的网络。外部接口是外部的,通常是公共的网络。你要设法保护内部网络不受外部网络的影响。 PIX防火墙还使用自适应性安全算法(ASA)。这种算法为接口分配安全等级,并且声称如果没有规则许可,任何通信都不得从低等级接口(如外部接口)流向高等级接口(如内部接口)。这个外部接口的安全等级是“0”,这个内部接口的安全等级是“100”。 下面是显示“nameif”命令的输出情况: pixfirewall# show nameif nameif ethernet0 outside security0 nameif ethernet1 inside security100 pixfirewall# 请注意,ethernet0(以太网0)接口是外部接口(它的默认名字),安全等级是0。另一方面,ethernet1(以太网1)接口是内部接口的名字(默认的),安全等级是100。 指南 在开始设置之前,你的老板已经给了你一些需要遵守的指南。这些指南是: ·所有的口令应该设置为“思科”(实际上,除了思科之外,你可设置为任意的口令)。 ·内部网络是10.0.0.0,拥有一个255.0.0.0的子网掩码。这个PIX防火墙的内部IP地址应该是10.1.1.1。
思科5505防火墙配置
asa 5505 常用配置2009-06-01 16:13 asa 5505 1.配置防火墙名 ciscoasa> enable ciscoasa# configure terminal ciscoasa(config)# hostname asa5505 2.配置telnet asa5505(config)#telnet 192.168.1.0 255.255.255.0 inside //允许内部接口192.168.1.0网段telnet防火墙 3.配置密码 asa5505(config)# password cisco //远程密码 asa5505(config)# enable password cisco //特权模式密码 4.配置IP asa5505(config)# interface vlan 2 //进入vlan2 asa5505(config-if)# ip address 218.xxx.37.222 255.255.255.192 //vlan2配置IP asa5505(config)#show ip address vlan2 //验证配置 5.端口加入vlan
//进入接口e0/3 asa5505(config-if)# switchport access vlan 3 //接口e0/3加入vlan3 asa5505(config)# interface vlan 3 //进入vlan3 asa5505(config-if)# ip address 10.10.10.36 255.255.255.224 //vlan3配置IP asa5505(config-if)# nameif dmz //vlan3名 asa5505(config-if)# no shutdown //开启 asa5505(config-if)# show switch vlan //验证配置 6.最大传输单元MTU asa5505(config)#mtu inside 1500 //inside最大传输单元1500字节 asa5505(config)#mtu outside 1500 //outside最大传输单元1500字节 asa5505(config)#mtu dmz 1500 //dmz最大传输单元1500字节 7.配置arp表的超时时间
CISCO ASA5520配置手册
CISCO ASA5520配置手册 CD-ASA5520# show run: Saved : ASA V ersion 7.2(2) ! hostname CD-ASA5520 //给防火墙命名 domain-name default.domain.invalid //定义工作域 enable password 9jNfZuG3TC5tCVH0 encrypted // 进入特权模式的密码 Names dns-guard ! interface GigabitEthernet0/0 //内网接口: duplex full //接口作工模式:全双工,半双,自适应 nameif inside //为端口命名:内部接口inside security-level 100 //设置安全级别0~100 值越大越安全 ip address 192.168.1.1 255.255.255.0 //设置本端口的IP地址 ! interface GigabitEthernet0/1 //外网接口 nameif outside //为外部端口命名:外部接口outside security-level 0 ip address 202.98.131.122 255.255.255.0 //IP地址配置 ! interface GigabitEthernet0/2 nameif dmz security-level 50 ip address 192.168.2.1 255.255.255.0 ! interface GigabitEthernet0/3 Shutdown no nameif no security-level no ip address ! interface Management0/0 //防火墙管理地址shutdown no nameif no security-level no ip address !passwd 2KFQnbNIdI.2KYOU encrypted ftp mode passive clock timezone CST 8 dns server-group DefaultDNS domain-name default.domain.invalid access-list outside_permit extended permit tcp any interface outside eq 3389 //访问控制列表 access-list outside_permit extended permit tcp any interface outside range 30000 30010
Cisco ASA 5505 防火墙常用配置案例
interface Vlan2 nameif outside --------------------对端口命名外端口 security-level 0 --------------------设置端口等级 ip address X.X.X.X 255.255.255.224 --------------------调试外网地址 ! interface Vlan3 nameif inside --------------------对端口命名内端口 security-level 100 --------------------调试外网地址 ip address 192.168.1.1 255.255.255.0 --------------------设置端口等级 ! interface Ethernet0/0 switchport access vlan 2 --------------------设置端口VLAN与VLAN2绑定 ! interface Ethernet0/1 switchport access vlan 3 --------------------设置端口VLAN与VLAN3绑定 ! interface Ethernet0/2 shutdown ! interface Ethernet0/3 shutdown ! interface Ethernet0/4 shutdown ! interface Ethernet0/5 shutdown ! interface Ethernet0/6 shutdown ! interface Ethernet0/7 shutdown ! passwd 2KFQnbNIdI.2KYOU encrypted ftp mode passive dns domain-lookup inside dns server-group DefaultDNS name-server 211.99.129.210 name-server 202.106.196.115 access-list 102 extended permit icmp any any ------------------设置ACL列表(允许ICMP全部通过) access-list 102 extended permit ip any any ------------------设置ACL列表(允许所有IP全部通过)
学习防火墙的配置方法..
在前几篇对防火墙的有关知识和技术作了一个较全面的介绍,本篇要为大家介绍一些实用的知识,那就是如何配置防火中的安全策略。但要注意的是,防火墙的具体配置方法也不是千篇一律的,不要说不同品牌,就是同一品牌的不同型号也不完全一样,所以在此也只能对一些通用防火墙配置方法作一基本介绍。同时,具体的防火墙策略配置会因具体的应用环境不同而有较大区别。首先介绍一些基本的配置原则。 一. 防火墙的基本配置原则 默认情况下,所有的防火墙都是按以下两种情况配置的: ●拒绝所有的流量,这需要在你的网络中特殊指定能够进入和出去的流量的一些类型。 ●允许所有的流量,这种情况需要你特殊指定要拒绝的流量的类型。可论证地,大多数防火墙默认都是拒绝所有的流量作为安全选项。一旦你安装防火墙后,你需要打开一些必要的端口来使防火墙内的用户在通过验证之后可以访问系统。换句话说,如果你想让你的员工们能够发送和接收Email,你必须在防火墙上设置相应的规则或开启允许POP3和SMTP的进程。 在防火墙的配置中,我们首先要遵循的原则就是安全实用,从这个角度考虑,在防火墙的配置过程中需坚持以下三个基本原则: (1). 简单实用:对防火墙环境设计来讲,首要的就是越简单越好。其实这也是任何事物的基本原则。越简单的实现方式,越容易理解和使用。而且是设计越简单,越不容易出错,防火墙的安全功能越容易得到保证,管理也越可靠和简便。 每种产品在开发前都会有其主要功能定位,比如防火墙产品的初衷就是实现网络之间的安全控制,入侵检测产品主要针对网络非法行为进行监控。但是随着技术的成熟和发展,这些产品在原来的主要功能之外或多或少地增加了一些增值功能,比如在防火墙上增加了查杀病毒、入侵检测等功能,在入侵检测上增加了病毒查杀功能。但是这些增值功能并不是所有应用环境都需要,在配置时我们也可针对具体应用环境进行配置,不必要对每一功能都详细配置,这样一则会大大增强配置难度,同时还可能因各方面配置不协调,引起新的安全漏洞,得不偿失。 (2). 全面深入:单一的防御措施是难以保障系统的安全的,只有采用全面的、多层次的深层防御战略体系才能实现系统的真正安全。在防火墙配置中,我们不要停留在几个表面的防火墙语句上,而应系统地看等整个网络的安全防护体系,尽量使各方面的配置相互加强,从深层次上防护整个系统。这方面可以
cisco_ASA配置思科的防火墙命令
要想配置思科的防火墙得先了解这些命令: 常用命令有:nameif、interface、ip address、nat、global、route、static等。 global 指定公网地址范围:定义地址池。 Global命令的配置语法: global (if_name) nat_id ip_address-ip_address [netmark global_mask] 其中: (if_name):表示外网接口名称,一般为outside。 nat_id:建立的地址池标识(nat要引用)。 ip_address-ip_address:表示一段ip地址范围。 [netmark global_mask]:表示全局ip地址的网络掩码。 nat 地址转换命令,将内网的私有ip转换为外网公网ip。 nat命令配置语法:nat (if_name) nat_id local_ip [netmark] 其中: (if_name):表示接口名称,一般为inside. nat_id:表示地址池,由global命令定义。 local_ip:表示内网的ip地址。对于0.0.0.0表示内网所有主机。 [netmark]:表示内网ip地址的子网掩码。 route route命令定义静态路由。 语法: route (if_name) 0 0 gateway_ip [metric] 其中: (if_name):表示接口名称。 0 0 :表示所有主机 Gateway_ip:表示网关路由器的ip地址或下一跳。 [metric]:路由花费。缺省值是1。 static 配置静态IP地址翻译,使内部地址与外部地址一一对应。 语法:
ciscoASA防火墙配置 - 基本配置过程
Cisco ASA 防火墙配置手册 基本配置过程 ----------Conan Zhongjm
拓扑图 1、配置主机名 hostname asa5520 2、配置密码 Enable password asa5520 Passwd cisco 3、配置接口 Conf t Interface ethernet 0/0 Nameif outside Security-level 0 Ip address 210.10.10.2 255.255.255.0 No shutdown Exit Interface ethernet 0/1 Nameif inside Security-level 100 Ip address 192.168.201.1 255.255.255.0 No shutdown Exit Interface ethernet 0/2 Nameif dmz Security-level 50 Ip address 192.168.202.1 255.255.255.0 No shutdown Exit 4、配置路由
Route outside 0.0.0.0 0.0.0.0 210.10.10.1 End Show route 5、配置网络地址转换 Nat-controal Nat (inside) 1 0 0 Global (outside) 1 interface Global (dmz) 1 192.168.202.100-192.168.202.110 ///////////////////////////////////////////////////////////////////// 配置完以上就可以实现基本的防火墙上网功能 ///////////////////////////////////////////////////////////////////// 6、配置远程登录 (1)telnet 登录 Conf t telnet 192.168.201.0 255.255.255.0 inside telnet timeout 15 (2)ssh登录 Crypto key generate rsa modulus 1024 Ssh 192.168.201.0 255.255.255.0 inside Ssh 0 0 outside Ssh timeout 30 Ssh version 2 (3)asdm登录 http server enable 8000 http 192.168.201.0 255.255.255.0 inside http 0 0 outside http 0 0 inside asdm image disk0:/asdm-615.bin username conan password 123456789 privilege 15 7、配置端口映射 (1)创建映射 Static (dmz,outside) 210.10.10.2 192.168.202.2 (2)因为防火墙默认把禁止外网访问DMZ区,所以要创建访问控制列表Access-list out_to_dmz permit tcp any host 210.10.10.2 eq 80 Access-group out_to_dmz in interface outside
思科FWSM防火墙模块配置
FWSM Basic Configuration Example Document ID: 98591 Introduction Prerequisites Requirements Components Used Related Products Conventions Background Information Configure Network Diagram Configurations Verify Troubleshoot Problem: Unable to pass the VLAN traffic from FWSM to the IPS Sensor 4270 Solution NetPro Discussion Forums ? Featured Conversations Related Information Introduction This document describes how to configure the basic configuration of the Firewall Services Module (FWSM)installed either in the Cisco 6500 Series Switches or Cisco 7600 Series Routers. This includes the configuration of the IP address, default routing, static and dynamic NATing, Access Control Lists (ACLs)statements in order to allow the desired traffic or block the unwanted traffic, application servers like Websense for the inspection of the internet traffic from the inside network, and the Webserver for the Internet users. Note: In a FWSM High Availability (HA) scenario, the failover can only successfully sync when the license keys are exactly the same between the modules. Therefore, the failover cannot work between the FWSMs with different licenses. Prerequisites Requirements There are no specific requirements for this document. Components Used The information in this document is based on these software and hardware versions: Firewall Services Module that runs software version 3.1 and later ? Catalyst 6500 series switches, with the required components as shown: Supervisor engine with Cisco IOS ? software, which is known as supervisor Cisco IOS, or Catalyst operating system (OS). See Table for supported supervisor engine and software releases. a. ?
Cisco路由器与防火墙配置大全
Cisco 2811 路由器配置大全 命令状态 1. router> 路由器处于用户命令状态,这时用户可以看路由器的连接状态,访问其它网络和主机,但不能看到和更改路由器的设置内容。 2. router# 在router>提示符下键入enable,路由器进入特权命令状态router#,这时不但可以执行所有的用户命令,还可以看到和更改路由器的设置内容。 3. router(config)# 在router#提示符下键入configure terminal,出现提示符router(config)#,此时路由器处于全局设置状态,这时可以设置路由器的全局参数。 4. router(config-if)#; router(config-line)#; router(config-router)#;… 路由器处于局部设置状态,这时可以设置路由器某个局部的参数。 5. > 路由器处于RXBOOT状态,在开机后60秒内按ctrl-break可进入此状态,这时路由器不能完成正常的功能,只能进行软件升级和手工引导。 6. 设置对话状态 这是一台新路由器开机时自动进入的状态,在特权命令状态使用SETUP命令也可进入此状态,这时可通过对话方式对路由器进行设置。 三、设置对话过程 1. 显示提示信息
2. 全局参数的设置 3. 接口参数的设置 4. 显示结果 利用设置对话过程可以避免手工输入命令的烦琐,但它还不能完全代替手工设置,一些特殊的设置还必须通过手工输入的方式完成。 进入设置对话过程后,路由器首先会显示一些提示信息: --- System Configuration Dialog --- At any point you may enter a question mark '?' for help. Use ctrl-c to abort configuration dialog at any prompt. Default settings are in square brackets '[]'. 这是告诉你在设置对话过程中的任何地方都可以键入“?”得到系统的帮助,按ctrl-c可以退出设置过程,缺省设置将显示在‘[]’中。然后路由器会问是否进入设置对话: Would you like to enter the initial configuration dialog? [yes]: 如果按y或回车,路由器就会进入设置对话过程。首先你可以看到各端口当前的状况: First, would you like to see the current interface summary? [yes]: Any interface listed with OK? value "NO" does not have a valid configuration Interface IP-Address OK? Method Status Protocol Ethernet0 unassigned NO unset up up Serial0 unassigned NO unset up up …………………………… 然后,路由器就开始全局参数的设置: Configuring global parameters:
Cisco路由器防火墙配置命令及实例
clear access-list counters 清除访问列表规则的统计信息。 clear access-list counters [ listnumber ] 【参数说明】 listnumber [可选] 要清除统计信息的规则的序号,如不指定,则清除所有的规则的统计信息。 【缺省情况】 任何时候都不清除统计信息。 【命令模式】 特权用户模式 【使用指南】 使用此命令来清除当前所用规则的统计信息,不指定规则编号则清除所有规则的统计信息。 【举例】 例1:清除当前所使用的序号为100的规则的统计信息。 Quidway#clear access-list counters 100 例2:清除当前所使用的所有规则的统计信息。 Quidway#clear access-list counters 【相关命令】 access-list 三、firewall 启用或禁止防火墙。 firewall { enable | disable } 【参数说明】 enable 表示启用防火墙。 disable 表示禁止防火墙。
【缺省情况】 系统缺省为禁止防火墙。 【命令模式】 全局配置模式 【使用指南】 使用此命令来启用或禁止防火墙,可以通过show firewall命令看到相应结果。如果采用了时间段包过滤,则在防火墙被关闭时也将被关闭;该命令控制防火墙的总开关。在使用firewall disable 命令关闭防火墙时,防火墙本身的统计信息也将被清除。 【举例】 启用防火墙。 Quidway(config)#firewall enable 【相关命令】 access-list,ip access-group firewall default 配置防火墙在没有相应的访问规则匹配时,缺省的过滤方式。 firewall default { permit | deny } 【参数说明】 permit 表示缺省过滤属性设置为“允许”。 deny 表示缺省过滤属性设置为“禁止”。 【缺省情况】 在防火墙开启的情况下,报文被缺省允许通过。 【命令模式】 全局配置模式 【使用指南】
相关文档
- Cisco路由器、防火墙WEB配置方法、SDM
- 思科防火墙9.1系统 nat配置
- 思科防火墙使用及功能配置
- cisco ASA5505防火墙详细配置
- 思科防火墙简单配置实例
- 思科ASA5505防火墙配置成功实例
- Cisco_ASA防火墙ASDM图文配置实例
- 实验三-cisco防火墙asa-5505-从内网访问外网服务(真实防火墙)
- Cisco路由器与防火墙配置大全
- 思科防火墙telnet 的正确配置方法
- ciscoASA防火墙详细配置
- 思科PIX防火墙简单配置实例
- ciscoASA防火墙配置 - 基本配置过程
- 思科防火墙简配置实例
- 思科ASA防火墙ASDM安装和配置
- 思科防火墙基本配置文档
- 思科的防火墙配置命令
- 思科防火墙完全配置
- Cisco ASA配置
- 思科ASA5505防火墙配置成功实例