H3C5130接入型交换机标准并配置文件

红色字体为需要自己修改对应的的内容。
#
version 7.1.045, Release 3109P09
#
sysname二基地一区1
#
telnet server enable
#
irf mac-address persistent timer
irf auto-update enable
undo irf link-delay
irf member 1 priority 1
#
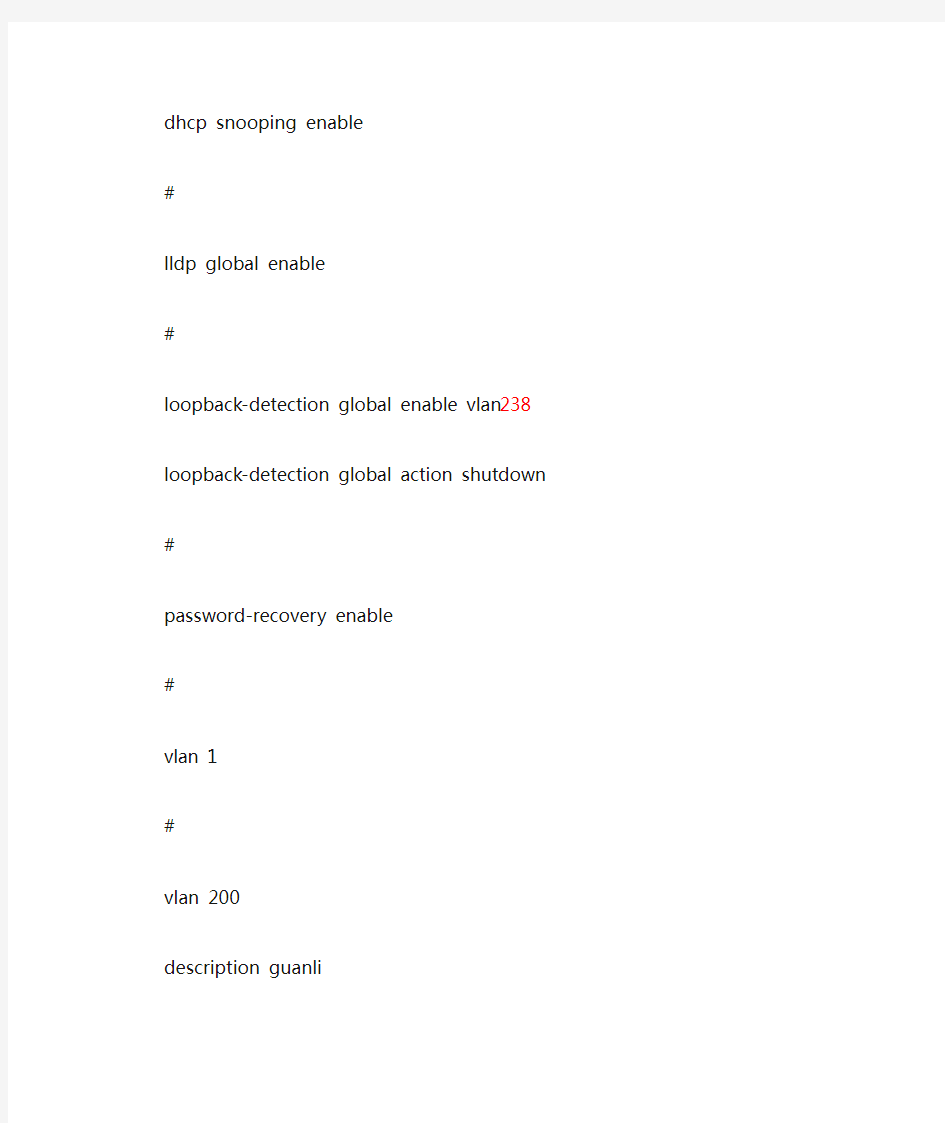
dhcp snooping enable
#
lldp global enable
#
loopback-detection global enable vlan238 loopback-detection global action shutdown #
password-recovery enable
#
vlan 1
#
vlan 200
description guanli
#
vlan 238
#
stp global enable
#
interface NULL0
#
interface Vlan-interface1
#
interface Vlan-interface200
ip address 192.168.200.179 255.255.255.0 #
interface GigabitEthernet1/0/1
port access vlan 238
ip verify source ip-address mac-address loopback-detection action shutdown dhcp snooping binding record
#
interface GigabitEthernet1/0/2
port access vlan 238
ip verify source ip-address mac-address loopback-detection action shutdown dhcp snooping binding record
#
interface GigabitEthernet1/0/3
port access vlan 238
ip verify source ip-address mac-address loopback-detection action shutdown dhcp snooping binding record
#
interface GigabitEthernet1/0/4
port access vlan 238
ip verify source ip-address mac-address loopback-detection action shutdown dhcp snooping binding record
#
interface GigabitEthernet1/0/5
port access vlan 238
ip verify source ip-address mac-address loopback-detection action shutdown dhcp snooping binding record
#
interface GigabitEthernet1/0/6
port access vlan 238
ip verify source ip-address mac-address loopback-detection action shutdown dhcp snooping binding record
#
interface GigabitEthernet1/0/7
port access vlan 238
ip verify source ip-address mac-address loopback-detection action shutdown dhcp snooping binding record
#
interface GigabitEthernet1/0/8
port access vlan 238
ip verify source ip-address mac-address
loopback-detection action shutdown dhcp snooping binding record
#
interface GigabitEthernet1/0/9
port access vlan 238
ip verify source ip-address mac-address loopback-detection action shutdown dhcp snooping binding record
#
interface GigabitEthernet1/0/10
port access vlan 238
ip verify source ip-address mac-address loopback-detection action shutdown dhcp snooping binding record
#
interface GigabitEthernet1/0/11
port access vlan 238
ip verify source ip-address mac-address loopback-detection action shutdown dhcp snooping binding record
#
interface GigabitEthernet1/0/12
port access vlan 238
ip verify source ip-address mac-address loopback-detection action shutdown dhcp snooping binding record
#
interface GigabitEthernet1/0/13
port access vlan 238
ip verify source ip-address mac-address loopback-detection action shutdown dhcp snooping binding record
#
interface GigabitEthernet1/0/14
port access vlan 238
ip verify source ip-address mac-address loopback-detection action shutdown dhcp snooping binding record
#
interface GigabitEthernet1/0/15
port access vlan 238
ip verify source ip-address mac-address loopback-detection action shutdown dhcp snooping binding record
#
interface GigabitEthernet1/0/16
port access vlan 238
ip verify source ip-address mac-address loopback-detection action shutdown dhcp snooping binding record
#
interface GigabitEthernet1/0/17
port access vlan 238
ip verify source ip-address mac-address loopback-detection action shutdown dhcp snooping binding record
#
interface GigabitEthernet1/0/18
port access vlan 238
ip verify source ip-address mac-address loopback-detection action shutdown dhcp snooping binding record
#
interface GigabitEthernet1/0/19
port access vlan 238
ip verify source ip-address mac-address loopback-detection action shutdown dhcp snooping binding record
#
interface GigabitEthernet1/0/20
port access vlan 238
ip verify source ip-address mac-address loopback-detection action shutdown dhcp snooping binding record
#
interface GigabitEthernet1/0/21
port access vlan 238
ip verify source ip-address mac-address loopback-detection action shutdown dhcp snooping binding record
#
interface GigabitEthernet1/0/22
port access vlan 238
ip verify source ip-address mac-address loopback-detection action shutdown dhcp snooping binding record
#
interface GigabitEthernet1/0/23
port access vlan 238
ip verify source ip-address mac-address loopback-detection action shutdown dhcp snooping binding record
#
interface GigabitEthernet1/0/24
port access vlan 238
ip verify source ip-address mac-address loopback-detection action shutdown dhcp snooping binding record
#
interface Ten-GigabitEthernet1/0/25 description link to 二基地核心S10508-2-29 port link-type trunk
port trunk permit vlan all
dhcp snooping trust
#
interface Ten-GigabitEthernet1/0/26
port link-type trunk
port trunk permit vlan all
dhcp snooping trust
#
interface Ten-GigabitEthernet1/0/27
port link-type trunk
port trunk permit vlan all
dhcp snooping trust
#
interface Ten-GigabitEthernet1/0/28
port link-type trunk
port trunk permit vlan all
dhcp snooping trust
#
scheduler logfile size 16
#
line class aux
user-role network-admin
#
line class vty
user-role network-operator
#
line aux 0
user-role network-admin
#
line vty 0 15
authentication-mode scheme
user-role network-operator
#
line vty 16 63
user-role network-operator
#
ip route-static 0.0.0.0 0 192.168.200.10
#
snmp-agent
snmp-agent local-engineid 800063A2033822D69CCCC2 snmp-agent community write private
snmp-agent community read public
snmp-agent sys-info version all
#
radius scheme system
user-name-format without-domain
#
domain system
#
domain default enable system
#
role name level-0
description Predefined level-0 role
#
role name level-1
description Predefined level-1 role
#
role name level-2
description Predefined level-2 role
#
role name level-3
description Predefined level-3 role
#
role name level-4
description Predefined level-4 role
#
role name level-5
description Predefined level-5 role
#
role name level-6
description Predefined level-6 role
#
role name level-7
description Predefined level-7 role
#
role name level-8
description Predefined level-8 role
#
role name level-9
description Predefined level-9 role
#
role name level-10
description Predefined level-10 role
#
role name level-11
description Predefined level-11 role
#
role name level-12
description Predefined level-12 role
#
role name level-13
description Predefined level-13 role
#
role name level-14
description Predefined level-14 role
#
user-group system
#
local-user admin class manage
password simple admin@123
service-type ssh telnet
authorization-attribute user-role network-admin authorization-attribute user-role network-operator #
local-user ftp class manage
service-type ftp
authorization-attribute user-role network-operator #
ftp server enable
#
华为交换机基本配置命令详细讲解
华为交换机基本配置命令详解 1、配置文件相关命令 [Quidway]display current-configuration 显示当前生效的配置 [Quidway]display saved-configuration 显示flash中配置文件,即下次上电启动时所用的配置文件 reset saved-configuration 檫除旧的配置文件reboot 交换机重启 display version 显示系统版本信息 2、基本配置 [Quidway]super password 修改特权用户密码 [Quidway]sysname 交换机命名 [Quidway]interface ethernet 1/0/1 进入接口视图 [Quidway]interface vlan 1 进入接口视图 [Quidway-Vlan-interfacex]ip address 10.1.1.11 255.255.0.0 配置VLAN的IP地址 [Quidway]ip route-static 0.0.0.0 0.0.0.0 10.1.1.1 静态路由=网关 3、telnet配置 [Quidway]user-interface vty 0 4 进入虚拟终端 [S3026-ui-vty0-4]authentication-mode password 设置口令模式 [S3026-ui-vty0-4]set authentication-mode password simple xmws123设置口令 [S3026-ui-vty0-4]user privilege level 3 用户级别 4、端口配置 [Quidway-Ethernet1/0/1]duplex {half|full|auto} 配置端口工作状态 [Quidway-Ethernet1/0/1]speed {10|100|auto} 配置端口工作速率 [Quidway-Ethernet1/0/1]flow-control 配置端口流控 [Quidway-Ethernet1/0/1]mdi {across|auto|normal} 配置端口平接扭接
接入层交换机配置文档
接入层交换机配置文档开机过程:
这里需要输“no”才能进入用户模式“>”(第一次开机才会出现) 配置交换机: 进入用户模式后输入“enable”进入特权模式(命令可以用“tab”键补全) 在特权模式下可使用show命令后面可以跟具体的参数
在特权模式下输入“conf treminal”进入全局模式,也叫配置模式 在全局模式下可以实现用户名、密码、设备名称、路由等配置,还可以创建vlan、进入vlan 接口、进入物理接口。 //创建用户名和密码,这个用户名和密码是远程登陆时候需要用到的:用户名:cisco 密码:cisco //这是从特权模式进入到全局模式需要用的密码,这个密码无论远程登陆或者console线连接登陆都是需要的(密码是密文的)密码:cisco 配置设备名称: //在全局模式下配置本设备名称:“hostname 后加设备名称” (JR=接入、JHJ=交换机、LTBGL=炼铁办公楼、C3560=交换机型号) 划分Vlan:
//首先全局模式创建相应的vlan:vlan 2 进入vlan 2 :int vlan 2 开启vlan 2 :no shutdown 然后进入物理端口,配置需要划分vlan的端口,例如把f0/1口划分到vlan 2里 //全局模式下进入f0/1口:interface f0/1 把此端口划分到vlan 2:switchport access vlan 2 把此端口模式设置成访问模式:switchport mode access 开启此端口:no shutdowm 还可以同时将多个端口划分到同一个vlan里, 全局模式下进入多个端口:interface range f0/1 - 24 例如: 配置trunk链路 //全局模式下进入需要配置trunk模式的端口:interface range g0/1 -2 封装dot1q协议:switchport trunk encapsulation dot1q 设置trunk模式:switchport mode trunk 开启端口:no shutdown 配置管理地址: //全局模式下进入vlan 1的端口模式:interface vlan 1 添加一个ip地址:ip address 10.99.21.1 255.255.255.128
华为交换机各种配置方法
端口限速基本配置1 端口绑定基本配置 ACL基本配置 密码恢复 三层交换配置 端口镜像配置 DHCP配置 配置文件管理 远程管理配置 STP配置 私有VLAN配置 端口trunk、hybrid应用配置 交换机配置(一)端口限速基本配置 华为3Com 2000_EI、S2000-SI、S3000-SI、S3026E、S3526E、S3528、S3552、S3900、S3050、S5012、S5024、S5600系列: 华为交换机端口限速 2000_EI系列以上的交换机都可以限速! 限速不同的交换机限速的方式不一样! 2000_EI直接在端口视图下面输入LINE-RATE 端口限速配置 1功能需求及组网说明 端口限速配置 『配置环境参数』 1. PC1和PC2的IP地址分别为 『组网需求』 1. 在SwitchA上配置端口限速,将PC1的下载速率限制在3Mbps,同时将PC1的上传速率限制在1Mbps 2数据配置步骤 『S2000EI系列交换机端口限速配置流程』 使用以太网物理端口下面的line-rate命令,来对该端口的出、入报文进行流量限速。【SwitchA相关配置】 1. 进入端口E0/1的配置视图 [SwitchA]interface Ethernet 0/1 2. 对端口E0/1的出方向报文进行流量限速,限制到3Mbps [SwitchA- Ethernet0/1]line-rate outbound 30 3. 对端口E0/1的入方向报文进行流量限速,限制到1Mbps [SwitchA- Ethernet0/1]line-rate inbound 16 【补充说明】 报文速率限制级别取值为1~127。如果速率限制级别取值在1~28范围内,则速率限制的粒度为64Kbps,这种情况下,当设置的级别为N,则端口上限制的速率大小为N*64K;如果速率限制级别取值在29~127范围内,则速率限制的粒度为1Mbps,这种情况下,当设置的级别为N,则端口上限制的速率大小为(N-27)*1Mbps。 此系列交换机的具体型号包括:S2008-EI、S2016-EI和S2403H-EI。 『S2000-SI和S3000-SI系列交换机端口限速配置流程』
接入交换机常见安全配置
适用场景:1-24口下联P C用户,25口下联二层网管交换机,26口上联汇聚交换机 堆叠环境中,若未指定优先级,则是根据它们的MAC地址(mac小的为主机)来确定谁是主机。优先级为越大越好,范围1-10。出场默认为1。 1、系统时间同步:如果客户有使用 ntp/sntp进行全网统一的时间配置的需求,可在设备上做Ruijie(config)#hostname TSG#5750 //给交换机命名 Ruijie(config)#sntp enable //首先开启 sntp 服务 Ruijie(config)#sntp server 210.72.145.44 //配置服务器IP地址,此为国家授时中心服务器IP 地址 Ruijie(config)#sntp interval 36000 // 配置sntp交互的时间间隔 措施一:限制远程管理源地址 Ruijie(config)#access-list 99 permit host 192.168.1.100 //配置控制列表,严格限定允许ip Ruijie(config)#line vty 0 35 Ruijie(config-line)#access-class 99 in 措施二:限制SNMP管理源地址 Ruijie(config)#access-list 99 permit host 192.168.1.100 //配置控制列表,严格限定允许ip Ruijie(config)#snmp-server community ruijie rw 99 措施三:使用加密管理协议,使用SSH管理,禁用Telnet协议 Ruijie(config)#no enable service telnet-server //禁用telnet管理 Ruijie(config)#enable service ssh-server //启用SSH管理 Ruijie(config)#crypto key generate dsa //设置ssh加密模式
三层交换机配置实例
---------------------------------------------------------------最新资料推荐------------------------------------------------------ 三层交换机配置实例 三层交换综合实验一般来讲,设计方案中主要包括以下内容: 用户需求需求分析使用什么技术来实现用户需求设计原则拓扑图设备清单一、模拟设计方案【用户需求】 1. 应用背景描述某公司新建办公大楼,布线工程已经与大楼内装修同步完成。 现公司需要建设大楼内部的办公网络系统。 大楼的设备间位于大楼一层,可用于放置核心交换机、路由器、服务器、网管工作站、电话交换机等设备。 在每层办公楼中有楼层配线间,用来放置接入层交换机与配线架。 目前公司工程部 25 人、销售部 25人、发展部 25 人、人事部 10 人、财务部加经理共 15 人。 2. 用户需求为公司提供办公自动化、计算机管理、资源共享及信息交流等全方位的服务,目前的信息点数大约 100 个,今后有扩充到 200 个的可能。 公司的很多业务依托于网络,要求网络的性能满足高效的办公要求。 同时对网络的可靠性要求也很高,要求在办公时间内,网络不能宕掉。 1 / 14
因此,在网络设计过程中,要充分考虑到网络设备的可靠性。 同时,无论是网络设备还是网络线路,都应该考虑冗余备份。 不能因为单点故障,而导致整个网络的瘫痪,影响公司业务的正常进行。 公司需要通过专线连接外部网络。 【需求分析】为了实现网络的高速、高性能、高可靠性还有冗余备份功能,主要用于双核心拓扑结构的网络中。 本实验采用双核心拓扑结构,将三层交换技术和 VTP、 STP、EthernetChannel综合运用。 【设计方案】 1、在交换机上配置 VLAN,控制广播流量 2、配置 2 台三层交换机之间的 EthernetChannel,实现三层交换机之间的高速互通 3、配置 VTP,实现单一平台管理 VLAN,同时启用修剪,减少中继端口上不必要的广播信息量 4、配置 STP,实现冗余备份、负载分担、避免环路 5、在三层交换机上配置 VLAN 间路由,实现不同 VLAN 之间互通 6、通过路由连入外网,可以通过静态路由或 RIP 路由协议【网络拓扑】根据用户对可靠性的要求,我们将网络设计为双核心结构,为了保证高性能,采用双核心进行负载分担。 当其中的一台核心交换机出现故障的时候,数据能自动转换到另一台交换机上,起到冗余备份作用。 注意: 本实验为了测试与外网的连通性,使用一个简单网络【设备
H3C三层交换机配置实例
H3C三层交换机配置实例 1 网络拓扑图 (1) 2 配置要求 (1) 3划分VLAN并描述 (2) 3.1进入系统视图 (2) 3.2 创建VLAN并描述 (2) 4 给VLAN设置网关 (3) 4.1 VLAN1的IP地址设置 (3) 4.2 VLAN100的网关设置 (3) 4.3 VLAN101的网关设置 (3) 4.4 VLAN102的网关设置 (3) 4.5 VLAN103的网关设置 (4) 5 给VLAN指定端口,设置端口类型 (4) 5.1 VLAN100指定端口 (4) 5.2 VLAN102指定端口 (4) 5.3 VLAN1/101/103指定端口 (5) 6 配置路由协议 (6) 6.1 默认路由 (6) 6.2配置流分类 (6) 6.3 定义行为 (6) 6.4 应用QOS策略 (6) 6.5 接口配置QOS策略 (7)
1 网络拓扑图 图1-1 网络拓扑图 2 配置要求 用户1网络:172.16.1.0/24 至出口1网络:172.16.100.0/24 用户2网络:192.168.1.0/24 至出口2网络:192.168.100.0/24实现功能:用户1通过互联网出口1,用户2通过互联网出口2。
3划分VLAN并描述 3.1进入系统视图
华为交换机配置命令
华为交换机配置命令
华为交换机配置指令 视图切换指令
打开以太网端口:[Switch-ethernet port-id]undo shutdown 设置以太网端口描述字符串:[Switch-ethernet port-id]description text 设置以太网端口的双工模式:[Switch-ethernet port-id]duplex { auto| full| half } 设置以太网端口的速率:[Switch-ethernet port-id]speed { 10 | 100 | 1000 | auto } 设置以太网端口的MDI模式:[Switch-ethernet port-id]mdi {across| auto | normal } 开启以太网端口的流量控制功能:[Switch-ethernet port-id]flow-control display查看指令 查看版本信息:
接入交换机RSTP配置规范
接入交换机RSTP配置规范 广州亚运会AGIS系统接入交换机原来部分配置了smart-link,但后来由于网络结构变更,部分开启了生成树,为了配置规范统一和维护的需要,现统一改成生成树的模式,并去掉smart-link相关配置,具体规范要求建议如下: 1、汇聚交换机配置: 001号交换机为主root,命令: stp mode rstp stp instance 0 root primary stp bpdu-protection stp enable 002号交换机为从root,命令: stp mode rstp stp instance 0 root secondary stp bpdu-protection stp enable 2、接入交换机配置,模式为RSTP,命令: stp mode rstp stp bpdu-protection stp enable 注意: 1)交换机和交换机相连的端口开启stp,交换机接PC、打印机的端口配置边缘端口,端口视图stp edged-port enable 2)配置了边缘端口的交换机同时开启BPDU保护,命令: 全局视图stp bpdu-protection 正常情况下,边缘端口应该不会收到生成树协议的配置消息。如果有人伪造配置消息恶意攻击交换机,就会引起网络震荡,BPDU保护功能可以防止这种网络攻击。交换机上启动了BPDU保护功能以后,如果边缘端口收到了配置消息,系统就将这些端口关闭,同时通知网管这些端口被MSTP关闭,被关闭的边缘端口只能由网络管理人员恢复。 配置范例: 汇聚交换机1 (全局启用RSTP) # stp mode rstp
2016年华为交换机配置步骤讲解
BIOS LOADING ... CopyrighT (c) 2008-2011 HUAWEI TECH CO,, LTD, (Ver248t ^un 26 2012, 18:54:52) press ctr1+B to enrer BOOTROM menu ?*. 0 Auto-booti ng.,. Decompressing image file .*? done Inirialize FSP Task PPI DEV sysinit .............................................. OK vrrp emd di sabl e... BFD emd disable*.. SEP emd di sable? * ? Hard system init............................................ OK Begin to start the system, pl ease wai ti ng VOS VF5彳门亍工 ............................... O K. Starrup File Check........................................ O K vos monitor ini t*..*,*..* .OK CFM inix advan匚E ........................................ OK PAT init .......................................................... OK HA S2M 1nit.................................................. O K VDS VFS irht hind............................. OK vRP_Root begin,,, VRP_in111 al 1zeTask begin.?. init the Device Link .................................... . . CFG(_planETrrit begin................................ CFM_Ini t begi n ........................................... CLi_cmdinit begin■ VRP_RegestAnLiNK€ird begin create task begi门……. task 1n1t begin... Recover configurate on, ,, OK!Press ENTER To get started. 恢复出厂设置:
华为交换机配置命令解释
华为交换机配置命令解释
配置trunk端口: [Quidway]int e0/1 [Quidway-Ethernet0/1]port link-type trunk [Quidway-Ethernet0/1]int e0/2 [Quidway-Ethernet0/2]port link-type trunk [Quidway-Ethernet0/2]quit 两边的端口都要配trunk,通过trunk 不打标签! 默认trunk 只允许vlan 1 通过 [Quidway]int e0/1 [Quidway-Ethernet0/1]port trunk permit vlan all [Quidway-Ethernet0/1]int e0/2 [Quidway-Ethernet0/2]port trunk permit vlan all 两边端口都要配置充许trunk 所有VLAN,如果是指定通过vlan号,将vlan all 改成对应的vlan编号即可。 取消任何命令,是在命令前面加一个undo 即可! 如何防止交换机环路: 华为的交换机生成树功能默认是关掉的
华三交换机配置方法及操作案例
华三交换机配置方法及操作案例 一、系统IP配置: [H3C]vlan20 [H3C]management-vlan20 [H3C]interfacevlan-interface 20 创建并进入管理VLAN [H3C]undointerface vlan-interface 20 删除管理VLAN接口 [H3C-Vlan-interface20]ipaddress 192.168.1.2 255.255.255.0 配置管理VLAN接口静态IP地址(缺省为192.168.0.234) [H3C-Vlan-interface20]undoip address 删除IP 地址 [H3C-Vlan-interface20]ipgateway 192.168.1.1 指定缺省网关(默认无网关地址) [H3C-Vlan-interface20]undoip gateway [H3C-Vlan-interface20]shutdown 关闭接口 [H3C-Vlan-interface20]undoshutdown 开启 [H3C]displayip 显示管理VLAN接口IP的相关信息 [H3C]displayinterface vlan-interface 20 查看管理VLAN的接口信息
华为的交换机基本配置命令
华为的交换机基本配置命令很多,在此,yjbys小编为大家带来的是最新交换机的配置命令,希望对同学们考试有帮助! 1、配置文件相关命令 [Quidway]display current-configuration 显示当前生效的配置 [Quidway]display saved-configuration 显示flash中配置文件,即下次上电启动时所用的配置文件 reset saved-configuration 檫除旧的配置文件 reboot 交换机重启 display version 显示系统版本信息 2、基本配置 [Quidway]super password 修改特权用户密码 [Quidway]sysname 交换机命名 [Quidway]interface ethernet 1/0/1 进入接口视图 [Quidway]interface vlan 1 进入接口视图 [Quidway-Vlan-interfacex]ip address 10.1.1.11 255.255.0.0 配置VLAN的IP地址 [Quidway]ip route-static 0.0.0.0 0.0.0.0 10.1.1.1 静态路由=网关 3、telnet配置 [Quidway]user-interface vty 0 4 进入虚拟终端 [S3026-ui-vty0-4]authentication-mode password 设置口令模式 [S3026-ui-vty0-4]set authentication-mode password simple xmws123 设置口令 [S3026-ui-vty0-4]user privilege level 3 用户级别 4、端口配置 [Quidway-Ethernet1/0/1]duplex {half|full|auto} 配置端口工作状态 [Quidway-Ethernet1/0/1]speed {10|100|auto} 配置端口工作速率 [Quidway-Ethernet1/0/1]flow-control 配置端口流控 [Quidway-Ethernet1/0/1]mdi {across|auto|normal} 配置端口平接扭接 [Quidway-Ethernet1/0/1]port link-type {trunk|access|hybrid} 设置端口工作模式 [Quidway-Ethernet1/0/1]undo shutdown 激活端口 [Quidway-Ethernet1/0/2]quit 退出系统视图 5、链路聚合配置
华为交换机基本配置命令
华为交换机基本配置命令 一、单交换机VLAN划分 命令命令解释 system 进入系统视图 system-view 进入系统视图 quit 退到系统视图 undo vlan 20 删除vlan 20 sysname 交换机命名 disp vlan 显示vlan vlan 20 创建vlan(也可进入vlan 20) port e1/0/1toe1/0/5 把端口1-5放入VLAN 20 中 5700系列 单个端口放入VLAN [Huawei]intg0/0/1 [Huawei]port link-typeaccess(注:接口类型access,hybrid、trunk) [Huawei]port default vlan 10 批量端口放入VLAN [Huawei]port-group 1 [Huawei-port-group-1]group-member ethernet G0/0/1 to ethernet G0/0/20 [Huawei-port-group-1]port hybrid untagged vlan 3 删除group(组)vlan 200内的15端口 [Huawei]intg0/0/15 [Huawei-GigabitEthernet0/0/15]undo port hybrid untagged vlan 200 通过group端口限速设置 [Huawei]Port-group 2 [Huawei]group-member g0/0/2 to g0/0/23 [Huawei]qos lr outbound cir 2000 cbs 20000 disp vlan 20 显示vlan里的端口20 int e1/0/24 进入端口24 undo port e1/0/10 表示删除当前VLAN端口10 disp curr 显示当前配置 return 返回 Save 保存 info-center source DS channel 0 log state off trap state off通过关闭日志信息命令改变 DS模块来实现(关闭配置后的确认信息显示) info-center source DS channel 0 log state on trap state on 通过打开日志信息命令改变DS模块来实现(打开配置后的确认信息显示)
H3C交换机设置详解
一.用户配置:
华为交换机VRRP配置
图3-128配置VRRP主备备份组网图 配置思路 采用VRRP主备备份实现网关冗余备份,配置思路如下: 1.配置各设备接口IP地址及路由协议,使各设备间网络层连通。 2.在SwitchA和SwitchB上配置VRRP备份组。其中,SwitchA上配置较高优先级和 20秒抢占延时,作为Master设备承担流量转发;SwitchB上配置较低优先级,作为备 用交换机,实现网关冗余备份。 操作步骤 1.配置设备间的网络互连 # 配置设备各接口的IP地址,以SwitchA为例。SwitchB和SwitchC的配置与SwitchA 类似,详见配置文件。
H3C交换机配置命令大全
H3C交换机配置命令大全 H3C交换机 1、system-view 进入系统视图模式 2、sysname 为设备命名 3、display current-configuration 当前配置情况 4、 language-mode Chinese|English 中英文切换 5、interface Ethernet 1/0/1 进入以太网端口视图 6、 port link-type Access|Trunk|Hybrid 设置端口访问模式 7、 undo shutdown 打开以太网端口 8、 shutdown 关闭以太网端口 9、 quit 退出当前视图模式 10、 vlan 10 创建VLAN 10并进入VLAN 10的视图模式 11、 port access vlan 10 在端口模式下将当前端口加入到vlan 10中 12、port E1/0/2 to E1/0/5 在VLAN模式下将指定端口加入到当前vlan中 13、port trunk permit vlan all 允许所有的vlan通过 H3C路由器 1、system-view 进入系统视图模式 2、sysname R1 为设备命名为R1 3、display ip routing-table 显示当前路由表 4、 language-mode Chinese|English 中英文切换 5、interface Ethernet 0/0 进入以太网端口视图 6、 ip address 192.168.1.1 255.255.255.0 配置IP地址和子网掩码 7、 undo shutdown 打开以太网端口
华三华为交换机路由器配置常用命令汇总
华三华为交换机路由器配置常用命令汇总 The final revision was on November 23, 2020
H3C交换机配置命令大全 1、system-view 进入系统视图模式 2、sysname 为设备命名 3、display current-configuration 当前配置情况 4、 language-mode Chinese|English 中英文切换 5、interface Ethernet 1/0/1 进入以太网端口视图 6、 port link-type Access|Trunk|Hybrid 设置端口访问模式 7、 undo shutdown 打开以太网端口 8、 shutdown 关闭以太网端口 9、 quit 退出当前视图模式 10、 vlan 10 创建VLAN 10并进入VLAN 10的视图模式 11、 port access vlan 10 在端口模式下将当前端口加入到vlan 10中 12、port E1/0/2 to E1/0/5 在VLAN模式下将指定端口加入到当前vlan中 13、port trunk permit vlan all 允许所有的vlan通过 H3C路由器配置命令大全
1、system-view 进入系统视图模式 2、sysname R1 为设备命名为R1 3、display ip routing-table 显示当前路由表 4、 language-mode Chinese|English 中英文切换 5、interface Ethernet 0/0 进入以太网端口视图 7、 undo shutdown 打开以太网端口 8、 shutdown 关闭以太网端口 9、 quit 退出当前视图模式 10、 ip route- H3C S3100 Switch H3C S3600 Switch H3C MSR 20-20 Router 1、调整超级终端的显示字号; 2、捕获超级终端操作命令行,以备日后查对;
2016年华为交换机配置步骤讲解
恢复出厂设置:
ip address 10.120.3.1 255.255.255.0 ///////////////////////////////////////////////////////////////////// management-vlan 1571 interface vlan 1571 ip address 10.120.211.1 255.255.255.0 //////////////////////////////////////////// Switch#con term Switch(config)#inter inter vlan 1166 Switch(config-if)#ip addresss 10.120.6.3 255.255.255.0 Switch(config-if)#exit Switch(config)#ip default-gateway 10.120.6.254 幼儿园的交换机 DHCP服务器210.36.64.80的设置:
新建作用域。。。业务VLAN 核心交换机端的设置: 1、